a photoblog of what i did today.....
a place where you photoblog your day or major project of any field. carpentry plumbing electrical automotive. any DIY job....(never know....someone might need the info someday....)
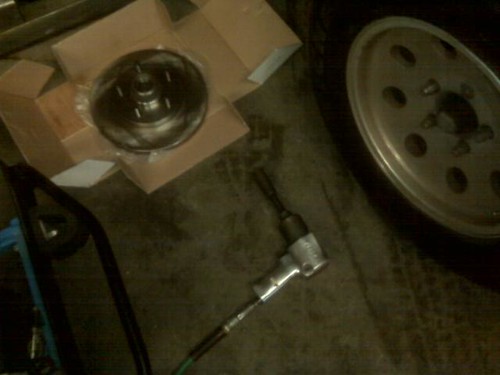
today was two projects. on the Fixed Or Repaired Daily my goal was to change the front rotors and brakes as well as a bad cam position sensor located under a bunch of shit you had to remove to get to on the right front side of the engine. a real PITA. I did the front end first. first pic here is the tight fit into the shop today and go kart limited space in which to work...
 truck 1
 by
plthijnx, on Flickr
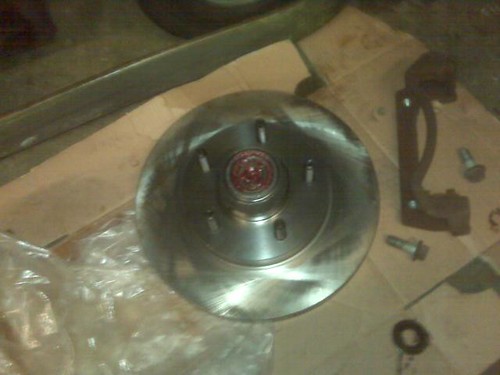
the new rotor:
 truck 2
 by
plthijnx, on Flickr
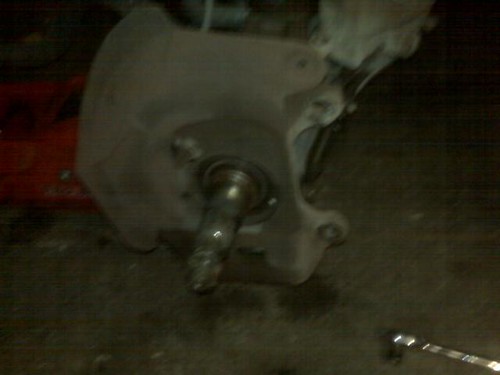
the doohickey you put the rotor on cleaned off with a shop rag. make sure you put a thin coat of grease on it before putting the rotor back on.
 truck 3
 by
plthijnx, on Flickr
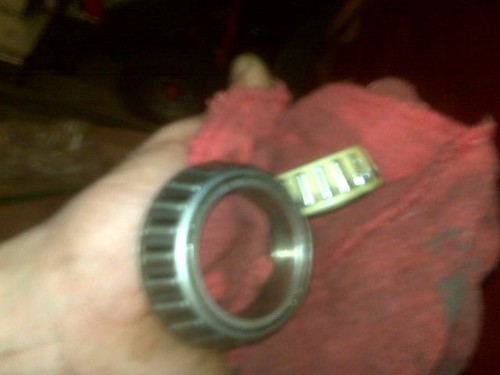
remove the wheel bearings from the old rotor, bathe them in gasoline then pack them with grease...
 truck 6
 by
plthijnx, on Flickr
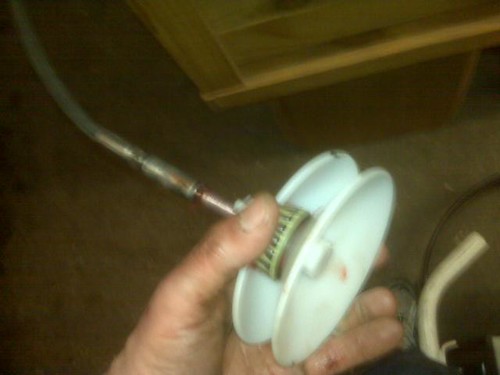
the best thing since sliced bread for this project... a bearing packer...
 truck 7
 by
plthijnx, on Flickr
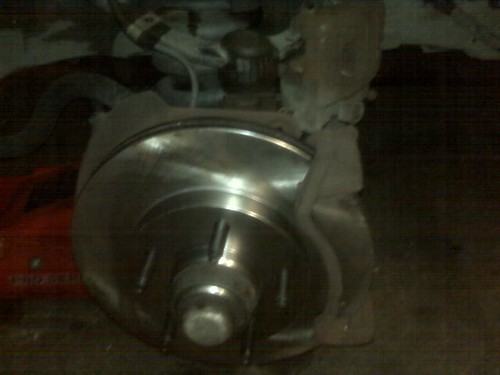
then with your bearings packed and in the new rotors you're ready to put them on...
 truck 4
 by
plthijnx, on Flickr
new rotor on with brake mounting assembly.
 truck 5
 by
plthijnx, on Flickr
done. put the tire back on and hit the road.
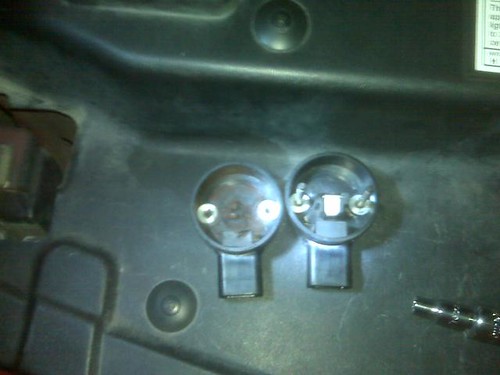
cam position sensor was a helluva lot harder and i was impatient so the blackberry sat on a go kart for that job. but i did take this one..the old sensor on the left cuisine-arted by the cam
 truck 9
 by
plthijnx, on Flickr
so put ur projects here. even needlepoint. anything that you've done and you're proud of doing yourself....
ty sir. both were easy compared to the transmission swap! :D
Now you can go and stop. :D
Now you can go and stop. :D
right on and since i don't have to fly it (thank god it's not a plane with a old motor) i can drive it. keeping it running, albeit expensive lately, has really given my spirits a lift. times been bad my friends. everyone here has been a tremendous help. thank you.
Nothing like getting shit done to improve your outlook on life.:D
Nothing like getting shit done to improve your outlook on life.:D
couldn't have said it better myself!
plthijinx, the whole thing looked like a PITA. I use to love to work on my vw's because they were mechanically simple. Now you need a degree in mechanical engineering to fix more modern trucks and cars, and all the electronic bs to do it.
I've replaced worn calipers on disk brakes before, but haven't done the rotor before. Do new rotors normally come with new wheel studs included?
I've replaced worn calipers on disk brakes before, but haven't done the rotor before. Do new rotors normally come with new wheel studs included?
fortunately mine did. some do and some don't from what i understand...
plthijinx, the whole thing looked like a PITA. I use to love to work on my vw's because they were mechanically simple. Now you need a degree in mechanical engineering to fix more modern trucks and cars, and all the electronic bs to do it.
no kiddin'! i think even the sensors have sensors!! :3_eyes:
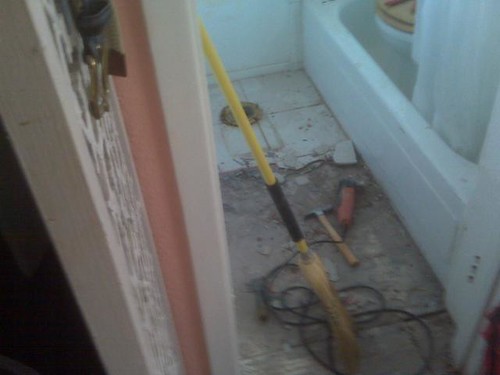
what was going to be only about a 6 tile replacement in the bathroom wound up being a "fuck it, lets redo the whole thing"
 tile 1
 by
plthijnx, on Flickr
prybar was the sliced bread tool for the demolition:
 tile 2
 by
plthijnx, on Flickr
a little more prep work and it's off to homo depot for hardy board and the tile store for tile mortar and grout.
 tile 3
 by
plthijnx, on Flickr
Nice, plt. I wish I had the skills to do stuff like this. I can clean the tile, but I can't tear it out and replace it.
Home projects I can do. Auto repair I leave to someone else. Great pics and flickr photos pjinx.
thanks kero... it's not that hard. tearing up stuff can be fun sometimes and is usually easier than the re-install!
ty merc! the automotive stuff i'm going to have to agree there. i just can't afford to pay someone right now to do the work for me. the transmission? they wanted 650 bucks to just swap them out if i brought them one. $1800 to rebuild the one i had.
Well, I guess I wouldn't trust myself not to mess something up. I always wanted to learn to install tile, because I had these cool ideas about making mosaic floors in bathrooms. It's the tearing out that I have hesitated about.
The husband does the vehicle repair, though he doesn't always like to. Had to replace a water pump in one of our vehicles a month ago and it was a nightmare I guess, but we saved 600 bucks.
prybar was the sliced bread tool for the demolition:
I have a Tile remover tool for my roto hammer, BBBRRRRZZZZZZZZ!!!
KeroCase Most of the Bigger Homo depot type places have classes that are free or cheap .
Dive in GIRL!!! get yer hands dirty !!!!
I wish people would post there pictures rather than linking them from a host site. It's aggravating to go through old threads and read comments about red X's. Just sayin'...
goddamnitsonofbitchshit.
the new cam sensor is talking to me. only a matter of time before i replace it again. first i have to figure out why it's eating them up. if i have to replace the dummy distributor that's going to be a major major project. :mad2:
what i mean by talking is this. sounds like you've got an all night gerbil on a wheel.
dig in kero. taking up the tile takes the least amount of time per project specs usually. right now the roommate is cutting the hardy board and laying it down while i'm cooking diner. (chili with fresh Roma tomatoes, garlic, oregano and jalapeño peppers. oh and a beer of course! beer's got water in it right?)
edit: yeah i'd rather replace the cam sensor than a water pump. know the hubby went through a lot of shit changing that out. hell i'd rather do the front brakes 3 times over than tackle a water pump. but would take the water pump over the transmission replacement. i need a new rear seal on my engine. going to have to do the tranny one more time. sigh. oh well. hindsight 20/20. note to self and all others. when doing a major major job, replace as many seals as you can while you have the access to them.
I wish people would post there pictures rather than linking them from a host site. It's aggravating to go through old threads and read comments about red X's. Just sayin'...
should i replace and repost them? you can see them can't you? just making sure...my html is rusty.....
the tile replacement job just got bigger. the wall in between the bath and sink area's bottom boards are rotten. may have to tear out and replace the whole wall. hope not.
Water , the Home owners Best asset and their Worst enemy
Gots to contain it or keep it out or deal with the consequences
The Deeper you dig the worse it is
As they say in TX YEEEEHHHHAAWWWW !!!
nah i say "YEEEEHHHHAAWWWW !!!" when i lose an engine on take off :D nah roommate is hoping we only have to replace the molding and a little bit of a 2x4. nah not gonna happen. sink/cabinets have to come out and replace the wall IMO. the base 2x4 that the wall sits on is what's rotten. then again this is on the second floor. so what else is rotten?
should i replace and repost them? you can see them can't you? just making sure...my html is rusty.....
Naw, it's OK, I see them, I'm just thinking ahead.
If you need a rear main, it could be from excessive end play, worn thrust bearings. If the crank is walking, it could be causing the cam to walk too. Doesn't matter if the cam is chain or gear driven, unless it's got a thrust retainer, it can walk with the crank. Something to think about.
ok something to think about. would it be advisable to go ahead and replace the motor? 170K mileage that i know of
You could put a dial indicator on it, and check the end play, or drop the pan (shudder) and check the thrust bearings. If you have access to a good motor, it might be time to cut bait.
ouch. feeling that. was talking to a life long friend who is ASE. he recommended changing the dummy distributor b4 the engine but you make some very good points. damn. don't want that monkey.
Don't let me talk you into jumping the gun. I'm just throwing out possible causes for what you've experienced, that don't make it so. There are other possibilities to explore before you give up on that motor.
right on and the purpose for this thread. help others and let them learn from their experiences.....and get a little help along the way...
i sure as hell don't want to do an engine swap. but if i do and i win the lottery i will coat the truck in gold.
If you win the lottery, get a new truck... one with a buxom chauffeur and a keg. ;)
I'm liking the buxom chauffeur idea. What does them go fer? Besides guys in gold-plated Ferds...
google buxom chauffer with safe search off and see whatcha get! ahem. nsfw.
slept in this morning but when i woke up the roommate had already dug into the wall. very lucky here. wasn't near as bad as we thought.
If you win the lottery, won't you be buying a plane?
very lucky here. wasn't near as bad as we thought.
Cool Now give it a good Spray of Bug spray ( Prolly dont Need it ,But Hey its Open ) and seal it up
If you win the lottery, won't you be buying a plane?
ohhhh you betcha!
edit: prolly one of
these used to fly one until the half owner crashed and burned it.
well the hardy board is in and the cutout closed back up. didn't think to spray in there though zip. enough on the job today. have to go to work now. roommate will finish it up tomorrow.
i apologize for missing out on the actual laying out of the tile, grouting, etc. but i had to work. here is the end result. when laying the tile be sure to use spacers for an even *ahem* lay.
Wow, that looks really nice, plt. It appears you are a good *ahem* layer (of tile, that is!)
:thumb: Nice job, very classy.
G'day All,
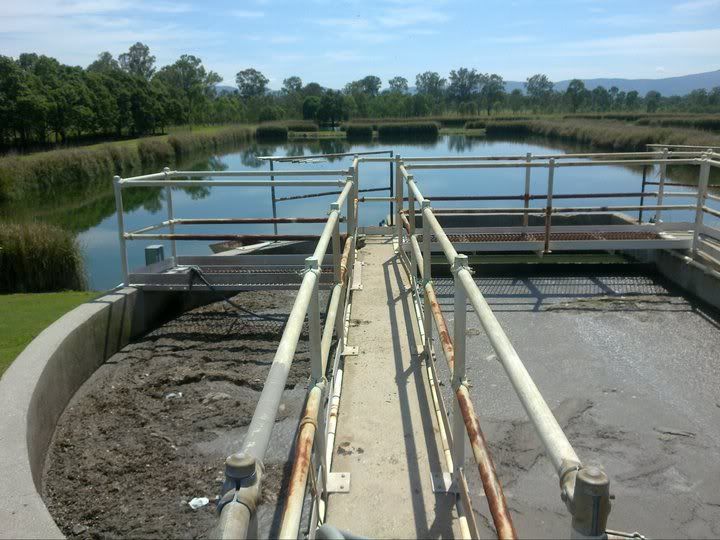
This was my day, 16th December 2010, All water related, all taken West of Brisbane, within about 50km of each other:
Brisbane's Wivenhoe dam is at capacity for the first time in years, these are shots of the spillway gates, with only one of five gates open:


Secondly, a site visit to a country waste water treatment plant, where the main tank is in need of concrete repair:
Finally, an afternoon Summer storm forced me to pull over on the way home; this is through my windscreen.

And yes, I know I haven't posted in ages, but I've lurked a bit, and this thread caught my eye, here 'tis!
Fred, any time you get bored, come visit me! I have a list of projects that I cannot do alone. Several on the Cougar, and several more on the house. And two on the camper.
lol alright brian!
cool pics hagar! dam's are a work of art imo. been to hover dam twice and i'd go again!
okaaaay. here's the next project. (where the hell are they coming from and why do they find me??) at the go-kart track today we moved the carport over about 6 inches for better sidewalk access for customers. after that we busted up the front curb at the exit for the go karts from the pit. we are going to pour concrete and taper it down to grade.
in pic #4 we have to cut the rail with a cutting torch about 2 inches past the concrete you see there
in pic #5 i drilled a tap hole in the concrete to fasten the rail to the concrete. pic #6 is bob giving me support while i drilled the hole for the anchor bolt. pretty nifty gadget the bolt is. you hammer it in and then tighten down the nut. when you tighten the nut the ass end of the bolt flairs anchoring it in place. pic #7 is using the cutting torch to make an anchor hole in angle iron for the rails. ok pic #8 here is 1X1 (??) angle that we welded bolts to for anchor support when we pour concrete. the angle is going to be installed on both the inside and outside of the sloping down curb.
and finally in pic #9 here we're cutting down the existing rail prepping it for the downgrade and tapering. far as we got today. more tomorrow.
Fun Fun Fun !!!
From some body Who has to run a rotohammer Way to much , they work Best when the hammer inside has room to do its thing , as in if yer drilling straight down Sitting on the rotohammer don't work so well , Keep a hold of the drill and Some Pressure on it , But the RotoHammer should be able to Bounce a Bit ,
think of it Like this , when yer driving a Nail with a claw Hammer you draw the hammer BACK to put some Muscle into the Hit , same thing with a rotohammer
here's a couple minute vid of cutting the rail...
railFun Fun Fun !!!
From some body Who has to run a rotohammer Way to much , they work Best when the hammer inside has room to do its thing , as in if yer drilling straight down Sitting on the rotohammer don't work so well , Keep a hold of the drill and Some Pressure on it , But the RotoHammer should be able to Bounce a Bit ,
think of it Like this , when yer driving a Nail with a claw Hammer you draw the hammer BACK to put some Muscle into the Hit , same thing with a rotohammer
yeah i figured that out today. true dat!
oh and here is a tour of our racing facilities!
[YOUTUBE]iCkWh28jcAw[/YOUTUBE]
at the beginning of the vid you can see what our end result of the curb at the front of the pit is supposed to look like
alright day two and job nearly complete. pic 1 is where we left off yesterday. today we cut the rail on the right side that was bent and replaced it with a straight piece. then we set the other angle steel on the right there making sure it was level or nearly so. then we cut plywood to anchor to the sides for the concrete form. next we made some more stakes for the rebar and added the rebar and secured it with the rebar strap wire thingys. handy little gadget. wood handle with a swivel hook. you put the wire around the intersection of rebar, put the tool on the two eyelets of wire, move your hand in a circle motion and your done. go to the next one. then after we finished that we mixed and poured 11 bags of concrete and formed it in. total job time: 10hrs.
when the concrete cures we'll then remove the plywood forms and then sand down the steel and paint it.
You're one busy man. great photo blogs!
ty! looking back over the last 35 days or so i have been real real busy.
changed the transmission on the truck
built a deck at work in our outside party area
put new front rotors and brakes on the truck as well as the cam position sensor
helped the roommate with the master bathroom tile
and finally this curb project.
next week is electrical. friend has a trailer that is scarily rigged up so he has power down one wall. i've taken a peek at it. gonna be a tricky job. going to have to start at the power panel and chase the circuit down to find the problem. have to remove every switch and outlet and check for continuity. should be fun!
looks much better than when you started. Now it's a jump!
funny you mention that!every now and then some dumb ass will come into the pit when the ride is over and twice the car port has been nailed! the second time was with a double seat car. yeah they not only bought a go kart ride but a pole too.
So do you own an amusement park or something?
nah my good friend and flying buddy does. i started working for him year ago last september when i quit working at the flight school/charter biz. i'm trying to get back into engineering or aviation but the economy sucks balls still so....
here is a link to our web page
Houston Grand Prix if you'd like to check it out.
Naw, it's OK, I see them, I'm just thinking ahead.
If you need a rear main, it could be from excessive end play, worn thrust bearings. If the crank is walking, it could be causing the cam to walk too. Doesn't matter if the cam is chain or gear driven, unless it's got a thrust retainer, it can walk with the crank. Something to think about.
i was rereading. so let me ask you this. when the bearings wear out then the shaft walks longitudinally? and if so then does that mean that the seals leak as a result of that? or could the seals just be old and leaky?
It could be either or neither, I was trying to figure out why the cam would be walking. But, after seeing the set up for that cam sensor, a walking cam wouldn't cause that problem. The rear main might have taken a beating from the trans problem too. Just keep an eye on the leak and see how bad it gets, it may just leak a little bit, for a long time.
My house and garage here in Texas were built in the late 70's and at that time built under county codes which are less strict the City of Houston ones which we now fall under. My garage is 22' wide and 20' deep and the ceiling joists and rafters are all 2 x 6's!!! Most were showing signs of sagging only made worse by knots that had all but dried out and were cracking.
My man cave/ wood working shop conversion began by insulating and drywalling the walls followed by a major re-engineering of the ceiling. Replacing the sagging rafters was not an option and even if we had, the code would call for something like a 2 x 10 or 2 x 12 or some kind of laminated beam. So I used an idea from an article I read several years ago in Fine Homebuilding. We jacked up the joists as much as possible to straighten out the sag, as much as 1 1/2 inches in the center of the room in some places. Using 1/2 cdx plywood ripped into 6 inch strips my son and I heavily coated one side with wood glue, clamped in place and used drywall screws about every 8 inches in a zig zag pattern to create a sister side board, then we did the other side of the 2 x 6. After every joist was engineered with the glued plywood we attached 2 x 4's to the rafters in a truss pattern to spread the load to the roof which is a 4 sided pyramid shape.
Then we added R19 insulation and 5/8 inch drywall, damn that stuff is heavy! My son is out there now starting to tape it and float it. He was a dry waller in California before relocating here.
This is the ceiling from Wednesday top today, Saturday!
Finishing the hanging of the drywall and starting to tape the seams. My son will do 2 passes of hot mud which drys with in an hour and then a final skimming with topping mud. It can be sanded the next day and painted!
Well done, a lot of work but, worth it. Does it have hurricane clips?
5/8 Drywall, yikes! You must have a lot of faith in your new lam-beams. :haha:
No we didn't add clips to the existing garage but did to a shed addition I added at the back wall of the building. The garage is low and we are in a heavily wooded area of Houston so if hurricane force wind gusts ever got down to 8 ft off the ground we would be in serious trouble with our 2 story home and our neighbor's before it effected the garage.
My son recommended 5/8 as it is fire coded and is only about 18lbs heavier per sheet than a sheet of 1/2 would be and would be better for our uneven ceiling joists. We don't have snow to worry about for extra roof weight and I only plan on storing some light things in the small attic space. I thought the 5/8 4 x 8s were heavy and my son said I should try hanging 5/8 4 x 12's instead!
Drywall jacks are cheap to rent, and a wondrous thing to use. I had always thought they would be more trouble than they would be worth, and used the grunt & swear method. Then I was helping a guy last spring that insisted on using one, and I was very impressed... and kicking myself for the money I'd wasted on Tylenol all these years. :o
My man cave/ wood working shop conversion
Yeah Right , Until yer Wife sees How AWESOME it turns out , then it'll be a Yoga / Sewing / Gurl Cave !!!
Good Job so far !!
But 5/8 Sheet rock OVER FREAKEN HEAD ????!!!!
Dude do you have STOCK In Tylenol or sum such ??
very very nice chris!! major :thumb: which part of houston? conroe, woodlands, kingwood? did you by chance put down some decking in your storage area there?
My man cave/ wood working shop conversion
Yeah Right , Until yer Wife sees How AWESOME it turns out , then it'll be a Yoga / Sewing / Gurl Cave !!!
:D
very very nice chris!! major :thumb: which part of houston? conroe, woodlands, kingwood? did you by chance put down some decking in your storage area there?
We live in Kingwood and yes, the shed I attached to my garage has a raised floor built on treated 2 x 8's sitting on concrete blocks just above the ground.
We actually got shut down on this project for 2 weeks after my home owners association found out. They wanted to see plans including paint swatches and shingle samples and measurements to my property lines to show I was not on the utility easement at the back of my property. They eventually gave me permission and the storage shed is done!
Pink? Is that an insect treatment, or should I say anti-insect treatment?
Pink? Is that an insect treatment, or should I say anti-insect treatment?
That's what I wondered but it is actually just to designate these as pre-cut stud length which is 92 5/8 inch in length.
again, nice work! here at the track when we built the deck on our outside party area i wanted to use concrete blocks but we wound up driving treated steaks into the ground. yeah it's gonna rot only in a matter of time but that's what i was told to do so i did it *shrug*. i work just down the freeway from you at 59 and lauder. drive up from friendswood. :smack: at least until i can get back into engineering or aviation.
I am thinking about building a cabin and putting it on concrete pilings, there are some prefabs you can buy that have a cone shaped bottom that is under the ground. Do you think that would work well and last a long time? I was thinking if I put some rebarb in them and used some 25k pressure treated concrete they should hold up.
And this guy is da bomb.
http://www.askthebuilder.com/[YOUTUBE]qbomj8A3vDE[/YOUTUBE]
Killer !!!
Got the Kidos SCREAMING !!!
Or was that YOU ??
I am thinking about building a cabin and putting it on concrete pilings, there are some prefabs you can buy that have a cone shaped bottom that is under the ground. Do you think that would work well and last a long time? I was thinking if I put some rebarb in them and used some 25k pressure treated concrete they should hold up.
now that sounds like a fun project!
Jim, love the vid man! kudos!
Love Spencer's facemask. That's awesome. Looks like a fun ride. I have a friend on the ski patrol over there, and another friend used to be the Assistant Manager.
yeah, i love that mask. Ippy got it for him for xmas. he got her the cookie monster hat....and they also exchanged snuggies.
I want to take them skiing(learning) there. That's where I learned how when I was appx spencer's age. not that I ever was any good at it....
Got the drywall painted and the new lighting up. Then we moved most of the tools and tool chests back in. Doing a big sorting of stuff on the workbenches so excuse the mess! This a totally major change from the old unfinished garage!
helluva job man! looks great!!
Wow! That looks great, and you did it so fast.
I wanted a big flat screen TV but my wife only let me have the little 13 inch one that no one ever watches in our guest room...:(
Great clip Jim. Nice drywall Chris.
You don't want a flat screen in the garage. What if you were watching the ball game while using the saw or something?
I don't know. Just I'm trying to make you feel better. :)
but wait! use the Pomegranate Phone shown on
this page and your set. all you need are those gloves butchers and fishermen use so they don't cut their hands!
well we started another special project at work today. what this job calls for is to put in another car port aka party area. rather than do what we did with the last time where concrete footings were an afterthought...this time we are doing it right. first we of course measured everything out. the carport is 20' x 30'. the slab we formed today is 5" x 30'. tomorrow after the cement has cured we will remove the form and make the other slab. once that is complete, in about 10 days or so, the carport will be installed then it will be time to deck it. once we framed up the form and put 2 expansion joints in we then put one run of rebar in. should have really put two but one will suffice for this job. rebar re-enforces the concrete. 8 bags total. talk about a pain in the ass! mixing concrete with a shovel in a wheelbarrow sucks. trust me.
Visiting Paris and spent several hours at the Louvre wondering around with my wife who has never been there before. This is about my 6th trip so I decided to try to capture it in a different way than most of the tourists do.
I would caption these as:
1. Lovely garden statue but my home owner's association would never allow it!
2. If an erection lasts for more then 3 hours call a doctor or you will look this for the rest of your life!
3. Everyone has to take a picture of the Mona Lisa but I rather enjoyed taking pictures of everyone doing it.
4. Who needs to get up close when you can just view it on someone else's camera!
Finished the day and headed back to the Hilton. We told them it was our anniversary when we checked in so today they gave us fresh flowers, champagne and some kind of chocolate decadence!
Captions:
5. "Dad! Mom's going to be really pissed when she gets home and sees how drunk you are!"
6.. "Psssst! Did you just let a really stinky one fly?"
7. Our surprise.
8. Even though it was close to freezing we went out on the 7th floor balcony and set up a picture with the Eiffel Tower in the background.
Awwww....happy belated anniversary! Paris, what a nice vacation. :) And that's a very lovely surprise! I'd love me some of that yummy piece of chocolate!
i love paris. been many times. i could spend a month at the louvre. beautiful place! used to have a pic almost like the one you took of everyone taking a pic of the mona lisa. i lost over half my pictures in the bs from 5 years ago. enjoy your trip! oh and happy belated as well!
well we got the second form completed yesterday. when i arrived at work bobby, my boss and pilot bud, had already started working on dismantling the first form to reuse and make the second. you have to be careful with concrete. make sure you have given it enough time to "cure" before removing the form. otherwise you run the risk of chipping/breaking the concrete. i'm new to concrete work so i'm learning these lessons as i go. all i know for sure is this: mixing concrete with a shovel in a wheelbarrow sucks. really really sucks. it took 8 80lb bags for each form. we ordered the new carport yesterday and should arrive in 7 to 10 days. long enough for the concrete to thoroughly set. well i'm off to get ready for work. 14 hour day ahead.
ok so the car port was put in today. errr sunday morning. tuesday we will start decking it. pics of that to come. i'm rather proud of our concrete work here. here is how that part turned out.....
why am I not in paris like chris??????
must remedy this...
Paris is a wonderful city!
ok new project started at home today with OMG status already achieved. TERMITE DAMAGE FOUND!!!!! ugh...what was supposed to be a new shower now is looking like new walls too. and god knows what else. pics of the demo so far.....
Cool Now give it a good Spray of Bug spray ( Prolly dont Need it ,But Hey its Open ) and seal it up
Rember this ????
Man you need professionally bonded treatment for Termites or you will never sell the place in the future. Just saying....
yeah we will be treating it. actually come to think of it i believe the house was already treated. 6 to one half dozen the other. i'll check on that and see. well here is how far we got today at work with the deck. we went to lowes in Humble, Tx and bought 2 2x4x16's 63 2x4x10's to bring back to the track but also bought but will pick up later 63 2x6x12's (i think) for the decking. anyway we made alright progress today. we laid out the 2x4's for runners then cut up other 2x4's into 4 16" stakes and 2 12" to drive into the ground for anchor support on the runners. we got 6 of the 9 runners in today and weather permitting will finish the other 3 tomorrow and start decking to hopefully be finished by the weekend. we also still have to finish the electrical too.
your input/ideas wanted:
[YOUTUBE]d4RCX1u0sNY[/YOUTUBE]
ok while i was at work building the deck, paul was demoing the bathroom at home. the window framing has to be redone due to t-damage so it will be taken out and replaced. here's the latest....
oh the dead area behind the shower is going to be utilized. we will make the shower bigger (longer) and re plumb up the shower pipes.
Furdowns are a HANDY Place to run wires , Plumbing , Speaker wires for the Next room , etc ,,,,,
Pain in the ASS to sheetrock or tile But they Are Usefull
Furdowns are a HANDY Place to run wires , Plumbing , Speaker wires for the Next room , etc ,,,,,
Pain in the ASS to sheetrock or tile But they Are Usefull
true true. in this case however, that fluorescent light sucks. same fixture is in all three bathrooms. we don't like them so it's going bye bye.
Throw throw bulbs In the trash First , then the Fixture on top !!!
so leave the FD and mount new light there and not on the wall? that's an idea....
In My Opinion if the Furdown could be Potentially use full Leave it ,
if Not TRASH the Fucker !!
We Have a Furdown that runs down 2 wall of our Kitchen ,
1 of these walls backs up to the liveing room ( where the Tv and the such is )
it is SOOOOOO Easy to drop a wire ANY Where down that wall !!!
None of that Drill a Hole and HOPE its in the right spot , Hell I have a 12x12 ( Ish ) Cavity to work with ( SHUT UP YA Pervs !!!)
lol i'll leave that one alone zip! no in this case the FD has no potential. so yeah we're scrapping it. here are pics of a 2x4 removed. the little bastards were hungry i tell ya!!
that aint wood , its saw dust held together by sap !!
If things are THAT Bad you guys May want to Start Looking at Structural intgererty All to gather !!
as in Whats a Load bearing wall , where , and what is it Holding up !!!
oh hell. check this shit out.....lemme go grab a pic
or four. it may be hard to tell but check out the twist in this 2x4. there are foundation problems here too. a nightmare. but i do what i can do. do what i'm asked of. make recommendations and if they are taken they are. usually $ dictates what is done. budgets. too bad we don't have an oil company's budget.
today the wx was bad so i didn't go to work to work on the new deck. so instead i worked in the bathroom downstairs. the deeper we dug in the more t-damage we found. pic #4 below shows it best. in the upper right back corner i had to remove a section of 2x4 that was eaten away using the "duct tape" of electrical power tools. yep. a
sawzall. we reframed the window and replaced the eaten studs as well as put up most but not all insulation. the temp is dropping here tonight to the mid to upper 20's so that made it a little more important to get up.
oh yeah, almost forgot...paul did call the insurance company. not covered.
here is the PITA job of the day. the shower pan has to come out to make room for the one we are going to fabricate from concrete. back in the day when this pan was installed they used molten lead to seal the drain. basically that meant that you have to get down there with a hammer and screwdriver and dig that shit out. it took me all of 2 maybe 2.5 hours of hammering chiseling and digging but i got it done. once i was down far enough i used a bigger screwdriver to dig down the the base of the drain and get under the lead thereby allowing me to pry out the lead that was adhered to the pipe. once the pan was out i had to clean up the packing (dirt) that was under the old pan to clean it up for the concrete pan we are going to install. this process begins with making a curb form then pouring the concrete and let it set up for a day or so then once it's set we will put down the rubber pan and then tile it up.
demo is now almost complete. paul is toying with the idea of re-tiling the floor too since we already have gutted the entire bathroom.
and of course it's not a job unless you give a little blood to the project gods...
Oh There MUST be a Blood Sacrifice !!!
true there. tomorrow if i don't go in early to work on the new deck i have to re-route some romex. no big deal. in the upper corner you can see where the wiring went to power the light over the sink. since we removed the fur down i now have to drill 2 2x4's and pass the cable through them so that the drywall can mount up flush. still trying to decide where to mount the new light over the sink though. on the wall or on the ceiling? dunno. figure that out later.
I suggest the wall. I just like that look better. And don't forget to put in a light/vent fan over the shower and for Pete's sake, make sure the vent exhausts OUTSIDE! I've seen what can happen when the vent exhausts into the attic, a void or once even a dryer port.
Come summer, I may even have a few big projects to share such as shed/barn building. Help is always welcome too! :D
lol right! yeah we are putting in a fart fan. didn't even think about venting to the outside. will go mention that now.
last night i decided to move the electrical like previously stated. MAN did i ever cause a spark! i was working "hot" and while removing the staple holding the romex on i busted through the insulation and ZZZZZZZZZZZZZZZZZZAP! didn't get me though but sure was bright! :D
i like the wall idea too but paul wants a ceiling mount. oh well.
last night i decided to move the electrical like previously stated. MAN did i ever cause a spark! i was working "hot" and while removing the staple holding the romex on i busted through the insulation and ZZZZZZZZZZZZZZZZZZAP! didn't get me though but sure was bright! :D
:facepalm: And you want us to jump into your airplane for a sky trip? :headshake
Which was brighter, the spark...or you?
;)
oh most definitely the spark!
oh and hey! i must be a good pilot......i'm still alive! :D
This is true!
Actually, I would have total faith in your flying ability. I would, however, think you might turn to me and say "here, hold my beer and watch THIS!" Vroooooooooom. I'm fearless in the earthly mortal realm, though.
:lol:
ahhhh yes. the proverbial redneck famous last words... "HEY Y'ALL WATCH THIS!" splat.
You boys need a good fire! Imagine how fast you could build... I admire your grit though.
I'm sure this is a dumb question... but are you certain that's old termite damage? I hope you are treating the ground around the house with termite poison just to be safe, otherwise all your new work could get eaten away again in short order.
I'm sure this is a dumb question... but are you certain that's old termite damage? I hope you are treating the ground around the house with termite poison just to be safe, otherwise all your new work could get eaten away again in short order.
just got through doing just that. yesterday one of bobby's friends showed up at work. he's an exterminator. gave me some heavy duty shit to spray. i soaked the bathroom especially the hole in the concrete for the shower drain.
ok. we are finished for the night. you can see in one pic the termite treatment sprayed vvvvery generously around the hole in the house slab for shower drainage. this weekend while i was trying to not get mauled by go kart kids paul put in the shower wall framing. then the framing on the wall behind the commode/vanity wall. the pipes made him do the jigsaw puzzle 2x4s then tonight i re re-wired the ceiling circuits to facilitate our needs. paul did decide to go with a wall mount light like i had hoped he would.
Looking good.
Question: Those cut up vertical pieces seem to be supported only by the connection to the existing drywall and a little cantilevered action from that stud to the side. I don't really get it. Are they just something to hold the drywall/hardi screws for the new wall? Or are they supported by something solid that I can't see?
ahhh. I got to go take a nap right now...
yyyyeah. i don;t agree with this part of the installation. he needs to notch 2x4s (my apostrophe key doesn;work sometimes and i;m tired of pounding the shit out of it) and put it in there. i asked him about this and i got a mumble answer. errr one i cant remember right now. doesnt make sense to me either. not a load bearer so whatev......
Yeah, I'm sure it's fine. Not the way I'd do it, but the house isn't going to fall down or anything.
Yeah, I'm sure it's fine. Not the way I'd do it, but the house isn't going to fall down or anything.
actually it is a load wall now that i looked at it again but one stud isn;t going to make that much of a difference. but like you said glatt, the house isn;t going to fall down.
ok time to do some electrical work. remember to always make sure the circuit is off then verify using a voltage tester. most know this but the black wire is your HOT wire and the white one is the neutral. the bare wire is the ground wire, or sometimes it;s green. oh, and when you do test the circuit you should have somewhere in the neighborhood of 120 volts. on this circuit i have 121 but that;s alright.
after striping back the insulation on the wires you then twist them together. black to black white to white ground to ground then use wire nuts on the hot and neutral. it;s always good practice to then seal up the wire nut with electrical tape.
sorry for the somewhat fuzzy pictures. my crackberry is overdosing today.....
the cut outs for the fart fan and a/c duct were a tad off but will be alright because of the flanges on the vent covers. then in the back there is the shower light. the fart fan is on it;s own circuit because i did not want the fan to suck up steam from the shower since it;s not venting to anywhere but the ceiling. i know i know....i tried to tell him. vent to outside but eh.....anyway.
the garage let alone the house is a disaster area right now. here is the new vanity that we are installing. picked it up on what ladies?? yes, we picked it up....on sale! :D $100 bucks.
ugh....back at it. i can hear paul cussing in canadian all the way up here in my bedroom.
cussing in canadian
Ehh FUCK !!!
lmao yep! and the "awww you mother fucker, you piece of shit, get in there, ahhhh fuck all eh"
edit: now i'm saying that too. smashed my thumb with the hammer.
ugh....back at it. i can hear paul cussing in canadian all the way up here in my bedroom.
What's that all aboot? ;)
This is what we did to Kung Pao Kitty yesterday.
What did you do? Btw, that kitty is adorable!
(my apostrophe key doesn;work sometimes and i;m tired of pounding the shit out of it)
The noble apostropholon returns!
RAWR! I is a LION!
Oh, I see it now. Poor kitty!!!!
What's that all aboot? ;)
it;s aboot pronunciation.
"ahhhh facker! get in there ya whore! oh fack aff!"
he was trying to screw in sheetrock and kept missing the stud.
*snicker*
omg! kitty been in a fight with the clippers!!
The noble apostropholon returns!
indeed. i have to pound the crap out of that key to get it to work. lemme count here.....
' oh. sure. right. damn thing worked the first time. beh. gonna go grab pics of what we did this morning before i had to drive to work to do more decking.....
phone is seriously smoking crack right now. no pics. maybe later. i have a poker tournament now that i forgot i registered for so...more later.
light sucks with the light on in there and the crackberry really torches the pipe when the light is on. here;s a few pics of what was done this morning before i went in to work.
paul picked up a couple handy tools. he needed to buy a new battery for the drill but it;s cheaper to buy a new drill and get the battery with it. this is what he picked up. a small pistol grip drill and hackzawll by Milwaukee. neat little set cost 150 bones. i dig the charge light....
alright...while paul is sheetrocking the downstairs window in the bathroom i am starting the demo of the shower wall in the upstairs master bath. there is a leak back there that we finally found. remember earlier in this thread we did the floor in there.
demo is generally pretty easy and in most cases quick. total time on this was about a half hour. good news is there is no visible termite damage. the leak isn;t coming from where paul thought. it;s been a pain in the ass trying to find. i think, after going under the vanity and looking at the drain pipes, that that is where the leak is. the rubber gaskets are hard and rotten. now paul is considering taking the tub out completely and replacing it with an elongated shower pan. remains to be seen.
i was apprehensive about how to do the shower pan installation. getting the slope right and all. then i found this:
[YOUTUBE]fDFtzGNRpvs[/YOUTUBE]
now paul is considering taking the tub out completely and replacing it with an elongated shower pan. remains to be seen.
Tell him Dont do that , bath rooms with Only a Shower are considered 1/2 bath , he could Devalue his House , call a realtor
i told him what you said. makes sense though. so now we may just keep it in there. it will be a pita either way. replacing the gaskets or even taking the tub out entirely and hauling it down stairs would be a royal pita. i;d rather leave it in place and replace the gaskets.
alright. we went into overtime tonight. after supper we started pouring concrete. i had wanted to get a pic of the shower drain flange and the amount of distance from the floor to the bottom of the flange but paul started mixing concrete and i had to haul butt to help so i didn;t have my camera on me. anyway, there was about a 3 inch gap or more between the existing concrete and the bottom of the flange. i cut off one inch earlier today and recommended more but paul didn;t want to do that. well i finally convinced him. reasoning being we would loose depth of the finished floor if we left it the way it was. so i took off one more inch from the drain pipe then set the flange. we mixed 1 and 1/3 bag of quickcrete and floated in a floor. when doing this sort of thing you want the cement dry. add only enough water to make it moist then use a trowel and level it as best you can using a level. doesn;t have to be perfect. the installation kit we are using makes the slope fool proof.
now all we do is wait for the crete to cure. in this case we are only going to wait about an hour. then we will set the quick slope installation kit and pour the rest of the crete.
in these next pics, sort of another interactive if you will, we are looking and trying to decide what paint color we want for the walls. the tile is the tile that is going in the shower. i like the darker but the lighter colors also bring out contrast. any thoughts?
we hit a dead end tonight. the ring that goes around the drain is the wrong size. BUT we did get the rubber pan in. first we laid it out then tucked in the corners then located and punched through the drain bolts then put the flange on and tightened it down. after that it was cut to fit but make sure you don;t cut less than 3 inches from the floor. any folds that need to be made can be hidden by the drywall.
Don't the sheets have to glue together at the seams?
no, not in this case. it was like a 4 x 6 sheet of rubber basically. so you place it in and cut to fit and fold on the seams. at least that;s what we did here. i;m sure there are several ways to do this part of the job. first time doing it so maybe we half assed it. i dunno. more than one way to skin a cat. i figured the weight of the concrete and the mold resistant drywall being mounted would suffice. if there is a better or easier way that you know of please by all means let me know. we may be doing this again upstairs.
i took these pics before i had to leave for work. paul went and got the correct ring so we could cut and mount the slope sticks. then he poured in the concrete.
then while he was doing that i was finishing up the deck installation at work. to space the 2x6x10 and 12;s i used nails and put them between them to give room for weather. the boards will expand and contract in hot and cold weather respectively so you want a little wiggle room. then for the boards that were slightly warped i stuck a crowbar in the ground and leaned on it while drilling in the decking screws. after the decking was complete i ran a chalk line down the sides and trimmed off the excess with a circular saw.
You get a lot accomplished. I'm impressed.
ty, i try. all it really is though is focus. well, energy too, lots and lots of energy :)
i;m glad i finished that deck yesterday because there are 10 parties booked for today. we thought it was 11 but the manager miscounted. either way 10 parties is a lot and several of them overlap. i betcha by sunset i will have completed my 2 step videos on the proper way a go kart ride should go and the "omfg what are you doing" way. now that is gonna be a fun thread! :D
Ya know, that bathroom job started out with a dripping tap. We'll just replace the washer, they said, but then they saw something else that needed doing while they were there. One thing leads to another ...
yep and that;s what i;m afraid of upstairs. to be honest i just got home from work and didn;t even go look in the downstairs bathroom. i;m exhausted, i got nailed by a kid tonight and almost broke, what felt like anyway, my right foot. got sandwiched between two cars. will have vid later for the thread i;m creating. on a motrin and beer binge, errrr for a whole beer then bed. the new party area was used and rented today. a plus there. we were the busiest ever in the history of the go kart track! we had a line of more than 50 people waiting to ride from 1 o;clock until about 11. gonna hit the rack. later peeps.
the finished party area. done. finished. finis. hoàn thành. завершенный. fertig.
paul got quite a bit done this weekend in the bathroom while i was playing frogger in go kart traffic. he got all the sheet rock hung and is now tiling the shower.....
he did take pics along the way though. all i have to do is get them off his camera and post them. will do it sometime today after i run errands.
paul said i was cutting too slow. f-that! i like my fingers!!!!
[YOUTUBE]2XMq1Xlq1Ws[/YOUTUBE]
also here is some of the progress we have made today. so much for my day off.
tyty it;s coming together slowly but coming together....
going back a bit...these are some pics paul took over the weekend while i was at work...
then this is how far he got on the tile today. then i;m off to homo depot for a paint pan and liner so i can prime the sheet rock....
alright so i got back from homo depot and started priming. messy job it is i tell ya, lol! but i got;er done.....
then the white boy just got whiter! i forgot i had my prescription sunglasses on my head and they got a sprinkle too. pita cleaning them off without scratching them. i didn;t want to use thinner on them for fear it would f;em up....
I HATE Painting !!!
So much so Both houses we have owned we got sided ,
Carol does the Painting in side , Ill help prep , and clean up , and Get Hard to reach spots , but the rest is Hers !!
yeah painting blows. but at least i can do it. wall tile? no. i can;t wall tile. i help prep and will mud and cut the tiles, but paul places them. at least the ones going up the wall. floor? no problem. but the wall? no.
alright. here is the progress made over the weekend. the shower is tiled and we are now grouting with non-sanded grout. i like the contrast from the shower floor to the wall..what do you think? also i mounted the light that goes over the vanity as well. floor tile in too.
Thats looking good man ,
But ya got a blub out dude !!!
Thats looking good man ,
But ya got a blub out dude !!!
It's early, and I'm not a morning person. I just went googling to figure out what "blub out" meant. I figured it must be an industry term. :blush:
It's early, and I'm not a morning person. I just went googling to figure out what "blub out" meant. I figured it must be an industry term. :blush:
:lol: I thought blubbing in reference to the pubble of water, then considered the source......
I love that tile in the shower! I will have to remember that when I build my next house.
i;ve been getting home late working 12 hour plus sometimes days building panels. here is where paul is with the bathroom... i particularly like the tile, like merc, and the paint scheme. still a lot more to go but he;s making the best progress he can without me there to help him....
now here;s what i;ve been up to all week. i could bitch slap the designer that designed these panels. they left out several key electrical components in the drawings that set us back a days work. see, they knew that they had the parts to go in the panel but did not allow for space. we had to remount the wire ways, called panduit in this case - the manufacturer, and terminal strip din rails - the metal thingies that the terminal blocks, fuses and other components fasten to on the back plate. anyway, here are some pics today while i was wiring panel #1. started it after lunch and am almost finished with it. another wireman needed the drawings i had to complete his panel so i gave him them and started on panel #3.
oh, and as far as the pretty wire colors? black in this case is 480 volt, red is 120, blue is 24 vdc, white is 120 neutral, and white/blue 24 neg. oh and green is ground.
Cool !!
So Is the Ethernet for comm or I/O ??
been busy and not been around too much but here is what we have at the house. well as of yesterday. it;s late and i haven;t ventured into the bathroom tonight to check progress. the original vanity had the pluming holes on the wrong side of the rear panels so paul returned it and got imo a better looking one.
then this last week at work someone laid down a foundation for a BBQ pit for the new party area. when i got to work today me and RC mounted the thing. then later ronnie broke it in by cooking fajitas for the staff!
Separate woodbox would've been nice.
On the other hand, they don't let us do any kind of BBQ at the Sears tower.
Separate woodbox would've been nice.
On the other hand, they don't let us do any kind of BBQ at the Sears tower.
Yeah i suggested that but oh well...
Edit: damn you autocorrect!!
I like that bathroom tile. The wall colors look just like my kitchen.
I like that bathroom tile. The wall colors look just like my kitchen.
good taste in colors then! :)
ok here it is! the curved shower rod is a real nice touch. i think overall this turned out really well. (oh and for the neat freaks, yeah we lost the electrical outlet/switch covers and hafta go get replacements at homo depot.
Nice! Looks really good. Good work!
Looks Great !!!
Those Curved curton rods are cool
oooooooooooops. we gotta bust up tile and lay concrete. the shower pan is not sloped correctly. if you look reeeeeal close at the pan pictures you can tell that it is lower than the rest of the shower in the upper left hand corner. what happened was that paul ran out of concrete and hoped all would be good. nope. so gotta fix that. we tried the shower tonight, not together mind you, and found out that the pan has a low spot.
BuuuuuuuMMMMeeeRRRR !!!!
I Hate redoing a Project !!!
yeah true....but it;s only 2 tiles so......
it was a real pita. first off i mixed the quick set with too much water so it was a pain to work with. notice in the second pic the level bubble showing slope away from the drain. after i put down the quick set and let it cure for an hour and a half or so i was able to come back in and mold a slope as seen by the bubble in the last pic. now we let it dry overnight then relay the tiles back in.
ok. today i put down the tool belt and picked up an airplane! THANK GAWD! here are some snippets from today. i met up with bobby at work and he brought his zr-1 vette! nice ride!
[YOUTUBE]u-lcoi4aQOM[/YOUTUBE]
then engine start up....
[YOUTUBE]KPcWahTPS1o[/YOUTUBE]
then take off from KDWH
[YOUTUBE]Xn8ADb4GaS8[/YOUTUBE]
bobby landing at KCLL where we had an excellent lunch at
Dixie Chicken
[YOUTUBE]G5xAj-x0xrQ[/YOUTUBE]
and finally my landing at KDWH. bobby flew the leg up there and i flew the leg back so we could both get stick time.
[YOUTUBE]AjEhAUBYrZU[/YOUTUBE]
all around. it was a great day to fly.
Therapeutic air time. :thumb:
Therapeutic air time. :thumb:
yessir. yes indeed it was!
I vote this thread, the best thread ever.
one thing i forgot to mention about that flight was this. birds. BIG birds. after we took off from KCLL about 7 miles southeast of the airport at 2,000 ft. was a flock of turkey buzzards. about 15 to 20 of them. damn near hit at least 5 of 'em. had to do some fancy stick n rudder to avoid them. chopped the throttle to idle and went into a left hand rollover dive then recovered when we were below them by a couple hundred feet. scary and fun all at the same time. that's one of the reasons i love to fly. every flight is different. flying to me is almost as good as sex! oh, and i did tell air traffic control (aka atc) about the birds and their location because there was incoming traffic into college station including continental express.
do those flocks fly at night?
do those flocks fly at night?
I know geese do. Not so sure about buzzards though.
[YOUTUBEWIDE]hR1I8jYTq3Q[/YOUTUBEWIDE]
Well That Sucked , But I Did learn some thing though
Shark bite connector Dont fit PVC
looks like you had fun today! go into more detail. i don't know plumbing all that well.....
did ya see the hole in the Valve ? I still have NO Idea what that was there for ( the valve that is )
So we removed Patio stones , 12x12 cement pavers , dug down remover More Pavers , dug down some more , i felt around in to hole , found what felt like a Valve handle , dug some more , Bailed out water , Shit its a valve , Shit there is Water Squirting Out of the Top side of the valve Ran and turned OFF the water Got a pipe cutter , cut out the Fucking Valve I cut it close so as to Not have to add any pipe ( more on that in a sec) , went to Lowes , discussed the options with Carol , we had wanted a faucet in the back yard , so Hell No time like the present , got the faucet a 3/4 T and 2 3/4 straight fittings , i knew I would have to trim the existing pipe to fit , so No Biggie ,Right
Well when I started trying to fit this all togather I hear SNAP , and Im neeling there with about 6" of copper pipe connected to about 6" of Pvc in my habd , the water line Into the house is copper and they had connected a section of copper to the PVC to add the valve i guess , Shit , so hi ho hi ho Back to Lowes I go , get a piece of 3/4" copper pipe and another fitting , Measure the pipe i need takeing into account the fittings , cut the Pipe , push the fitting on said Pipe , push this into the T on the new faucet , shit the fitting wont fit on the PVC , Must be 1" , so Back to Lowes , snag a 3/4"to 1" fitting , Now the fitting wont Snug down on the Pvc Shit !!! Back to lowes with a Small Piece of the PVC , Dude explains that PVC is measured ID ( inside diameter ) copper is measured OD ( Out side diameter ) BS I say , Here Let me show you , and slides the Piece of PVC Over a piece of 3/4" copper , Well Ya learn something new Every day , so what do I do ??
I explain what im doing to him , he gets a pvc fitting that will screw Into a Union and 1 for the copper side as well ,
thus the pic and the comment that that sucked !!!
Looking mighty fine, zipper, did you lose some weight?
i don't know plumbing all that well.....
1. Water runs downhill.
2. Payday is Friday.
3. Don't put your fingers in your mouth.
Then there's this:
http://www.theonion.com/articles/when-you-hire-union-plumbers-you-hire-trained-prof,18853/trial and error zip. that's why i asked for clarification. i might have to do the same someday or maybe another cellarite. so if we do have to do said job we can come here and/or pm the "project manager"
hmmm maybe i should become a non-licensed plumber!
Did you get to the end of the article?
One last word of wisdom: If you hire an electrician, union or otherwise, he's going to fuck your wife right in the ass and send you the pictures.
Nothing you can do about that.
:eek:
I don't know about the project mngr thing ,
but im willing to throw in my 2 cents
Feetz I Used to be an electrician ;)
Did you get to the end of the article?
:eek:
oh ok this part:
One last word of wisdom: If you hire an electrician, union or otherwise, he's going to fuck your wife right in the ass and send you the pictures.
Nothing you can do about that.
oh the tighter the better!
shut up sheldon. :D
I don't know about the project mngr thing ,
but im willing to throw in my 2 cents
Feetz I Used to be an electrician ;)
I'll have to check out your flickr page again!
here is a brew that i picked up yesterday at spec's liquor store called "mississippi mud" like the bottle, like the flavor too! good brew! will be buying more of it in the future!
oops. meant to post this elsewhere...DOH! oh well. and i ain't even drunk! lmao! (thank gawd!)
i wish i'd of taken pictures but today i fixed the honda 4-trax four wheeler we use regularly at work. you see it's like this. a while back, almost 8 months ago the starter switch burned up. actually i think it was longer than that. more like 2 years ago. anyway, it was rigged up where the starter was wired from the battery to the switch to the starter. well that won't work. what happens is this. the switch cannot handle the amperage so it burns up. could be two starts could be 20. never can tell. well for the last 6 weeks or so i have been pushing to wire this up back right. in other words, wire in a relay like it should be. then what happens is this: you push the starter button. the starter button is wired to the coil. the coil energizes then closes the starter contact therefore bypassing the load that was going through the switch. (helllllloooooo! that's the way it came from the factory!) so anyway, i found out today that the relay in the quad is new. ronnie just didn't know how to wire it up so he bypassed it. the thing is a piece of shit but it works and it works well. for whatever reason the original starter button was 86'ed. i opened up the housing and the wires were cut. short. no way to rewire it. not that i saw anyway. not without taking the complete thing apart. so here's what i did. i wired the new switch into the coil. then spliced in the negative to the return wire. then i ran a wire from the hot through the switch and on to the relay coil. for whatever reason, no wiring diagram of the scooter so had to improvise with a volt meter testing continuity, got it to where i could energize the coil. now second problem aroused. the starter positive post is jacked up. took me several tries to make it work. adjusted the nut to get a deeper penetration into the starter. prolly needs a new starter. duct tape and bailing wire be damned. the thing works. will try and take pictures of it tomorrow.
ok so. here are pics of the finished job on the 4 wheeler at work. pic1 shows the relay. pic2 is the wire i connected to the battery positive terminal. the other end of the wire was at the starter button the other was connected to the relay plug you see here in pic4. pic 3 was splicing in the negative. and finally, pic5 showing the starter push button.
totally forgot to resize the damn pics, sorry guys
Pretty typical day after a Bad ass Thunder storm last nite ,
the scale ( Under the counter ) the Main PCB ( the brains ) caught a Bit of a Sparkle , still weighed but that was All , No comm( to PC , or any of the score boards ) , No I/O ( traffic Lights ), first time this has happened in 6+ years
solution , replace the main Pcb , load the Custom Program and all the setup and cal data I backed up on the PC (and My Laptop )
Oh and I Included a Pic of the Palatial Shack right Next to the Radiation Det , heat and AC , Insulation
that was My Afternoon , how was yours ??
good job bro!
now this.
sumbitchmotherfuckinshitifuckedupagain.
pics soon of body work on a 2001 ford f-150. pole was in my blind spot and i checked to see if it was there. it was. new project soon. hopefully next week or so.
ok, here is a small taste of one of the many cabinets i've been working on. today i started on this one. it's a 40 ckt (circuit) heat trace panel that requires 208v(olts). there are 40 ckts dedicated to the heat tracing, which by the way is where a pipe has to be heated to whatever temperature for whatever reason, this panel controls the temperature via the heating elements and the RTD's (resistance temperature detection). first thing is to take the drawings for the panel and check the BOM or bill of material. next make sure everything is mounted where it's supposed to be and the right parts were used. next is making sure that the equipment is tight and snug. after that you do a point to point wire inspection and ohm them out to make sure all connections are correct and that the termination points are not frayed. then you take make shift RTD's and insert them into the RTD terminals as seen on the left side of the panel. the fake RTD's are the maroon looking thingamabobs. after that, hook up service power and power up the panel load the applicable software and test every heat trace circuit. after all checks out and problems fixed, remove fake RTD's, heat shrink the wire tags, blow shop air throughout the panel then vacuum out the bottom basin. done.
in most cases. this panel has not only an air conditioner (on the right side panel) but also has what's called purge air. what that is is this: the panel is going in a hazardous location. ie there are flammable gases present so they hook the panel up to an air line and have positive pressure in it to prevent any of the ambient outside air to enter the enclosure.
i like my job. :)
Purged air SSSSSSSUUUUCCKKKKSSS !!
Scary when you have to By pass it with an extension cord that you have to cut the end off so you can work inside the panel in a haz area ,
Good job
Ok so rember the washed out slanted Pool ??
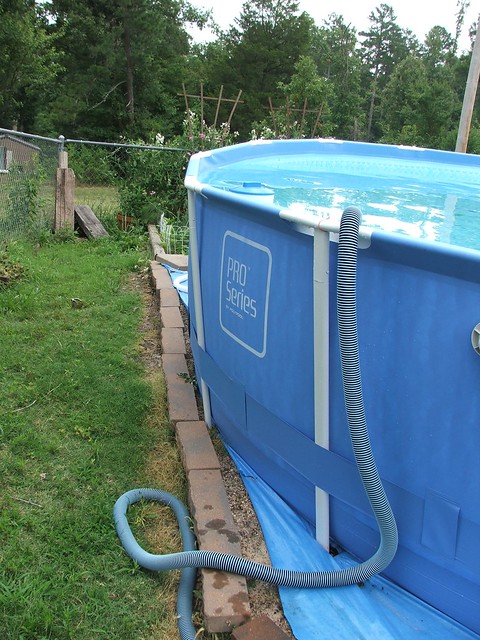 Dscf7353
 by
zippyt, on Flickr
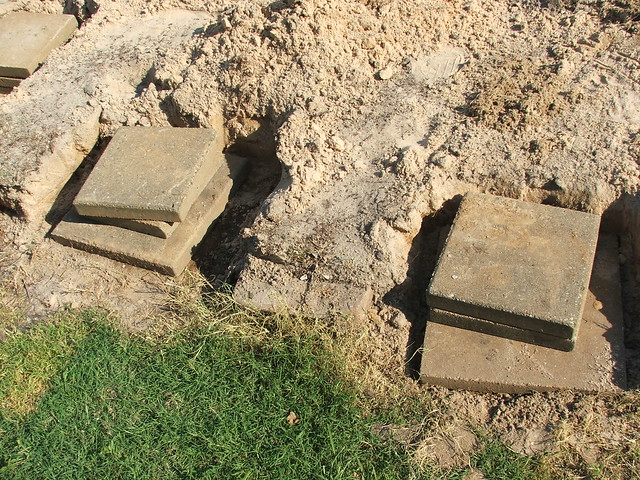
Well I drained , dissambled and Moved that Heavy Mother F(Watch Yo Mouth !!!
this Morning I started leveling and installing pavers to Harden the Places where the Steel support poles touch the ground , in 100 f heat no less
 Dscf7365
 by
zippyt, on Flickr
 DSCF7362
 by
zippyt, on Flickr
 DSCF7363
 by
zippyt, on Flickr
Wash out and sink AGAIN byotch !!!!!
I dare Ya !!!
There's an irony to working your ass off in that heat on your pool and not being able to cool off in it later.
It's damn ironic, I tell ya.
Ya Tell me about it !!!
I went thru 3 2 liter Hydration packs today and I am Only about half way done setting the pavers , much less leveling the sand , much less setting the Pool BACK Up , Much Less Filling the 6000 gallon Fucker ( it takes 24 SOLID hrs ) !!!
It'll be worth it though
I went thru 3 2 liter Hydration packs today...
Oh yeah? I didn't know you could get Spaten in two liter bottles, SUH WEET!
;)
It will be worth it.
Today I finished a bathroom remodeling job for the bathroom that my step son's 5 children share in their home. They needed 2 sinks and the paint and tile needed updating. Two sinks required plumbing modifications and a new vanity and counter top. I also had to replace the rusted toilet flange and install a new toilet as the old one was cracked and leaking.
Shot 1 Pre-demo
Shot 2 plumbing mods
Shot 3 vanity construction
Shot 4 project completed!
Very nice! I wish you were my stepdad.
Also, you need some caulk around those sinks. :)
Thanks and yes, I applied a bead of caulk to the rim of the hole to seal the sink to the counter and today I used a white silicone and filled the small space where the outer edge of the sink meets the counter surface.
Excellent work Chris.
I too did a bathroom remodel over the last few days. Stripped the room to bare wall and sub flooring. Skim-coated the walls on day one, then painted on day two. Day three was lighting, Luan, vanity & toilet installed along with matching brushed nickel accessories. I'm beat. Gotta finish some caulking - I'll do that tom. I don't like the counter top, so I'm gonna order a granite piece and that should finish the job.
Gorgeous bathroom, and I love that shower curtain!
Damn Chris! "Oh, yeah I just knocked out this vanity. Still had time for a few rounds of golf that afternoon"
Great job!
very nice!!!
i have a project coming up soon. automotive. replacing my a/c in the Fixed Or Repaired Daily again. stay tuned. i'm busy so i have to make time to do this. will be before the end of the month as the warranty expires then.
There's an irony to working your ass off in that heat on your pool and not being able to cool off in it later.
Its later ,
The Pools not Full yet but its deep enough in can float and drink a cold beer
 DSCF7368
 by
zippyt, on Flickr
Hahah.....Looks like you're enjoying yourself. :D
Much Less Filling the 6000 gallon Fucker ( it takes 24 SOLID hrs ) !!!
Yikes. Glad I don't have your water bill.
[YOUTUBE]27u35P06XsU[/YOUTUBE]
sweeet zip!!!
here's a couple vids from flying today....one is landing at cleveland muni (texas y'all not ohio) and the other lake livingston. then later i'll add one of me being a little goofy (but not too much) :)
[YOUTUBE]8LV-7_w9nEY[/YOUTUBE]
[YOUTUBE]WDRv8-RSRTY[/YOUTUBE]
flying over lake livingston
[YOUTUBE]fom1AeZmr_4[/YOUTUBE]
[YOUTUBE]lHvvs2-UMjs[/YOUTUBE]
kthxbai!
In a week or so we are headed Back to Fla ,
its a 1/2-3/4 mile walk to the beach from our cabin
I have been looking at carts to carry coolers chairs Etc,,,,
most of them are $2-300 !!!!
So thanks to the wounders of the Net i found some drawings of a cart made from PVC
so fro about $100 worth of Pipe , Pipe fittings, and wheels
I made my own , Check it out !!!!
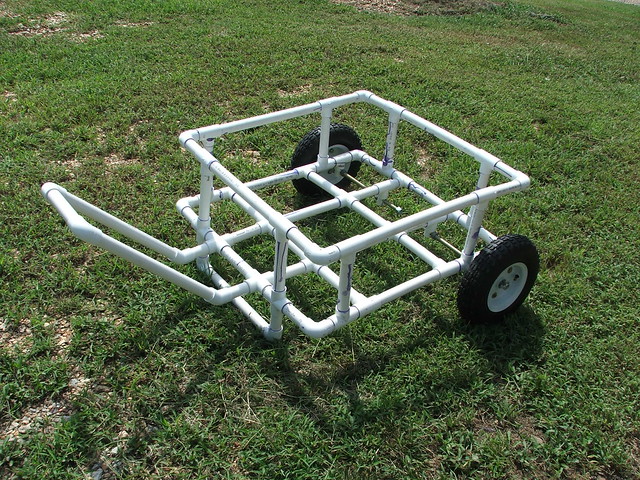 cart1
cart1 by
zippyt, on Flickr
This thing will hold 2 full size coolers !!
yes I still need to tighten up the axles and glue a few Pieces on the Handle , But it works Great !!!!
Today I spent several hours scanning pictures from my mother's WWII photo album. Some you may remember I have mentioned that my mother was in the OSS and went out to India and on to China with Julia Child and also worked with Paul Child. In Chungking she met my father who was a major in Britain's MI9 unit.
I just finished reading Jennet Conant's new book, "A Covert Affair, Julia and Paul Child in the OSS". I contributed material for the book from mother's war letters and a diary that she kept, written in shorthand! Anyway, it got me thinking that maybe I will try to put something together as I have hundreds of letters and photographs. Even if is just for me and my family it would be a way of sharing the information.
So here are some of today's images:
1. My mother at her desk where she worked as the secretary to Col. Dick Hepner who was Chief of the OSS Detachment 404. note the barbed wire covering the window for security.
2. Paul Child, another officer and Col Hepner working on war maps.
3. Julia Child with some other OSS staff in Kandy, Ceylon.
4. My mom, the caption on the back says "crossing the Yangtze by ferry." I love the very 40's sheik V-neck sweater, nice permed hair and sunglasses. She grew up on a farm in Minnesota and after the war never moved back, she and my dad moved to NY and loved to travel from then on!
In the second picture, w/Mr.'s Child and Hepner, I feel like I know what that is on the table. No, not the bowl! I just can't pull it out of my memory. I want to say it's a radio, but, that doesn't feel right...musta killed that brain cell at some point.
Even the pictures you didn't take are cool.
Oh, yeah, I see. Did it take two hands, one for the talking hole and one for the hearing hole? Or what?
I also just now noticed the padlock on the jeep hood.
It's just like a normal 'phone. Follow the lead, you can just make out the top of the handset on the side facing away from the camera.
Ima Dumas. I see now. I thought the cord from receiver to handset was a rope for carrying it.:lol2
Also, looks (from this stolen Flickr pic) like the bells are turned upside down, that threw me, too.
My mind gets a grip on things like this and won't let go sometimes. Thanks for straightening me out.
They are great pictures. This is what's great about the internet. Now people wanting to research Julia Child in WWII can see these.
They are great pictures. This is what's great about the internet. Now people wanting to research dumbasses who don't know what a phone is can see these.
FIFY.
The bells are inverted to function as ash trays.
Shed construction begins tomorrow. Pictures will be taken this time.
Stay tuned!
I do NOT believe this! It hasn't rained in months. So I get to laying the foundation and it bloody well RAINS!
Now it's too hot and humid to work. Oh well, tomorrow's another day!
Here's a pic of what I did a few days ago...the rock is almost big as a golf ball.
What a python, what an anaconda, what an --- inchworm?
Thats not a rock, that's a meteorite.
That's not a python anaconda inchworm, that's an Alien tentacle!
Thats not a rock, that's a meteorite.
That's not a python anaconda inchworm, that's an Alien tentacle!
Wait, what are we watching here, Star Wars, or Japanese porn?
Wait, Japanese Star Wars Porn!
the birth of a meme!
....4. My mom, the caption on the back says "crossing the Yangtze by ferry." I love the very 40's sheik V-neck sweater, nice permed hair and sunglasses. She grew up on a farm in Minnesota and after the war never moved back, she and my dad moved to NY and loved to travel from then on!
You can't expect such a classy dame, that's seen the Elephant, to go back to the farm. :headshake
Wait, MN? When I saw the first picture, I thought she had a beautiful smile that reminded me of Betty White. Rose Nylund was patterned after your Mom?
This stuff should be in the National Archives or Smithsonian. Antiques Road show would call them, "National Treasures", and I'd wholeheartedly agree.
Thanks a million for sharing them. :notworthy
the birth of a meme!
[scene in garbage compactor; tentacle grabs someone's foot]
Han Solo: I've seen enough hentai ...
I'm calling the shed project complete. I am far too tired to post pictures tonight.
I'll try tomorrow after running errands.
As I promised, here is a photo diary of my shed build project. It took three days of hot, sweaty toil but it's done!
This first photo shows the beginning. Boxes of parts staged at the site.
link
The second photo shows the frame of the foundation built and levelled.
link
The third photo shows the foundation completed with my friend Anne driving in the last screws (yes, I used the proper deck screws for PT lumber).
link
Photo four shows the floor of the shed laid out and assembled and connected. Thus ended Day One of the project.
link
Day Two began bright and early to beat some of the brutal Texas heat.
Photo five shows the walls in place. The directions made it look SO easy! Just insert tab A into Slot B and snap into place. HAH!
link
Photo six shows the major roof panels in place. This ended Day Two.
link
Day Three opened early also. By noon the temperatures are above 100 degrees, requiring frequent cool off breaks and about three liters of ice water each day.
Photo seven shows the more of the roof and the doors installed.
link
Photo eight shows the end product after the last roof parts, skylights and smaller things like shutters in place. The shed has been shimmed to allow the doors to open and latch closed again, the windows to open and all the roof vents and screens installed.
link
I wish I could get the images to appear in the post like everyone else gets but I don't think I'm doing something right. All I get are tags.
Apologies to everyone for all the clicking.
Next time we order something like this, I will refuse to assemble it until the spring or fall.
Wow. That looks like a lot of work. Worth it though. Well done!
okie dokie. here we go again. the other day i went and bought a new dishwasher as ours died about a year and a half ago. i forgot to take pics of the removal of the old one but here is the installation of the new one. i took basic step by step pics to hopefully show someone that this is a project that is relatively easy, albeit could be difficult depending on your ability to turn wrenches, hammer to fit and paint to match. the washer was delivered this morning and right out of the box i saw that i was going to 1. have to go to home depot and buy a 3/4" to 3/8" elbow to hook up the water line and 2. improvise on hooking up the electrical. i improvised using a spare computer cord. i cut the end off and stripped it back about 1.5" - 2" or so then stripped back the 3 conductors to connect in the junction box under the washer. after twisting the wires (remember, black is the hot wire and white is the neutral) i used wire nuts and electrical tape to secure the nuts so they wont come loose through vibration of the unit. it's always a good idea to tape them regardless. after securing the electrical cord and attaching the drain hose extension i positioned the unit in it's little cubby hole but not all the way as to give room to work/connect shit. i fed the drain hose through the side of the cabinets and attached the hose to the disposal using a hose clamp. next connect the water feed to the unit. oh, don't forget to use Teflon tape on the fittings. after connecting, turn the water valve on and check for leaks now. it would suck to complete the installation then have to take it out because it leaks. after checking that push the unit in place an make sure it's level. after that secure the unit to the counter top and take the washer for a test run!
eta: oh yeah, don't forget to hook up the ground wire (green) to the unit junction box.
well done cept you need a bushing or romex fitting for the cord going thru the box knock out
Well done plt! I agree with zippy, put some kind of protection for that electrical cord going through that sheet metal hole, eh?
I also see you're getting better with that camera including some left handed shots. Nice work!
yeah i'm going to go to home depot and get a bushing to put in there. i did think about that (after i'd already gone to home depot) when i was hooking up the cord.
thanks BigV i am doing a smidgen better with it. in january Dr. Froth (a member here that lurks mostly) had a concert and i ran all over the place from front stage to backstage snapping photos. i think i have them public on my facebook....
I'm calling the shed project complete. I am far too tired to post pictures tonight.
I'll try tomorrow after running errands.
thanks for sharing! great job!!
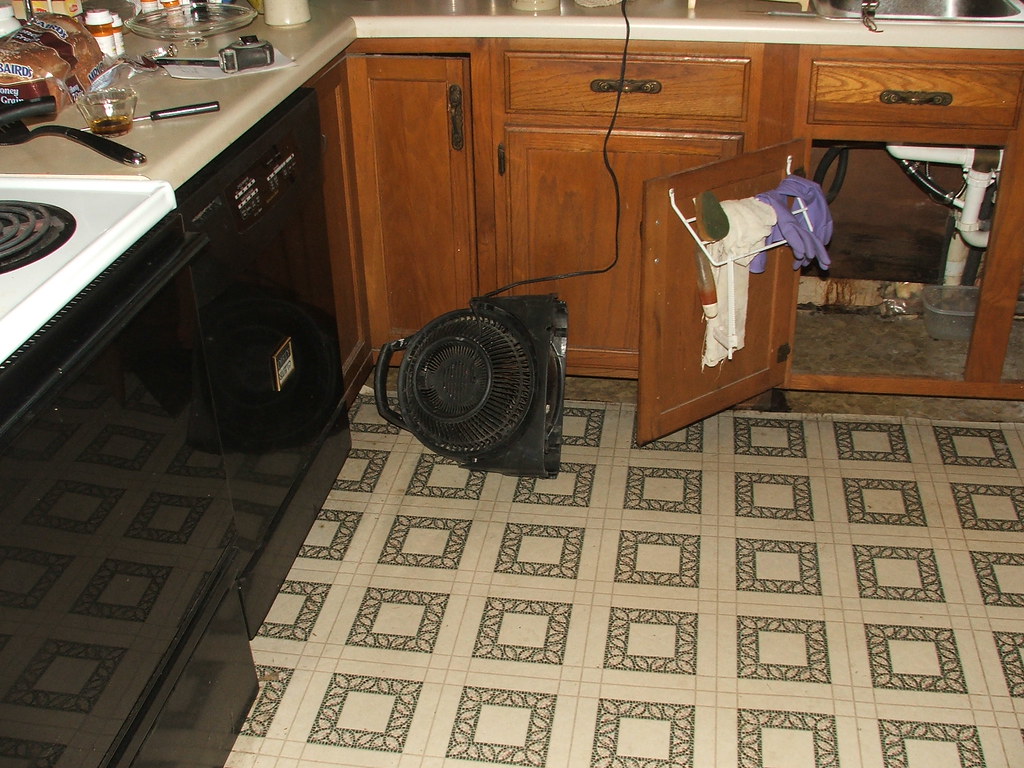
Not the way i wanted to spend an easter morning !!!!
I was pouring a cup of coffie this morning bare footed ,
suddenly my foot was wet
" WTF !!!!!!"
Looked at the bace board , wet , FUCK !!!!!
looked under the sink , WET, FFFUUUUUCCCCKKKKKK !!!!
and it had been wet for a while , FUCK !!!!!
So I grabbed a hammer and a pry bar and started stripping wet MDF board away ( why do they even make that shit ????? it USELESS !!!)
under the kitchen cabnets
 DSCF7694
 by
zippyt, on Flickr
 DSCF7695
 by
zippyt, on Flickr
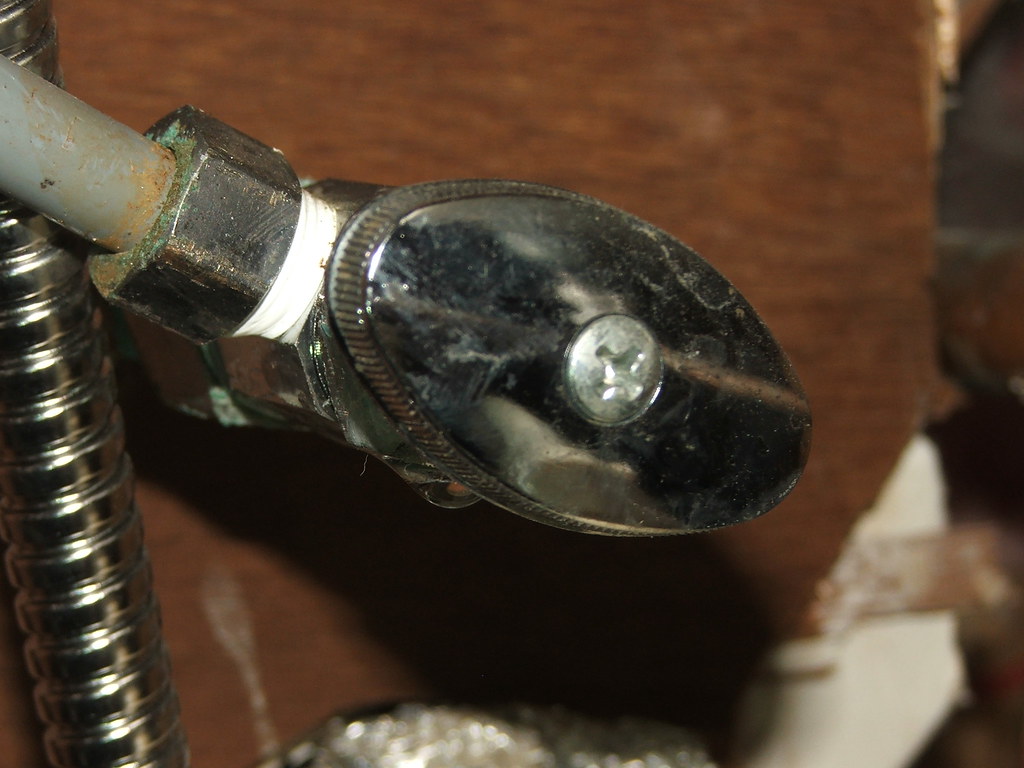
Fans UP !!!
Here's the Leaken Byotch that caused this !
 DSCF7698
 by
zippyt, on Flickr
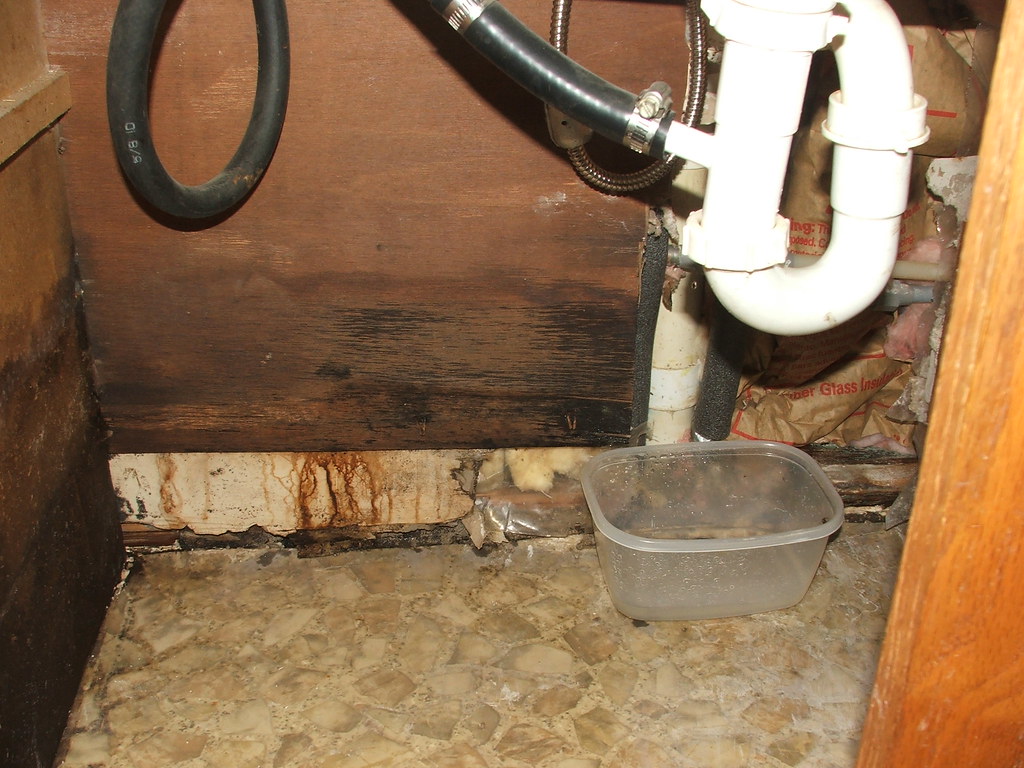
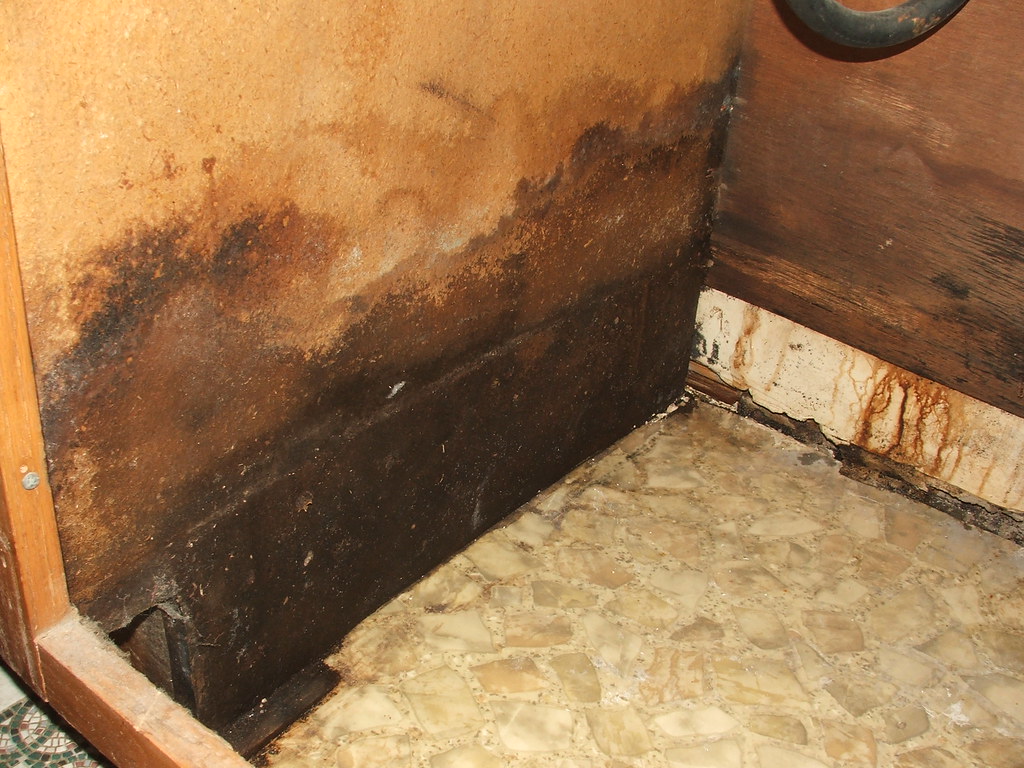
And heres what it did ,
 DSCF7702
 by
zippyt, on Flickr
 DSCF7703
 by
zippyt, on Flickr
New fitting in place , but the pic i took to show you all , well i saw a small drip
 DSCF7705
 by
zippyt, on Flickr
so i thaught i was done , but well i guess i have to mess with it a LITTLE More
tape measure? check!
spatula? check!
shot of whiskey? CHECK!
ugh that Shot is bacon greese ,
take a shot ifn you want ,
but i think it would be a Little thick going down
here is the drip and drop , hard to see untill i looked at it full screen
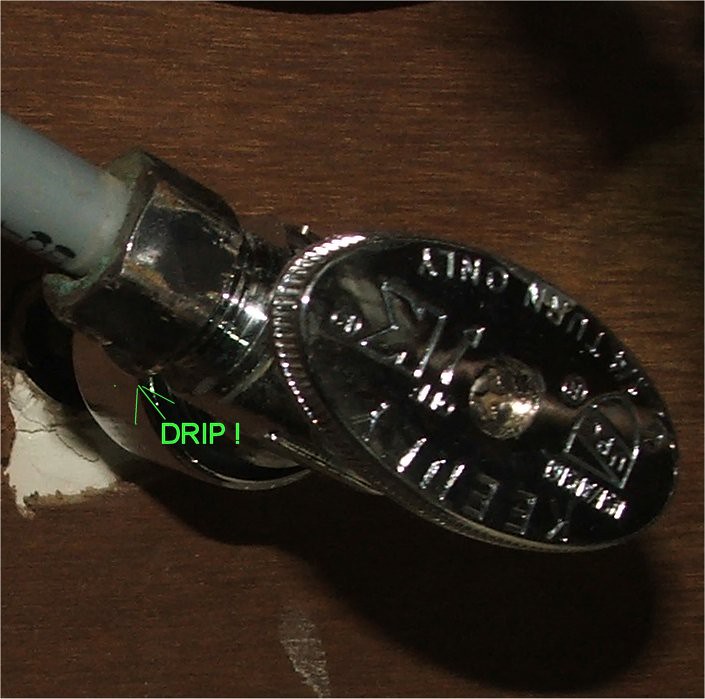 drip
drip by
zippyt, on Flickr
drop
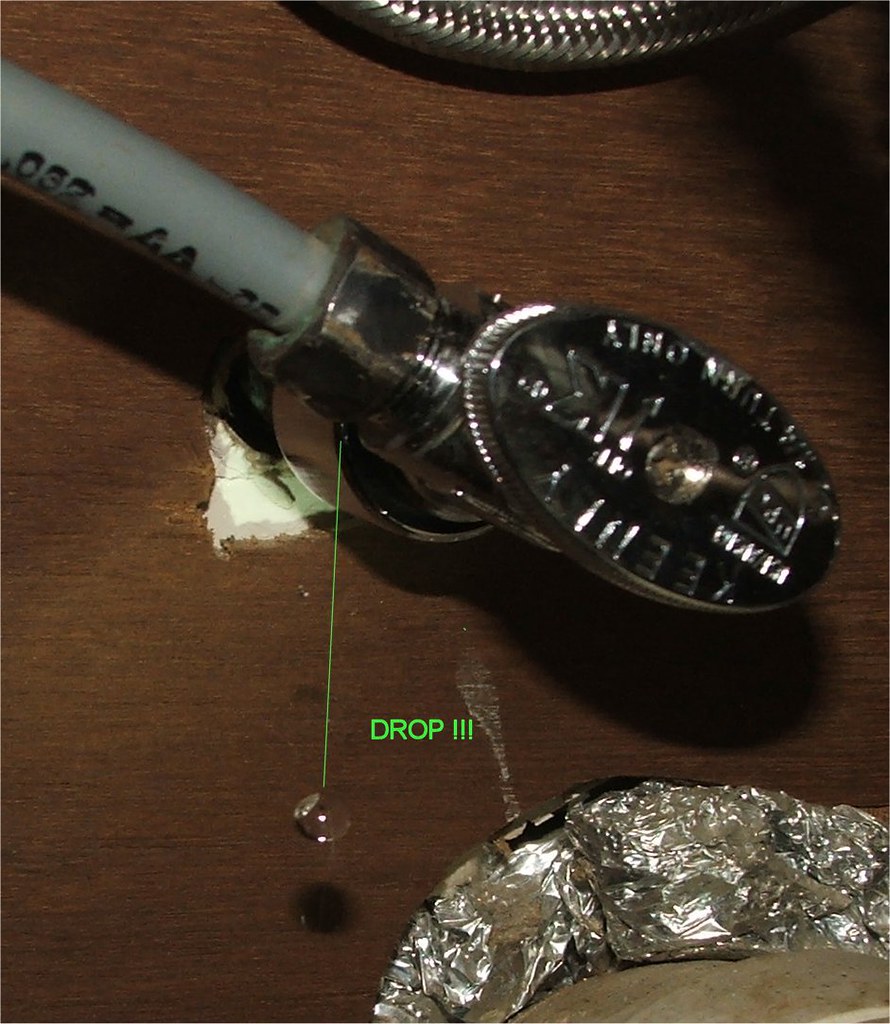 drop
drop by
zippyt, on Flickr
i know some of y'all out there in cellarland know how to change your own oil in your vehicle. but for those who don't and think they might wanna try? here's a step by step for them. the riggamaroo is basically the same for all cars/trucks. locate the drain plug on the oil pan (the lowest point on the pan has the bolt (see pics). anyway, it can be a messy job so make sure you have a catch pan for the used oil. you can buy them at any auto parts store or even at wal-mart. when done take the used oil back to the auto parts store for recycling. i didn't show every step here, my fault, but i showed how to do the under body work. i feel confident that you can figure out what hole to pour the new oil in. just make sure you know how much oil to pour in. cars/trucks take different amounts. depends on the engine size. read your owners manual.
oh the hammer and screwdriver were for old filter removal because i could not find my filter wrench. i was going to red neck it and stab the old filter with the screwdriver to knock it loose but i didn't have to. i was able to remove it with just my hand. now when you replace the oil filter it's a good idea to pour some of the new oil into the new filter. also, lubricate the rubber gasket on the filter with the new oil.....
once you've replaced the drain bolt (plug) and put the new filter on, your set to go ahead and put the new oil in. the oil cap is clearly labeled under the hood. also check the dip stick as well, by dip stick i mean the oil dip stick, ok? not me! make sure you have enough oil in your motor to operate safely. happy trails.
Always double check when the old filter comes off the rubber comes with it.
good point Bruce.
Also, what to do with the used oil? like i mentioned above, take it to the auto parts store. down here, they take it for free. not sure about other places around the country though.
Burn it in the garage heater.;)
this was actualy last sunday ,
Garage shelves were a Bit rusted out ,
so Out with the old
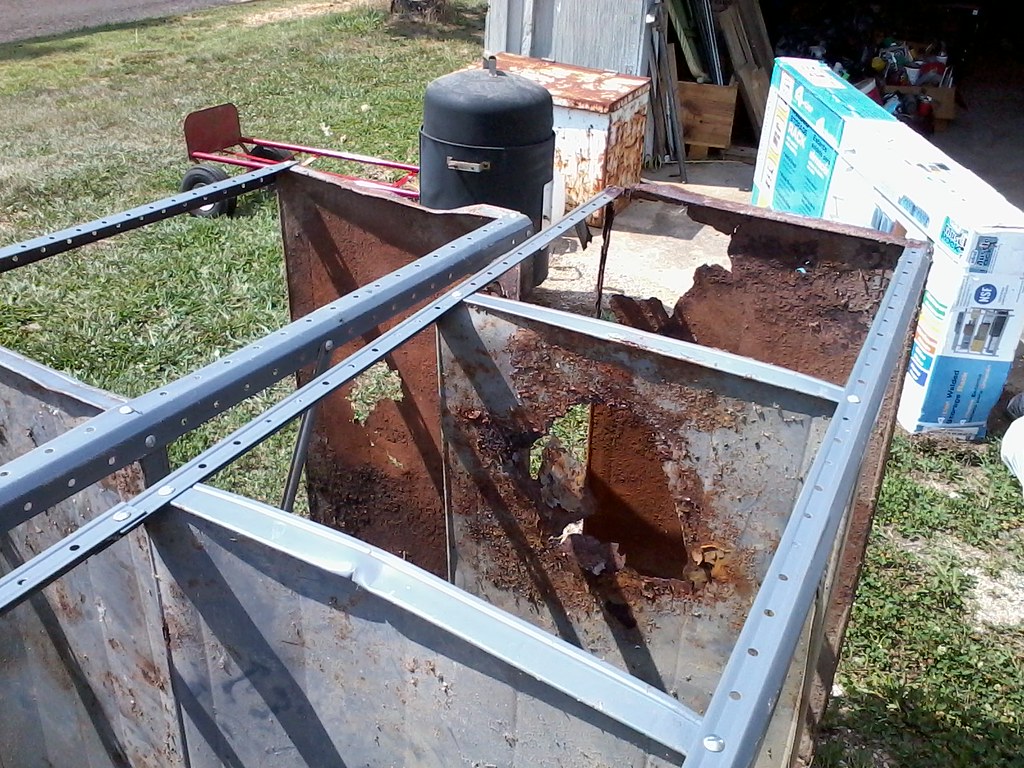 Photo233
 by
zippyt, on Flickr
And in with the new
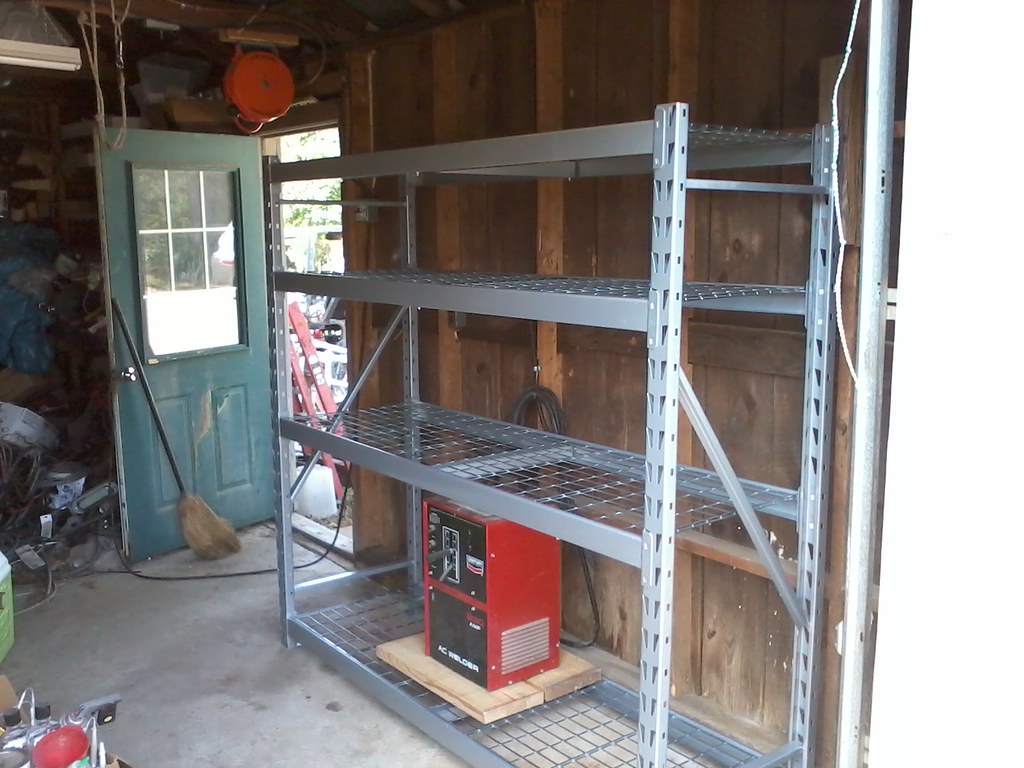 Photo234
 by
zippyt, on Flickr
and the obligatory junk pic
 Photo232
 by
zippyt, on Flickr
Still not totaly sorted but we are getting there
The blurring effect makes it look - - - worse?
once you've replaced the drain bolt (plug) and put the new filter on, your set to go ahead and put the new oil in. the oil cap is clearly labeled under the hood. also check the dip stick as well, by dip stick i mean the oil dip stick, ok? not me! make sure you have enough oil in your motor to operate safely. happy trails.
It is VERY important to do these steps in this order.
Trust me.
:smack:
Heh... my drain plug has a very slow leak. We knew this already from the large stain on our driveway.
At our last oil change, the mechanic noted that they had replaced it with a larger one to bandaid the problem, but gravely warned me that it was "only going to last 3 or 4 more oil changes."
You mean... a year? On a car with 170,000 miles, that we don't even know if it's going to make it another year? Forgive me if I don't put my doom face on.
It is VERY important to do these steps in this order.
Trust me.
:smack:
only the last time.
So Tree Fae and I volunteered for Maker Faire here in KC today, and I met this guy who I'd seen on Pawn Stars trying to sell this very robot. Turns out he's from the KC area. I'd always wondered just how produced that Pawn Stars was, and I asked the guy about it. He confirmed what I had always figured...that it is totally scripted and produced. In the case of he and his robot, he had emailed the producers eight months before he finally was filmed, and was told to show up on a prearranged date to conduct his "transaction". He was interesting to talk to.
That explains why there's nobody around when they're negotiating, and why Chumley hasn't been fired.
I've always wondered if shows like Pawnstars, Orange County Choppers, and Pickers, get paid to do it or just promises of increased business and t-shirt sales.
I'm sure the principals get paid. But yeah, Gold and Silver Pawn Shop is now a tourist destination because of the show.
As a worker at a pawn shop I can confirm this theory
There are two things that give it away. One is that the cameras obviously can't wait around all day for people with interesting things to sell. They go out and find things to be on the show and come back and video them.
Two is that people with interesting things to sell do not sell them to pawn shops.
If you look around Youtube you can find a video of Rick working his shop before Pawn Stars and it does not look anything like it does on the History channel. It looks like a pawn shop.
The truth is that the History channel wanted to have actual ratings, and certainly noticed that Antiques Roadshow gets big ratings (on a channel that claims to not be about ratings but actually is). How can you have Antiques Roadshow but not obviously have it be Antiques Roadshow?
So they crow-barred [strike]antique[/strike] Historical items into it to justify it being on History, a channel that claims to be about History but actually is not. And then it worked, so now there are copycat shows such as Storage Wars and Pickers that are also Antiques Roadshow but, you know, not Antiques Roadshow. There are the items, the stories, the Lotto-mentality money happening, but no mandolins playing so you know it is not on PBS.
And they are all fake! People would not negotiate on camera. It's all fake. Ironically, Antiques Roadshow can claim to be unique and special and thus justify its existence on PBS because it's not *totally* fake, only
partly fake.
Spot on, Toad. I still enjoy the show, though.
Other cool things at Maker Faire KC...
A nice art bike ala old school sci fi Mars ships...and...anyone remember what The Prisoner drove?
that's totally cool guys!
here is a week ago last sunday. i'm only just now posting them.
As y'all know i worked the go kart track for a better part of two years while looking for a job back in engineering and from previous posts in this thread you know how much work Bobby (and I when i worked for him) has put in there making improvements. well Bobby put in a third track and just opened it up to the public about a month ago.
we finally got up there to take some pictures for his website and to hang on the wall at the track. now taking pictures of the track from the air is to say the least, challenging. why? Houston Intercontinental Airport is right there. i mean right there as in jets were diverted around us!
(oh the pics were cloudy because of the windows)
it was all safe mind you, i had called Tracon (houston approach control) prior to getting up in the air and got permission to get within what's called the "Houston Class B" airspace and within spitting distance of the big airport.
when we got to the track and started our orbit i started snapping pictures as fast as i could with my nikon while talking to Houston tower and fighting with Bobby over the rudder because he kept putting the wing strut right in my frame of view. this is almost what it was like:
Bob: "HEY! get your foot off the rudder!"
Me: "NO! you either fly the plane with the ailerons & rudder..."
Houston: "N9568L traffic, twelve o'clock, boeing 747 climbing through 1,000"
Me: "and keep that strut out of (roger Houston, have the traffic in sight) my way or i'm..."
Houston: "use caution 68L, wake turbulence"
Me: "gonna operate the rudder! (roger, we're ready for it) now what's it gonna be?"
i know, hard to follow but that's something you get used to up there. listening to the radio and talking at the same time. needless to say, it was a blast. here's a few pics. one of the airport as we were passing, another of an RJ jet nearby and then a pic of the track from the north and one from the south
:notworthy:
Awesome, plt!
Wow, great pics! Having 747s thundering by close enough to make wake turbulence warnings necessary, though ... yikes. :eek:
Verry Cool , witch track is new ??
thanks y'all, it was a blast. wake turbulence isn't so bad as long as you know what to do if you encounter it. i've been flipped upside down from mountain eddy currents before. kinda similar.
Verry Cool , witch track is new ??
that one right there! no! next to that one! no not that one, the other one!
Oh i see that one right there ,
over behind that other one ,
That lighter-coloured track looks NUTSO FUN!
I totally guessed the wrong track was the new one. I thought it was the roughly triangular shaped track.
That sounds way too stressful for me. It looks like you were right in the flight path of the airport. Gah!
I've been away for a few days.
I went with my son's Webelos den to scout camp in the mountains of Virginia. It was a crazy experience. Lots of mahem and boys being boys running around and yelling and having fun. It was a blast.
This is Goshen Virginia. It's owned by the National Capitol Area Council of the Boy Scouts. The land was purchased decades ago by the heiress of the Post cereal company and donated to the Boy Scouts.
So here's where I slept for 3 nights. It was freaking cold at night, and there was little to keep the bugs out. But they weren't bad at all. My tent mate had to leave after the first night, so I got a tent to myself for the last two nights.
[ATTACH]39307[/ATTACH]
This was the swim area. Very scenic. In the time I was there, there was only swimming on the first day, and that was just to pass the swim test. The other days, we were busy with other activities. My son is still there, and it's supposed to hit 100, so they better let the kids go swimming today.
[ATTACH]39308[/ATTACH]
Here's the dining hall. What a freaking zoo! The food wasn't bad, but it was so loud and crowded. Almost 300 people there this week. All eating at once. Since we went to the dining hall 3 times a day, it was a big part of the experience.
[ATTACH]39309[/ATTACH]
Tuesday, we went for a hike in the morning. It was supposed to be a mile long, but was actually 5 miles long. We got some bad information from the leaders, and I felt bad because I brought water, but no snacks for the kids I was responsible for. Oh well. Very nice hike though.
[ATTACH]39310[/ATTACH]
That afternoon, the kids did archery and BB guns. Our den went last, and there were extra slots, so I got to shoot a BB gun for about 5 minutes. I hadn't shot one in 30 years, and had never shot from a prone position. it was really uncomfortable and felt all wrong. But looking at the pictures my son took of me, I can see that I should have been lying at a slight angle to the target instead of facing it directly. That would have fixed everything. Next time. (I still got several bulls eyes.)
[ATTACH]39311[/ATTACH]
This was our fishing spot. We spent two evenings here after dinner. It was spectacular and so quiet and peaceful, and the setting sun lit up the distant mountain range beautifully.
[ATTACH]39312[/ATTACH]
The morning before I had to leave, we did a hike up to the top of the mountains you can see from the fishing spot. There's a nice viewing rock up there. What you can't see in this picture is the 300 other people who had hiked up there that same morning.
[ATTACH]39313[/ATTACH]
I enjoyed this scout camp a lot, and was sorry to go, but it's clear that it's a lot more fun to do things as just our den of 12 boys than to be thrown in with a group of 300. But the benefit of the large group is all the activities that they have for you.
I totally guessed the wrong track was the new one. I thought it was the roughly triangular shaped track.
That sounds way too stressful for me. It looks like you were right in the flight path of the airport. Gah!
that's the original track. reason it looks so dark is it gets 2 coats of tar seal every year. the new one is just plain asphalt without sealant.
@zen: yeah that's the half mile track (the other two are a quarter mile). it's loads of fun unless you work there! people can't seem to stay on the track so you have to go out there and get them going again. the one's that do it on purpose get booted back over to the "kiddie track" as we called it
Glatt? that looked like a blast! i bet y'all had a large time! great pics dude!
That place, that lake, looks so peaceful...I just want to go there and relax for like a thousand days.
Sheesh I need a vacation.
Well this is a combination of a few days of work in my garage workshop. I had this older style Ryobi plunge router that I seldom use because I have a nice new Hitachi model and I also had an old metal framed table sitting around so I decided to make a router table that could come in handy should I ever get around to redoing my kitchen and making my own cabinets and doors.
Image 1. The table which I had to cut down in size since it was bigger than the 24 x 32 inch top. I also added some supports for some shelves which will help firm it up.
Image 2. The table with shelves and top in trial positions. I then took it outside and painted it with fresh black spray paint. The top will be 1 sheet of 3/4" birch plywood laminated to 1 3/4" sheet of laminate covered particle board. The laminate makes it easy to slide the stock across it.
Image 3. The insert which is 3/8 aluminum plate and is about 9 x 11 inches. I traced it to a scrap of birch ply and cut that out and then sanded it until the insert plate slid in smoothly. This is my pattern for routing the laminate top.
Image 4. I used construction adhesive spread with a notched trowel and then used just about every clamp in my shop to squeeze them together and left overnight.
Ok so the next morning I removed all of the clamps. The insert plate came with some pre-drilled holes for non plunge type routers like Porter Cable which are more common but like I said, I had this nice one not being used and it is a more powerful one then my Hitachi. I removed the small cover plate from the bottom of my router and discovered I had room to drill out the holes and tap new ones to allow for a bigger machine screw. I then matched the adapted router base up with the insert plate and drilled holes on my drill press. I went with a nice countersunk machine bold that is tightened with a allen wrench.
1. and 2. Attaching the router base to the insert
3. I added a locking nut so the machine screw can't accidentally vibrate loose.
4. Here is a closeup of the pattern cutting bit on my Hitachi router. I used my sabre saw to cut the area that would not be needed and would leave a lip to be cut with a rabbet. I then clamped my plywood pattern and used the pattern bit to cut the rabbet. The ball bearing above the cutting tips runs along the pattern. It took 2 passes to get the correct depth.
I purposefully left the lower piece of plywood on the table top slightly larger, about 1/8" and used a longer pattern bit to trim it to get a perfectly smooth edge. Then I attached some 1/2 pine to give a nice solid edge and hide the ugly view of the particle board and plywood. I used glue and my brad nailer to attach it and then used a small rounding bit on my trim router to round off the edge and the corners.
1. Edges attached and smoothed out.
2. Insert plate installed with router attached and bit just protruding.
3. View from underneath showing the router hanging upside down.
The IT tech in me said: "Why on earth would someone need to build a whole table for one router?"
Then I saw the last photo and, after 10 seconds on Google, said: "Oh."
Nice handiwork.
look very solid. That will be handy. Now for the fence!
Thanks, and yes it does have specific use beyond what most hobbyists need such as making the cuts for cabinet doors to be assembled.
I still have to get it wired up with a central safety type switch, add some wheels and construct a fence and a slot for a miter gauge to move along. I'll also probably add some type of vacuum hookup since routers make a lot of fine saw dust.
Very nice work, Chris.
A friend sent me some drawings for one he built (about a year ago)
I am yet to build mine. Now seeing what you've done, I may incorporate some of what you've done into the plans.
Nice, they are very handy. :thumb:
today i went and flew bobby's new plane. A Vans RV-6A. it's an experimental kit plane available that you put together (just over half) yourself then once completed it goes through the rigamaroo of getting certified by the FAA. it's an extensive process.
this plane was already built and bobby bought it off of a dude that didn't fly it very much. i believe it has under 800 total hours on it. it is a dream to fly and fairly easy. after watching him land a few times i took the last landing back at our new home airport north of houston, and aside from the final approach speed being just a little faster than i'm accustomed to, it was real easy to land.
only one of the 3 vids i took of rolling the aircraft came out....here it is....
[YOUTUBE]zMp6LUq2bLA[/YOUTUBE]
and nice work Chris!! that will come in very handy indeed!!
Well the router table is officially completed. I added a safety type power switch that can be turned off with my knee and the router is attached to an outlet that can also have the shop vac attached to so both are turned on and off simultaneously. I also added a wheel package so the table can be moved and the wheels retracted.
I built a fairly heavy duty fence that clamps to the table and did not require slots that can fill up with debris. The front of the fence has a fixed upper section made of particle board coated with laminate and the lower section is adjustable and can be opened or closed around the router bit to control dust buildup and keep the fence from being damaged by the cutting edge of the bit. The fence also has a T-track for attaching a feather board to keep the stock in place. And I added a combination T-Track and miter slot. The miter gauge shown is off of my table saw. I may eventually build a coping sled which is a much more secure way to move some stock through the cutting bit. Also need to add a vacuum port behind the fence and under the table to collect dust. Maybe next week!
May as well add these 2 other shots of recent projects I completed.
1 is an extended work table for the band saw with an adjustable fence and miter gauge.
2 is also an extended table for the drill press with an adjustable fence and 2 lock down jigs to hold work in place. This is the old Delta drill press I got for $50 and rebuilt. It is solid as a tank!
I love that old drill press.
Good work on all those table tops and fences, etc. They are all going to make work much more pleasant.
Very nice work Chris.
I'm envious of your drill press. I couldn't afford (space nor room) a stand alone, so I bought a tabletop model. Its great and all, but too many times I find I cannot use it on certain things as the distance between the bit and the shelf is too limiting.
We bought a used car a couple weeks ago, and knew when we got it that the brakes were pretty worn and would need to be replaced soon. So at around 2PM Saturday, I realized I had a beautiful 4.5 hour empty window until we were meeting friends for dinner. I stopped in the auto parts store and bought new brake pads.
I got home and switched the cars in the driveway and my son and I proceeded to take the front wheel off the driver's side. I went to install the new pads, but they didn't fit! So back to the store to exchange them. This time with an old pad in hand to make sure I had the right ones before I left. I got a knowledgeable clerk this time and everyone was extremely apologetic that they gave me the wrong part initially.
Now I was feeling a little pressure, somehow I had only 2 hours now, and still needed to take a shower. I did the driver's side brakes with no problem, and figured the passenger's side would be even faster. Except I couldn't get two of the five lug nuts off. I sprayed them several times with WD40 and then got cleaned up and went to dinner with the friends.
So Sunday morning, I went out there and tried again. The lug nuts wouldn't budge. So I heated them with a propane torch, and they still wouldn't budge. Finally, I decided to use more muscle than I thought I should. And I snapped them both clean off! I would have been pissed if I was on the side of the road, but this was a controlled environment and I was happy to get the wheel off.
So my photoblog begins with this picture.
[ATTACH]41184[/ATTACH]
See the three nice wheel stud bolts and the two broken ones? This will not do. Let's fix it.
First we remove the brake caliper piston assembly thing and hang it by a bent coat hanger from one of the giant springs holding up the car. We're hanging it because the line full of brake fluid is too weak to hold up this big and heavy hunk of metal and I don't want to have to mess with replacing brake fluid and bleeding air out of the system, so I just leave the whole thing attached to the brake fluid lines. But I want it out of the way, so I hang it up.
[ATTACH]41185[/ATTACH]
Next comes the pads. They are old and worn, so I pull them out of the brake mount assembly. I want to save them for now because I'll need to reuse the shims in a bit.
[ATTACH]41186[/ATTACH]
The old pads next to the new ones.
[ATTACH]41187[/ATTACH]
Next I want to take the brake assembly thing off. It's in the way of getting the brake disk (or brake rotor) off. There are two huge bolts in the back that I have to remove to get this off. They were pretty tight, so I got a mallet to bang on the wrench handle to get those bolts out. Off it came. This one we can just set aside.
[ATTACH]41188[/ATTACH]
Now we can remove the brake rotor easily. It just falls right off.
[ATTACH]41189[/ATTACH]
Here's the wheel hub with the two broken studs. I want to pound them out with a hammer, but there's not much sticking out to hit. I need a nail set or something. Also, look at that thin sheet metal splash guard thing behind the wheel hub. It's so close to the hub, the only way I can get a new wheel stud bolt in there is to line each hole up with that little notch.
[ATTACH]41190[/ATTACH]
And after digging through a junk drawer, I found the perfect thing to pound these old broken studs out. An old door hinge pin. It has a nice large head that I can't miss with my hammer blows, and it's nice and strong.
[ATTACH]41191[/ATTACH]
I couldn't take a picture while swinging the hammer, but the broken studs came out easily.
I couldn't rotate the wheel stud to get those holes to line up with the notch in the sheet metal splash guard so I could get the new stud bolts in, so I put the transmission into neutral.
[ATTACH]41192[/ATTACH]
Now I can easily rotate the hub by hand, and lined the first hole up with the notch.
[ATTACH]41193[/ATTACH]
This is one of the new wheel stud bolts. Some guy in a Youtube video said that putting them in the freezer would shrink them very slightly and make it just a little easier to install them. I figured it couldn't hurt, so that was the first thing I had done in the morning. Notice how the bolt gets fatter and is ridged just before you get to the head. The hole is smaller than those ridges, and when you pull or hit the bolt into place it just jams into the hole and is held there by the friction in that ridged area.
[ATTACH]41194[/ATTACH]
And this is the bolt inserted partway into the hole. I still need to get it in another half inch.
[ATTACH]41195[/ATTACH]
I could try to swing a hammer back there and pound the bolt in, but that seemed to lack elegance. So I decided to pull the bolt in instead.
I stacked a bunch of oversized washers and put one of the new lug nut on backwards so the flat part of the lug nut would rub against the washers. This worked great at first, but when I started to apply actual force to the wrench, the whole wheel hub started to rotate.
[ATTACH]41197[/ATTACH]
So I got a long pry bar and slipped it between two wheel stud bolts and against the ground. That locked the wheel hub in place so I could apply some force and pull that new wheel stud bolt into place. It worked beautifully.
[ATTACH]41198[/ATTACH]
Here's the first new stud snug in the hole! The second one was even easier because I knew the routine now.
[ATTACH]41199[/ATTACH]
And I cleaned and sanded the brake rotor a little to get rid of some of the glazing on the surface. There were no deep ridges at all, so I could reuse it without resurfacing it.
[ATTACH]41200[/ATTACH]
Oh, hey. This is a good picture where you can see the piston in the background. It's that silvery looking cup with the rubber gasket surrounding it. It's sticking out pretty far. As the old pads had worn down, it pushed out farther and farther. I'll need to compress it to make room for the new thicker pads to be installed.
Now I put the brake mount assembly back. This thing must have a real name, but I don't know it off the top of my head. It just holds all the brake stuff in place. It was hard to get this off, so I figured I should put it back on just as tightly. So I pounded the handle of the wrench with a mallet a little to snug up those bolts. If I had a torque wrench, I could put it back to the exact specs, but I don't, so I do my best. It's not falling off.
[ATTACH]41201[/ATTACH]
Under the hood is the master brake cylinder. You can see the fluid level is a little low. That's because all that fluid is down in the caliper piston that got extended so far when the brake pads wore down.
[ATTACH]41205[/ATTACH]
I use a clamp to squeeze the piston back into place.
[ATTACH]41203[/ATTACH]
And now look at the fluid level. It's higher. We had been getting an intermittent brake warning light when we went up and down hills, and I think that was caused by the low levels of fluid in master cylinder dipping below the sensor there. Now that the level is higher, I expect that light won't be coming on again.
[ATTACH]41206[/ATTACH]
We're almost there!
I took the shims off the old worn pads and I cleaned them with brake cleaner. Then I lined up the new pads and shims and lubricated them with special high temperature brake lube. This keeps the brakes from squealing. You DON'T lubricate the braking surface of the pads, you lubricate the rear of the pads. Then if they move around a millimeter or two against the caliper when braking, they won't make any noise. So spread that grease around with my finger and then stack the shims onto the backs of the brake pads.
[ATTACH]41207[/ATTACH]
Put the pads in place in the brake mount assembly. There are some clips at the contact points that hold them snugly in place.
[ATTACH]41208[/ATTACH]
Now you can take the hanging caliper part off the coat hanger and put that over the pads and bolt that on. Make sure to remove the coat hanger from the springs. That will make a racket if you drive around with that up in there.
[ATTACH]41209[/ATTACH]
And put the wheel on.
[ATTACH]41210[/ATTACH]
Pump the pedal a few times, and go for a test drive! It stops perfectly and no squeals or anything. Doesn't pull to either side when I brake and no pulsation or vibrations or anything.
This whole project cost around $60 for the new pads, the brake cleaner, the brake pad lube, the two new wheel studs, and two lug nuts.
The shop would have charged about $300 for the brake job and probably $50-$100 for the wheel studs. But they would have resurfaced the rotors on a lathe, so they would have done a little more than I did.
It was more of a pain in the ass than I was expecting with the wrong parts and the broken bolts, but it went ok. Normally it would be easier than this.
I'm very impressed... Good job !
Good job, you figured out the little out all the little details like the notch in the splash guard, and pulling with the lug nut reversed. I would have put a little NeverSeize on the lugs, (never oil or grease), but that's not critical.
Buy a torque wrench, even a cheap beam type. A cheap one may not be as accurate, but it will mean everything is even. Most people don't realize how important the lug nut torque is. Sure, changing a flat beside the road, get 'em tight and get the hell out of there. But servicing in a safe place, proper and even torquing will prevent bent rims, rotors and hubs, that cause small vibrations you may not notice, but accelerate wear on the tires and driveline.
By the way, you're not fooling me with the gloves. I know they're to disguise your kid's hands in the pictures, so we won't know you were just drinking beer and snapping pictures, while forcing the poor child to labor out in the weather. :haha:
I would have put a little NeverSeize on the lugs, (never oil or grease), but that's not critical.
Would that have prevented me breaking those wheel stud bolts in the first place? After a quarter turn, I couldn't budge the lug nuts.
Yeah, that's what it's for. Those lug nuts were probably run on with an impact gun, with the combination of speed and metal-to-metal causing them to gall. It would be unusual for it to happen by hand, but I've seen stranger things. It will also help keep rust from building up on the threads making the nuts hard to get off.
I also use a little where the rim fits tightly over the center hub,so rust doesn't bind them together when I'm trying to get the wheel off. Just trying to make my future life easier.
A little tube of silver (I like it better than the copper) NeverSeize will last you the rest of your life... and probably your son's life too. BUT, it's a bitch to clean off your hands and it will NOT wash out of your clothes... ever. :haha:
By the way, you're not fooling me with the gloves. I know they're to disguise your kid's hands in the pictures, so we won't know you were just drinking beer and snapping pictures, while forcing the poor child to labor out in the weather. :haha:
Not yet, but I hope that will soon be the case. He knows how to jack up the car and change a tire.
[ATTACH]41214[/ATTACH]
[ATTACH]41215[/ATTACH]
[ATTACH]41216[/ATTACH]
I wear the gloves because I have a desk job and my hands are not hard or calloused and I bleed very easily when I do jobs like this. Always bashing my knuckles against something. Also to keep them clean. But to be honest, I think it's mostly because I still have etched in my memory that scene from the opening credits of The Incredible Hulk when David Banner is changing a tire in the rain and the wrench slips and he bashes his knuckles against the pavement.
Ha Ha, I knew it was him.
Gloves are safety equipment, which always explains itself. ;)
Good job. I will be doing the brakes on my Avalanche soon, only all around since it is five years old now and they are the original pads. I am betting they are all worn since I am beginning to hear squealing.
I really hope I don't need special equipment to do them, like my Cougar needed.
Good job Glatt !!!
Betterer job that sonny Boy knows how to change a tire !!!!!
1 comment , as long as you were changeing wheel studs , why not do them All on that wheel , just my $.02
In hindsight, I wish I had changed them all, it was so easy.
So, the bloke's back black brake block broke, eh?
great job glatt!
when you had to brace the rotor to pull the new studs in, why not put the transmission in park?
and Brian, all you need is the hex socket and you're good to go. but if you're going to replace the rotors i recommend repacking the bearings (see page 1 to do it neatly, ok, well....less messy.)
eta: and even better job teaching your son how to wrench early on. i grew up watching and helping my dad and it helped tremendously.
i have a bad vent solenoid on my chevy now....i almost tackled it last weekend. this sucker looks like a royal pain in the ass because it's so cumbersome. not big, just awkward. it's long and snaky.
anyone have experience doing this one? i've read on a few forums that you can remove the solenoid and blow it out with an air hose and have it work fine....i'm wondering if cleaning the filter at the top of the vent line would do it?
[YOUTUBE]w1ZbKIGlojA[/YOUTUBE]
Oh THAT looks like a Major PITA !!!!!
Before you do that, do a little hooning through a field of clover or alfalfa. It won't make it easier but the crap falling in your face will taste better.;)
That's the nice thing about a truck though, you can just crawl under there.
So, the bloke's back black brake block broke, eh?
*snicker*
I went down to check the property that I used to lease. They are logging it and will be through in 2 weeks. I might do another lease. While I was there I managed to hang up my Tracker on a log. I had Addie with me, so I taught her to drive a manual in 4L while I lifted the rear end. This will be an experience both of us will never forget. LOL. BTW, all pics are by Addie since she is the better photographer
5 years old and can work a manual in 1st gear, shoots a .22 rifle, and helps skin game. Now if I could only get the other 3 kids to......
5 years old and can work a manual in 1st gear, shoots a .22 rifle, and helps skin game. Now if I could only get the other 3 kids to......
Man.
This is completely awesome!! I give you, and Addie, a standing ovation!
:notworthy
Thanks. She's my little buddy. I guess I get to spend more time with her because I'm older than I was with the other 3. Plus being gone on deployments starting with Desert Storm (5 total), made me miss a great deal of their lives.
I guess I'm trying to say I screwed up as a dad when I was younger and I've learned from my mistakes
Don't we all.
I've told my younger kids that they owe a debt to their oldest brother for breaking trail for them.
First we remove the brake caliper piston assembly thing and hang it by a bent coat hanger from one of the giant springs holding up the car. We're hanging it because the line full of brake fluid is too weak to hold up this big and heavy hunk of metal and I don't want to have to mess with replacing brake fluid and bleeding air out of the system, so I just leave the whole thing attached to the brake fluid lines. But I want it out of the way, so I hang it up.
In the interest of full disclosure. The brakes seemed fine to me after pumping the pedals a lot to seat the calipers and going for a test drive, but when I gave the car to my wife, she thought the pedal was really soft and the brakes were bad. She had a scare when the car didn't stop the way she was expecting. I listened to her description of what happened, and realized the pedal was indeed pretty soft. My pumping them initially had masked the problem when I was testing the car.
Somehow I must have gotten air or contaminants in the line when I pushed the pistons back in with a C-clamp.
I've since read that it's better to bleed off the brake fluid when pushing the piston back in rather than pushing all the fluid back up to the master cylinder.
Anyway, that meant I needed to bleed the brakes to try to get the air out of the system. And I figured that as long as I was bleeding the brakes, I might as well put a lot of fluid in and basically flush them. So that's what I did over the weekend. Didn't take any pictures, because there's nothing to take a picture of. You just open a valve at the right rear wheel, have someone pump the brakes with the engine off, and then close the valve, and tell them to take their foot off the brake. Repeat about 8 times, and then add fluid to the master cylinder. Repeat that cycle for about 20 minutes until all new fluid is coming out at the RR wheel, and you don't see any bubbles in your bleeder tube. Then bleed the left rear wheel, and then right front wheel, and then left front wheel.
It's tedious and takes an hour and requires a helper. But the helper can go inside and watch the Giants beat the Redskins while you are putting the wheels back on and taking the next one off and getting your clear tube in place and inserted in your bottle. They only need to come out to pump the pedal for a few minutes at a time.
So add about $15 in brake fluid to the job. And $2 for a clear plastic tube. And I had to buy an offset wrench to reach the bleeder valve on the rear brakes, because the brake drum lip was in the way of my regular wrench, and the single wrench was sold out, so I had to buy a set for $22.
So add $40 to the job, but it also resulted in a brake line flush.
My wife is very pleased with the brakes now. And I'm glad she can stop the car when she needs to. :)
I wish I had your mechanical knowledge. I do well just to change the oil. Very impressive
Well, I'd never done it before. I read the shop manual and watched a few Youtube vids. I just have confidence and some tools.
congrats to both glatt and Big Sarge...well done!!!
i remember learning to drive with a korean war era weapons carrier (and our cj-5 jeep, hell i didn't care as long as i got to drive!) i was about 5 or 6 with my dad. that is something Addie will never forget! having dad teach her to drive!
Somehow I must have gotten air or contaminants in the line when I pushed the pistons back in with a C-clamp.
Not necessarily you're fault, it could have already been contaminated. You were smart to push as much new fluid into the system as you could, fresh fluid never hurts. :thumb:
My Avalanche's brakes are now due for a pad change. The squealing is getting loud. After a mandatory dentist visit, I will be buying a set of extreme duty pads and getting to work.
a couple weeks ago i was sitting on the couch eating supper watching TV with Paul and i glance over at an electrical socket on the wall and notice a burn mark on it. Seen this sort of thing before (so i thought) no big deal right?
wrong.
I asked Paul if he knew anything about it to which he said "no" so i guess it was the maid that did it with the vacuum cleaner. (will make sense here in a little bit).
what really, REALLY, pisses me off is that nothing was said of the smoked outlet. i wasn't pissed until i went to replace the socket last saturday night. scorched doesn't even come close. destroyed does though.
When I opened up the junction box cover and saw the extent of the damage is when i got pissed. this could have caused a serious fire.
(going to be a two post thread here)
here is the outlet:
here's the problem, or a big part of it, aluminum wiring. The house was built back in the early 70's when aluminum was thought to be a better alternative to the more expensive copper wire. yeah it was cheaper, but it's got it's problems. heating and cooling caused the connections to over time come loose and short out. what else can add to that is ants or other electricity liking bugs making nests in the socket.
the overall cure is to rewire the entire house with copper. WAY too expensive.
there are several options to pig tail aluminum to copper. some ok, some good, some not so good.
so....... after some research i've ordered 50
Alumiconn connectors. they recommend using 3 per outlet (Hot, Neutral, Ground) but i don't see the point of using the one for the ground wire. i'm only concerned about load carrying conductors of which the ground isn't one of them under normal conditions (sans ground fault).
so anyway, i will be posting later this weekend or early next week showing installation of the Alumiconn pig tail system.
So lemme ask you: will you or will you not have to beat the maid?
So lemme ask you: will you or will you not have to beat the maid?
Even though that's an old one, it still sounds vaguely dirty...
Woah!
It will be interesting to see what you find at the rest of the outlets. Are you doing the junction boxes too?
Oh Your going to have FUUUUUNNN !!!
Wouldn't be easier to torch the house and start over with a new one?
Wouldn't be easier to torch the house and start over with a new one?
right on! but moving our stuff out before we torch it would suck. me thinks it's easier to fix'em :D
glatt, yeah the connectors will fit in the j-boxes so there's no worries there. here's a vid:
[YOUTUBE]XLUv4DRYx2U[/YOUTUBE]
OH! in the video i'm going to make....i will be working both hot and cold.....just to make things interesting....and perhaps funny. who knows! :eek: :D
Oh yeah let me whip out my TORQUE screw driver !!!!
Give me a friggen break ,
Like EVERY home owner has one of those !!!
I Cringed when Glatt ( Escuse me for this ) used a Hinge pin to remove those wheel studs , i was Screaming in my head " Dude I have a Punch for that !!"
Then i remembered that not every one has the tools I have ,
so carry one , Rant done with
having used a torque screwdriver at the panel shop for a while i've got a good idea how much to torque with out an actual driver. 10-15 inch lbs. isn't much at all...considering i used to torque some terminals to 50 in. lbs. plus
[YOUTUBE]gN7NVzd44D8&feature[/YOUTUBE]
plthijinx - you are a man of many talents. i wish i had just a fraction of your skills
aww shucks sarge.....that's a compliment that i appreciate! and you as well sir, you have many as well!
He did one Hot later after a few more beers , i was on the phone with him , funny when he got bit a couple of times
I watched the whole video. 10 minutes for an outlet isn't too shabby, but it adds up when you have so many to do. Those connectors are pretty convenient though. You make it look easy.
Good work!
Thanks glatt....it is a pretty easy process. I did however find some pretty spooky situations. For example: loose connections, figured out some jackass reversed the hot and neutral wires the hard way (zap! Ouch!), and one blind cover that when i peeked inside for shits and giggles found an exposed wire splice.
We are ordering about 30 more connectors. The main goal this weekend was to do the outlets that have a constant load or a possible high amp load such as the vacuum cleaner.
How many amps does a pilot draw?
What's the frequency, Kenneth?
Plt...that was awesome.
How many amps does a pilot draw?
*snort*
Beer's an excellent conductor of electricity it would appear.
ps, glad you're ok.
Not exactly what I did today but something I saw. After I drop my wife of at the Shell Refinery here in Geelong, I go for a 2.8 km walk along a wildlife trail not far away. I like it because it is relatively quite and there are lots of Australian black swans and ducks and other birds on the water in the lagoon.
When I got back to my car there is a boat ramp near by and here is what I saw and it was not there when I drove by earlier to go for my walk. Seems like someone drove a pickup truck or Ute as they are called here, down the boat ramp into the lagoon. The wind is really whipping up today and the tide was coming in so much of it was going underwater. I was able to read USI on the back and a phone number so I called the number from my mobile.
"Hello, USI."
"Hi, are you missing a truck?"
"Yes, we had a truck stolen today. Have you seen it?"
"Yes, I see it right now. It is in the water at Limeburner's Lagoon near the Geelong Grammar School."
"In the lagoon?"
"Yes and the waves are up to the front windscreen with white caps breaking all around."
"Oh thank you, we had a truck stolen this morning. Where abouts is it?"
"Just past the boat ramp."
"Are you American?"
"Yes, I was just driving by and saw it and could read the phone number so I thought I'd give you a call."
"Ok, Thanks for calling us!"
"No worries!" I feel like such a local when I get to say that! :D
The Geelong Grammar School is one of the most prestigious in Australia, as I recall reading Prince Charles attended there for awhile as a lad. It had kids up to 18 or so who then go off to University, Wonder if it was a couple of them out for a joy ride?
Nu Uhhh , its a SHARK !!!
Uh Oh, now you're a suspect. :haha:
Ooh dear.
Good of you to call it in, but it'll be pretty much cactus inside.
I doubt the GGS boys would go joyriding in anything so plebian as a ute.
The buoy looks red.
So that owl and pussycat at least knew to stay to the right in their escape to sea.
Be on the lookout for some honey and maybe some money washing ashore.
Today I went wine tasting and shopping and found a neat winery in central Victoria in the town of Great Western that had a neat wine cellar that they let me wonder around in. The winery, Best Wines is about 150 years old and from the amount of cobwebs and bits of sunlight filtering through the rafters it made for a great little photo adventure. Some of the vessels for storage were of the largest I've seen in quite a while made of oak; a real testament for the craft of good cooperage. I think the images work well in color or B&W depending on your mood
And they had some really nice wines so I ended up with 6 to bring home next week. That makes 28 bottles so far!
Wow.
Australians. "Cellaring" wine in sheds for over 150 years. :lol: Cause "shedding" wine sounds gross.
That last image is great. Have you offered it to them, maybe for their website or promo uses?
So i got thrown off into a cluster F**k of a job ( nothing new here but it still SUCKS ), F'd up old truck scale that we moved ( why , because the customer wanted it )
So we had to make some holes in new bace plates for anchors(Bace plate is 19"x 13"x 5/8" thick ) these holes need to be 1" so a 3/4" anchor can pass thru and secure the plate to the cement ,
I spent the better part of an afternoon drilling progressively larger holes with a Hand drill , Screw that stuff !!!!!!
Here is the bace plate ,
 Photo422
 by
zippyt, on Flickr
So I called around and found a Houge drill , Truely a Cool thing !!!
Here is the drill , more milling Mec if you ask me ,
 Photo423
 by
zippyt, on Flickr
it has a Electro magnetic bace and uses a Cool bits ( actualy called a Roto Broach ) that cut a core out of the steel
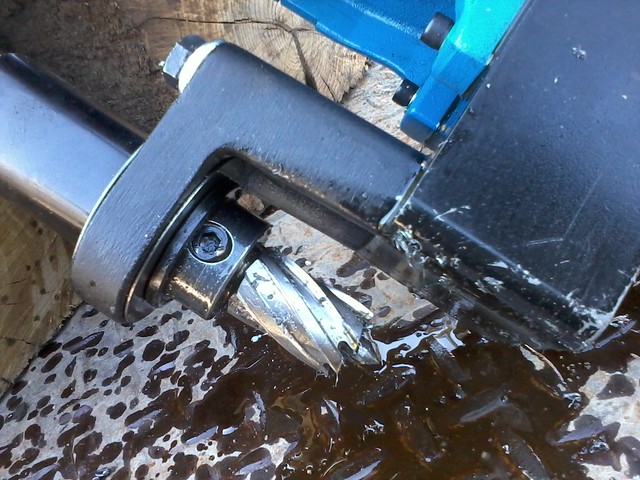 Photo425
 by
zippyt, on Flickr
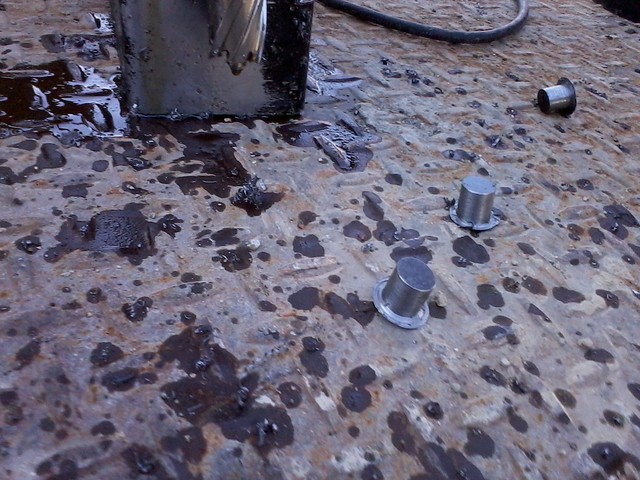 Photo424
 by
zippyt, on Flickr
 Photo429
 by
zippyt, on Flickr
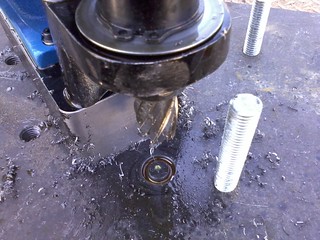 Photo428
 by
zippyt, on Flickr
 Photo427
 by
zippyt, on Flickr
Zip 20 holes later , it was harder jacking up and pulling the bace plates and putting them back in than it was cutting the holes .
cutting cores sounds like smart engineering. you have to move less metal to get the same amount of hole. Niiiice tool buddy!
Plus, you get to keep the really short, ƒucking metal bars. ;)
And build a cannon to shoot them. :D
Hougen drills are the shnizzle, we used a lot of them at Westinghouse, where you needed big straight holes in 50 or 100 ton pieces, in the field.
zippyt is smarter than the average bear. :thumb:
That's a cool tool. I love the electromagnetic base. Great idea. That final picture looks like it has some sort of oil tank on the side. Does it oil the cutting bit automatically, or do you have a helper squirting as you cut?
If it's got an electro magnetic base I bet it has an automatic oiler. It looks like it might be that yellow hose leading from that plastic reservoir.
I kinda want one, although I have no use for one or space to store it.
I kinda want one, although I have no use for one or space to store it.
I'm sure your wife has a bunch of outfits she never wears, get her to give them to good will to make some room. Show her the bits that go into the thing and she'll see how cool and necessary it is.
I'll bet not many $1500 dresses though. :haha:
There's a ball valve at the bottom of the oil reservoir.
Yes thats an oiler But im a paranoid feller so as holes were being cut I was giveing it a dose of cutting every now and then , l didnt want to mess up the only bit we had.
That it turns out we bought when we rented the drill , so when my boss took it back for me ,they looked at him funny when he asked about the bit, oh thats Yours, so I have acool thingee to add to the collection
It would look good as a smaller mace, like Glatt's gear. ;)
Yes thats an oiler But im a paranoid feller so as holes were being cut I was giveing it a dose of cutting every now and then , l didnt want to mess up the only bit we had.
Smart move, that bastard son of a hole saw and an end mill, needs lots of juice.
Caught a mutha f'in weasel. I put the remaining hens in crates in the chicken coop, baited the trap with a chicken leg from the earlier tragedy, and voila a super smelly morning present.
Clever trapping technique.
How many more will you need to make Pete a nice coat?
Dare I hope that the weasel was peacefully liberated far from your home?
Or, failing that, that the weasel was peacefully liberated from the endless cycle of death and rebirth?
Head on a stake to warn others. :yeldead:
I'm curious though. How do you get rid of the damn thing? The old school method of dropping it in a pond to drown inside the cage seems a little cruel. If I had a burlap sack, I'd maybe try to gas it with the car's exhaust piped into the sack. Shooting it might damage the cage, so you don't want to do that. How do you do it? Do you really release it in the woods? How do you do that without getting bitten?
Run it through with a saber.
you've got to be cruel to be kind
in the right measure
cruel to be kind, it's a very good sign
Cruel to be kind means no more weasels
baaaaaaybeeeee
you've got to be cruel to be kind.
Over-dose of vitamin Pb. Sometimes its the velocity not the dose. He is now a chew toy for Benny just to give him the idea. He did, however, achieve total consciousness, so he's got that going for him.
In all seriousness, I always reflect on the taking of life, but wasn't eager to transport my problem to someone else.
<snip>
That it turns out we bought when we rented the drill , so when my boss took it back for me ,they looked at him funny when he asked about the bit, oh thats Yours, so I have acool thingee to add to the collection
But it will already be there waiting for your next job...
Over-dose of vitamin Pb. Sometimes its the velocity not the dose. He is now a chew toy for Benny just to give him the idea. He did, however, achieve total consciousness, so he's got that going for him.
In all seriousness, I always reflect on the taking of life, but wasn't eager to transport my problem to someone else.
I am disappoint. Why no skin it, make nice fur cuff?
<Clue> It was Griff in the chicken coop with the lead pipe! </Clue>
Bye pretty weasel.
I am disappoint. Why no skin it, make nice fur cuff?
/lazy
how you gonna get your cornmeal made?
That is what thralls are for.
Hey kids, been a while, but here's a new project for me. Years ago, before my disaster, some of you may remember that I owned and was proud of a marine aquarium but lost it when i went on my hiatus from society. Well just this last Sunday a friend of mine, whom i've only recently met, sent me an I.M. asking me if I would be interested in a 125 gallon tank for $300.00. yeah, let me think about this......YES!
It's been neglected some and needs some TLC and patience. First thing in order is a canister filter followed by a UV filter then after that about 50 more pounds of live rock to create a make shift mountain/reef. You will notice that one of the live rock has live coral growing on it (super bonus!) anyway, here are the initial pics......
the sole occupant of the tank is a Blue Damsel as the other two fish (Sargent Majors) died due to shock/stress of the move. no worries. i'm setting up a community tank so they were too aggressive from the git go but selling them to the fish store would have been an option. oh well.......I have my work cut out for me.
Cool, now you need some Krugerrands to sprinkle on the sand.
Nice! How big is it? Like 3 feet long or so?
lol XoB! i wish!
and Glatt it's 18"d x 4' w X 21.5" tall :) it was a steal at $300!!!!
Oh dude. We just took one to goodwill, the same size. My buddy is retired and he just cruises tag sales all year long 6 days a week during the season. He's got a dozen tanks, the smallest is 75 gallons. He gave us a 55 gallon that he outgrew. In his basement he built a 20x10 kidney shaped pool for his Koi.
I wish I could have given you our tank, but 300 ain't bad. IF you are retired and do tag sales 6x52 then you can get them for 50, but sometimes you gotta let the other guy make a living.
Fish are so cool. I love to watch them.
tnx Griff!
and yeah 3F, i can watch them for hours. hell last night i sat there studying and imagining what i'm going to do to it for a solid hour at least.
I don't have teh time to go bargain hunting though and 50 bucks beats 300 any day of the week.
sometime today i'm going to order a eheim canister filter, uv filter and a circ pump for both. then next week bring in more live rock. on second thought i might get a protein skimmer before the live rock. it has a duel bio wheel on it though which might be enough....
Jumped right off the cliff....
[ATTACH]44194[/ATTACH]
Wow! Very impressive.
I'd bee skeered to do that.
Yeah, I couldn't do it. Had the opportunity to make the jump off the Stratosphere in Vegas and just no way/no how...:headshake
But that is a fantastic picture!
I had that urge to vomit up my guts when initially I took off. But then frankly, it was not all that scary. At least not scary enough to prevent a shot!
Yesterday, my son and I finally demolished the last of the old lower kitchen cabinets. Since we are living in the middle of this project and need to use the kitchen as it progresses I made up some nifty little counters from scraps and put them on some small wheels that I had out in my storage shed. Even the stove and kitchen sink are on moveable counters; all I need to do is shut off the gas and water and disconnect things and the counters move away from the wall while I finish things. The first shot is from the other day when the cabinet for the stove was removed, the second one is from last night.
I was real proud of my sheet metal work. We had a downdraft ventilation system before and are now going with an over the stove top vent so I built a box to fit in the wall cavity to take the air from where the hood will go and vent it down to the hole already in the wall which you can see in the first picture. Covered the hole with some plastic to keep the humid air from outside coming in! Had to also reroute some wires around where the box had to go.
Today, I plan to move the counters away from the wall and finish up changes to the electrical and plumbing. Hope to get the new drywall on and then next week start floating and taping all the seams and holes.
I don't see a vapor barrier.
Don't you need one, especially considering the high humidity of the kitchen ?
Otherwise, it looks like a very neat workmanship, and I can imagine
the difficulty of living under a "work in progress". :thumbsup:
You made that sheet metal box? I'm very impressed. Sheet metal work is a skill.
FYI, vapor barriers are generally a bad idea in the south where air conditioning is in use more than heating. Buildingscience.com goes into GREAT detail on when vapor barriers should be used and when they actually cause rot. This is very much not a one size fits all situation.
Glatt, you're right. That's an excellent resource.
Yes, houses here typically have some kind of barrier on the outside between the stud wall and the brick or siding. Tivek of similar on new homes, mine is older so it has some kind of foil covered board at the lower level where there is brick outside and roofers felt on the upper walls where there is composite siding. I think they let it breath more.
I really prefer fiberglass insulation over the cellulose I have but removing would be a huge mess and I already am creating enough dust!
Glatt, my son asked me where I learned to form and bend sheet metal and I explained that back in the dark ages when I was in high school I took several years of wood and metal shop. In the latter I learned how to use a box and pan brake, how to weld, cast metal and run a metal lathe. I think it too bad that so many schools no longer offer students these courses unless they are going a vocational route.
Oh and on working with sheet metal I learned to always wear gloves. You can get some nasty cuts from that stuff!
Chris, that is awesome!!!! can't wait to see what it looks like when you're finished! I know it's going to be very nice!
Here's an update on my project.
Yesterday the canister filter I ordered arrived and I set it up. It was a bit of a pain in the ass to understand the multi-language translated directions but basically it's no more than common sense on setting it up so it really wasn't that bad. This filter is a multi-level media filter which does several things. 1.) obviously filters out junk floating in the water but more importantly 2.) creates and maintains "good" bacteria to eat fish waste and help keep the water crystal clear.
Today I tested the water and it couldn't be more perfect so I hauled my butt up to the fish store and brought home an anenomie and a host clown fish. Now this little bugger isn't the normal clown fish, nope doesn't look like Nemo! Have a look......think he's cool? I sure do!
neato, philthy! i was thinking of getting a fish tank but i may get phucked out of some of my pay so i'm holding off. nothing that intricate, either, having never done a tank by myself. you should come be my aquaman/handyman.
tanks for the photos! :)
Wow! That anemone is cool.
Ya, I had no idea people had them in their tanks. Coolio.
neato, philthy! i was thinking of getting a fish tank but i may get phucked out of some of my pay so i'm holding off. nothing that intricate, either, having never done a tank by myself. you should come be my aquaman/handyman.
tanks for the photos! :)
i work for sex. oh, and beer.
Wow! That anemone is cool.
Ya, I had no idea people had them in their tanks. Coolio.
they are a pain in the ass to keep alive. usually they only last about a year in household aquariums. this one cost almost $50 bucks.....they had one......for $350. shit you not.
Just few cans of beer! True that drunk brute can't recall the count but he can say they were just 'few'. And damn he was stalking the streets like a vampire with his new zoom lens.
Guess what, no inspiration found out there and drunkard blabbered like a fool for few minutes. Next thing, he pointed the camera towards sky and gave it a short.
Came home, slept like a dead man.
And actually it didn't came out that bad considering the hang-over I found in the morning :D
[ATTACH]44250[/ATTACH]
Nice moon shot!
Today I vacuumed the cars, which they desperately needed. As I was cleaning out the old Prizm, I had the driver's door open, and could see leaves and debris in the body panel behind the driver's wheel. The shop vac wouldn't touch them, and poking a stick in there didn't do a thing except dislodge a little green sapling growing in there. I realized that many leaves that fell on the windshield would slide down to the driver's wiper and get under the hood where they would fall down into this body panel. They were supposed to continue through a gap and drop to the ground, but they were getting stuck. So I took the plastic wheel well cover off and found about 2-3 cups worth of decomposed leaves.
[ATTACH]44251[/ATTACH]
This is the accumulation after 18 years. Very fertile looking soil. I was amazed that there was no rust after that long.
So then I wanted to clean the vents under the windshield. Lot of seeds and leaves and stuff were getting stuck in that screen and contributing to a slight must smell coming from the vents. So I removed the windshield wipers and pulled off that molding that covers the vent intake.
[ATTACH]44252[/ATTACH]
It was filthy.
[ATTACH]44253[/ATTACH]
Around this time, my son came out to see what I was doing, and if he could help, so I asked him to blast out the screens that cover the vents. He had fun playing with the hose and did a good job.
[ATTACH]44254[/ATTACH]
reinstalled. So much cleaner.
[ATTACH]44255[/ATTACH]
Er...Glatt, did you find any dodo fossils under all that excavation?:D
Yesterday I restarted a yearly tradition....finally.....offshore fishing.
all in all it was a great day. Ronnie (the big guy in teh middle on the group pic) and I decided we needed to go offshore just after Bobby's funeral. So basically, it was all the managers from the go-kart track except for one. it was their first time going offshore and everyone had a blast. Shoot, it was Jac's first time to go fishing ever! he didn't do too bad either. Ronnie was the big fish winner with about a 30 pounder.
I had caught 3 keepers but gave one away to a couple that didn't have that much luck and didn't want them to go home empty handed.
Nice! Looks like fun, and that's an impressive catch to my eye.
Actually, now that I think about it a little, I went drift fishing off Florida with my buddies years ago, and it was a miseable time. Something about just bobbing there on the waves. I had never been seasick before, but the sun beating down and the bobbing around just pushed me a little too far. Everyone laughed and said my chumming was good for attracting fish. But it didn't help me so much. I went home empty handed. And empty stomached. :facepalm: good times. :blush:
oh yeah, i've done that plenty of times before! seas were cooperative yesterday. 3-5 ft. with an occasional 10 footer but the frequency of the waves were about 15 seconds so it was a comfortable trip. only about 2 of the 74 got ill.
apparently the person we asked to take the pic didn't know how to focus..... :neutral: guess a half-ass pic is better than no pic :rolleyes:
Very nice. Tell your buddy HE is in the lead for this year's Cellar Fishing Contest!
lol
Hey, snapper season open off Texas?? just asking
Hey, snapper season open off Texas?? just asking
Yeah Buster but it's only 30 days long. originally it was to be 14 days. you have until the end of June.
I had to buy some house cleaners for the tank so i bought a Halloween Hermit crab, Blue Knuckle Hermit Crab and this guy errrr gal, a Dragon Gobi. Here she is making herself a home......
[YOUTUBE]2llVBadChNY&feature[/YOUTUBE]
Okay, this may not be very impressive to you handy types, but I'm VERY proud of it so far, as this is my first time ever working with power tools.
[ATTACH]44495[/ATTACH]
It is the very beginnings of an interactive board for my baby daughter. It is an MDF board decoupaged with scrapbook paper. As I took my break, there are now six door holes and a light switch hole cut in to it. When it's done, the holes will have little doors on hinges, and there will all sorts of things to play with -- barrel bolts, latches, knobs, a touch light, and a door knocker to name a few. Woohoo!
[ATTACH]44496[/ATTACH]
Kitsune snapped this shot of me working. :)
Now that's real handiwork to build your own Fallout Shelter.
Just don't let the neighbors know about it.
P.S. both knees on the ground for stability to avoid industrial accidents.
End of day 1.
[ATTACH]44497[/ATTACH]
I love that you're using regular hardware for a baby toy. But are you sure you want her learning how door latches work so young?
nice work Chocolatl! Zen's posted my first thought... heehee.. I doubt you're giving her anything she wouldn't get on her own. Abstinence only as strategy is a dismal failure. Better she should use her capacity to understand a door latch to also comprehend "No, no, no." than to live in fear of the day she inevitably figures it out.
what a cool toy!
Thanks guys! We don't have bolts or latches on anything in the house, so I don't need to worry about her applying her newfound knowledge in every day life. It should be good fine motor practice! It'll also take her some time to grow in to -- for now, we're leaving the little doors unlocked. As she gets older, smarter, and more nimble fingered, we'll start locking them. My hope is to get a lot of mileage out of this thing!
AARRRGGHH. Was just reading about all the wonderful carcinogenic chemicals MDF can release over time. Scrapping the board and starting over. It was looking cute, too. :(
[ATTACH]44517[/ATTACH]
MDF truly sucks. Solid wood is your best option. Alder, Birch, Maple would be my top choices for ease of machining, cost, and lowest toxicity. Some hardwoods and some softwood can cause skin reactions.
Very impressive!
We had a bunch of shelving installed at work in our old building years ago. Instead of metal shelves, they were MDF, supported by a metal frame. Walking into that room was a terrible assault on your senses. Even your eyes would burn after being in there for half an hour. The worst part was that you couldn't even open a window. It took about two years for the smell to go away. Horrible. There were several thousand board feet of fresh MDF in there though. Nothing like your single board.
Aw, dammit.
Still, good thing you spotted the potential problem before Beans got all hyper-allergic or whatever.
Glatt, that sounds awful!
I initially chose the MDF because it's wonderfully smooth. I knew it would be held together with some kinds of resins, but I didn't realize just how toxic that stuff would be. I imagine just the one board wouldn't be too bad, but the idea that my baby would be handling something that was leaching formaldehyde wasn't very appealing.
Thanks for the wood recommendations, foot. I ended up going with untreated poplar cuz the hardware store only had that and oak. Round two this weekend.
That's why it's so ... widely liked.
I'll see myself out.
I initially chose the MDF because it's wonderfully smooth. I knew it would be held together with some kinds of resins, but I didn't realize just how toxic that stuff would be.
Seal it with a good lead based paint. ;)
Has anyone mentioned how we've missed you lately?
Tis I... and Juliet is still chaste. :o
snip--
I ended up going with untreated poplar cuz the hardware store only had that and oak.
--snip
That's why it's so ... widely liked.
I'll see myself out.
waaaitaminit. If it's so "widely liked", why is it still available unlike the other species?
Widely liked = popular = poplar
It was a stretch, and I'm sure Zen feels appropriately ashamed.
Ha! Bet he doesn't. :haha:
Widely liked = popular = poplar
It was a stretch, and I'm sure Zen feels appropriately ashamed.
I got that. I challenge that. If it *was* WIDELY LIKED, why is there still some of it on the shelves for sale, when the other wood, presumably "not poplar", is sold out?
Zen's puns are unmatched, but this one while both obvious and euphonious was logically backwards. Or is that upside down? Perhaps that's his logic.... :3eye:
I actually didn't like the poplar, popular or not.
Back to MDF, with a non-toxic wood sealant on the way.
Also going to attempt to make a few to sell.
I got that. I challenge that. If it *was* WIDELY LIKED, why is there still some of it on the shelves for sale, when the other wood, presumably "not poplar", is sold out?
Zen's puns are unmatched, but this one while both obvious and euphonious was logically backwards. Or is that upside down? Perhaps that's his logic.... :3eye:
Well, if you want, you could look at it from the other direction: what if other woods were so unpopular that they were never stocked in the first place? My grocery store has no starfruit, but lots of apples, not because people hate apples, but because the grocery store is appropriately anticipating consumer demand.
(Please don't mind me though, I'm just entertaining myself...) :)
snip--
(Please don't mind me though, I'm just entertaining myself...) :)
Oak a.
Poplar grows exceptionally fast and big. And pretty much all over. Maple is chopped up and burned out here, along with Cherry, Ash, Oak, Birch. There's plenty left over for sawyers. Price and availability fluctuate by what's being cut. There are many many wood puns that I will not repeat. The poplar one is perennial.
Woodworkers have a lot of time, alone with nothing but their own minds to keep them company. If it's a wood pun, it's been said.
Now, Choco, what's not to like about the poplar? Were you using 1/2" MDF and the Poplar is 3/4"?
Poplar only comes up to a foot wide, so you have to join it to make it bigger. Is my guess.
Nah, both were 3/4", just the poplar was a lot rougher. It splintered so easily.
[slightly embarrassed giggling]
Oak a.
:right: u-huh. :D
My neighbor across the street is demolishing his house and I asked him if I could have the bricks from his chimney. He said yes, and his demolition crew piled the whole bricks on a couple pallets on my driveway. They were not cleaned, only separated. I'm cleaning them.
What labor intensive work.
The left pallet represents about six hours of intermittent work as I figured out the best combination of tools to remove the mortar. I've settled on a hatchet. I went through hammer, chisel, power chisel and my favorite pair of gardening gloves in the course of cleaning 54 bricks. I have got to find a way to increase my output.
Note to self: don't forget the ibuprofen with breakfast.
[ATTACH]44684[/ATTACH]
V invest in a
brick hammer , trust me on this , they are the AMAZING !!!!!!!!
Oh and a wide brick chisel
saw those on some video... I guess I'll get them before breakfast. thanks man!
On your way to the hammer store and back, drag some bricks on the pavement. :haha:
thought about a belt sander...
the mortar is widely variable, some is soft, and some of it is permanent. I won't be using that face on the outside, nope. It destroyed my glove. tomorrow will be leather glove time. dragging/rubbing, etc. I've considered it. even grinding them on the sidewalk. wax on, wax off,
eta:
I heard about a guy that got a diamond encrusted blade on his chop saw and sawed that shit off. I'm thinking about that too.
I think you'll find zippy's hammer quite amazing, but leather gloves for sure.
If you're okay with the occasional gouge on the sides, you could get some serious work done with an angle grinder that has a masonry wheel in it.
Having a vise or something to hold the bricks would be ergonomically smart.
But I think zip has it right; never pass up an opportunity to collect another Estwing.
If you're okay with the occasional gouge on the sides, you could get some serious work done with an angle grinder that has a masonry wheel in it.
If you go this route, try to be considerate of your neighbors and don't do your loud obnoxious grinding for hours on end during their prime weekend BBQ time. Grinders make some of the worse noise for power tools. Not to mention the clouds of dust wafting all over the place.
The *chink* *chink* of a brick hammer is much better, imho.
Another idea is to clean them as you are installing them. You are handling them an extra time or two with your method.
Move them to the project, chip at them with the new hammer, install them.
"Laziness is the cool aunt who lets you smoke pot in her house of invention."
Smart grabbing those bricks. $$$$$$$$
Pshaw! All in all it's just another brick in the wall...
You're thinking of Dark Side of the Moon.
Don't give me that do goody good bullshit.
Let's not make this an us and them thing.
V invest in a brick hammer , trust me on this , they are the AMAZING !!!!!!!!
Oh and a wide brick chisel
If you're okay with the occasional gouge on the sides, you could get some serious work done with an angle grinder that has a masonry wheel in it.
Having a vise or something to hold the bricks would be ergonomically smart.
But I think zip has it right; never pass up an opportunity to collect another Estwing.
I think you'll find zippy's hammer quite amazing, but leather gloves for sure.
You guys were right, A-mazing.
[ATTACH]44854[/ATTACH]
V they have been working on that design for a few thousnd years , just the right heft , ju as t the right angle on the pick/chisel side , worth the duckets for cleaning or forming and laying bricks , good job
been a while but here's an ongoing project (aquariums always are).
for the last month or so i have been dealing with sick fish of which 3 of them died. they were a yellow tang, blue damsel and finally my black and white clown fish aka saddle back clown fish i think.
as if it couldn't get any worse, the tank lighting went south. the upper lighting spectrum circuit let the smoke out so i ordered one wednesday and it arrived today. i got that together and installed but not before a very slight piping water leak soaked the power strip causing a circulation pump and my semi-new uv filter to fry. i had a spare circulation pump (in the right top corner there) but the uv filter will have to wait.
i suppose i could splice on a new plug but would rather not do that. come to think of it i might to it for a temporary fix until the new one arrives.
anyway, here is a pic of the tank now all cleaned up and ready (i think) for more inhabitants. on the side of caution i'm going to wait another week and keep a close eye on the 3 fish that are in there. and yeah, i quarantined the sick fish and treated them but to no avail.
It's a full time job taking care of that tank.
sure is, but worth it imo! :)
A friend had two big tanks and two smaller tanks. One night we're sitting there with the lights off, except the tank lights, half baked, watching the fish, grooving on the music, and the power goes off. Sit for a few minutes waiting, then oh crap, plan B. What a buzz kill. :haha:
The Prizm's rear view mirror day/night switch mechanism had stopped working and the mirror was very wobbly.
This package was waiting for me Friday when I got home.
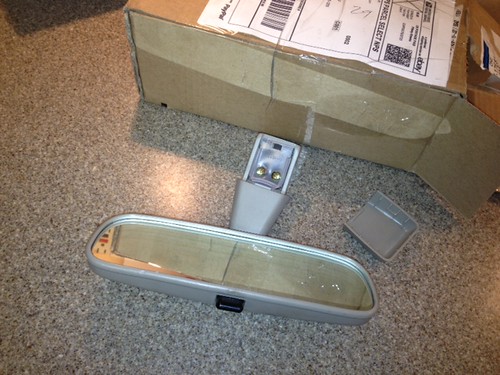
A junkyard part from Maine, bought on eBay for $42, including shipping. [COLOR="Red"]Edit: actually $32, including shipping.[/COLOR]
So Saturday I started with the mirror, because I figured it would be easy. I was right. You just snap off the trim piece that covers the screws. And unscrew it. And install the new one the same way, but in reverse. I used a putty knife to snap off the trim piece without gouging it up like a screw driver might have done.
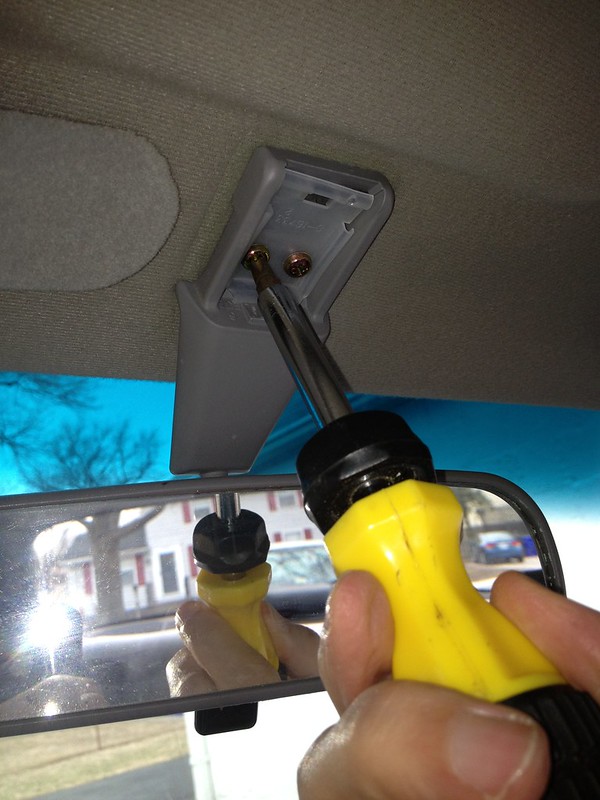
And here's the new mirror, installed.
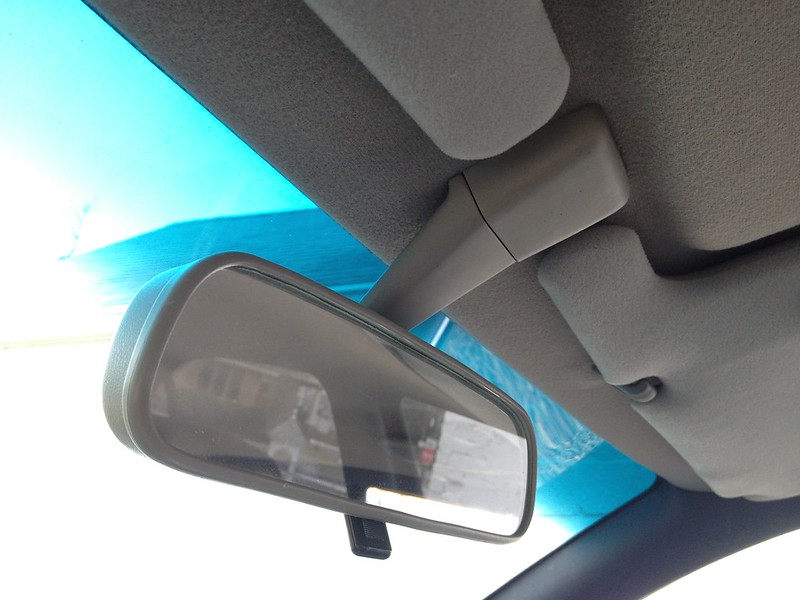
It's great to have a working mirror again.
Vurry nize.
But, $42?? Daaaaaaaaaayum.:eek:
ETA: After checking junkyards around here (I used a 95 Prizm, cuz I don't know whatchya got)...That's about what they go for.
Then I turned my attention to the rear door windows. Both of them were really squeaky and difficult to roll up and down. I didn't know what I was going to find, but figured it would be cleaning and lubricating.
So for anyone looking up how to fix squeaky windows on a 1996 Geo Prizm, this is how I did it:
First, unscrew the two screws holding on the armrest.
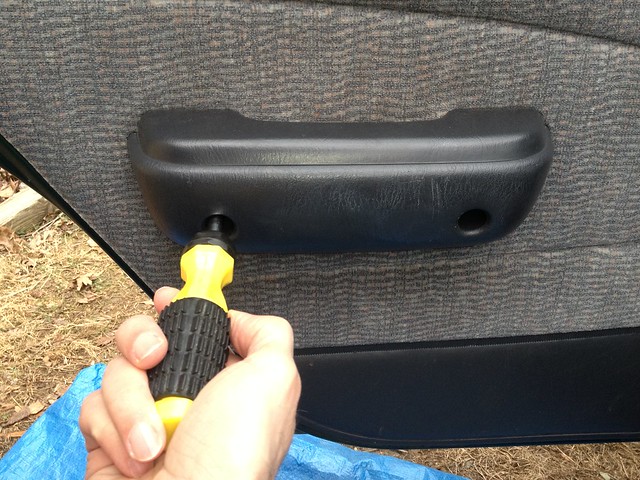
Then, you need to remove the window crank. This isn't obvious at all unless you have the manual or otherwise know the trick. You take a rag and wedge it up under the crank, kind of tugging back and forth. This loosens a retaining clip just enough so you can pull it out with a pair of needle nose pliers or the tip of a screwdriver.

This is what you're pulling out so you can get the crank handle off.
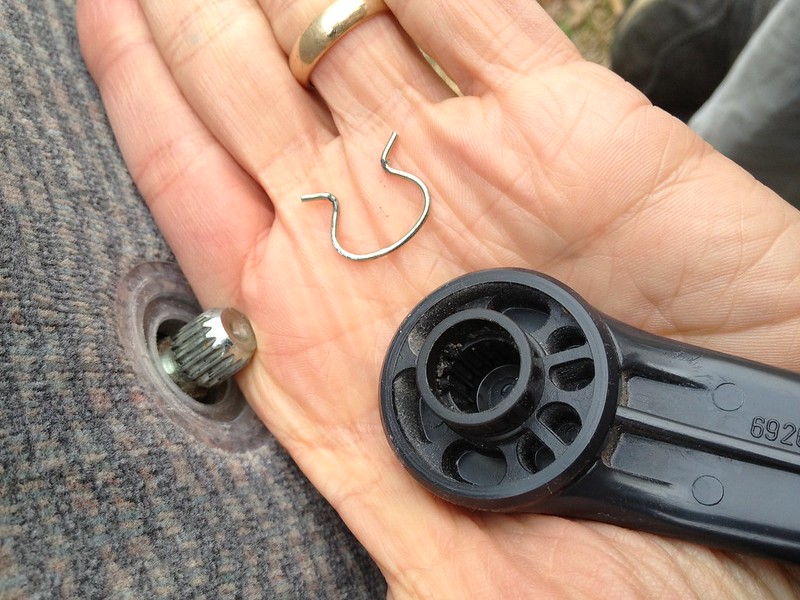
Then you have to get the interior door handle out of the way. Unscrew the single screw holding it in place, and then pull it towards the front of the car about half an inch. That will allow the tabs to release from the door and it will come loose.
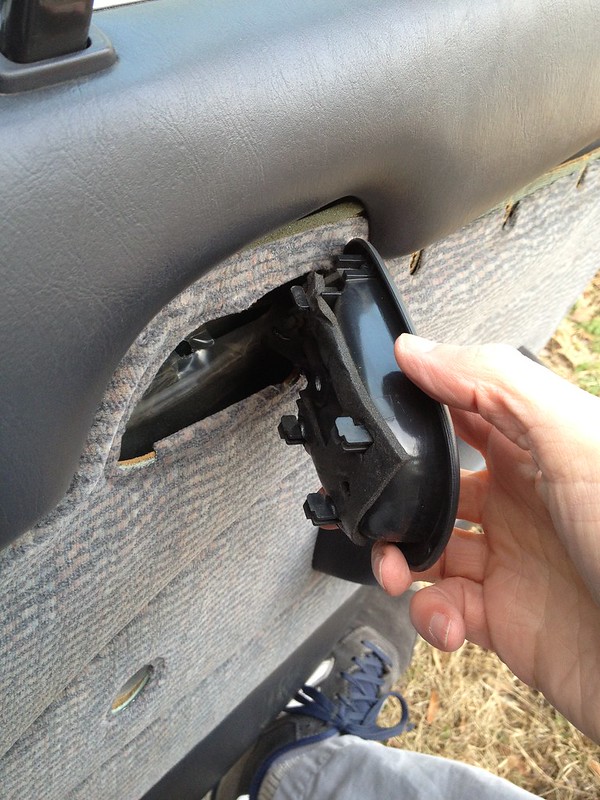
Use a putty knife to pop the panel off the door. Just slip the knife in the gap between the door and panel, and slide it over to where it's right next to a fastener clip and pull the panel away from the door to pop that clip free. Do that for each clip, until the panel is really loose and just being held on by the interior door handle. Twist the door handle a little and push it through the hole in the panel as you pull the panel free.
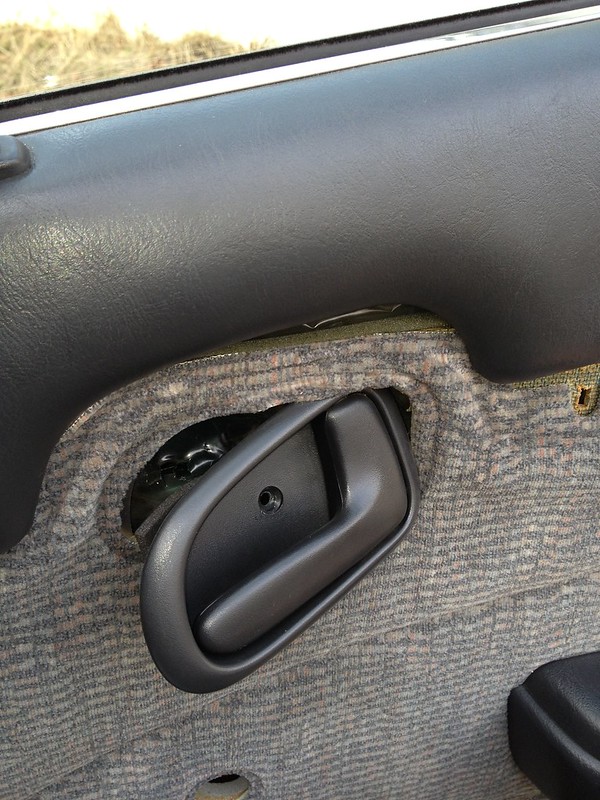
Pull the panel free, and you'll see the plastic water barrier covering everything.
Carefully remove it. I found that sometimes it just pulled easily free, and other times I had to cut at the adhesive with a razor blade. I cut through the plastic barrier around the two points that support the armrest, and I also cut a larger slot so I could slide it off past the interior door handle.
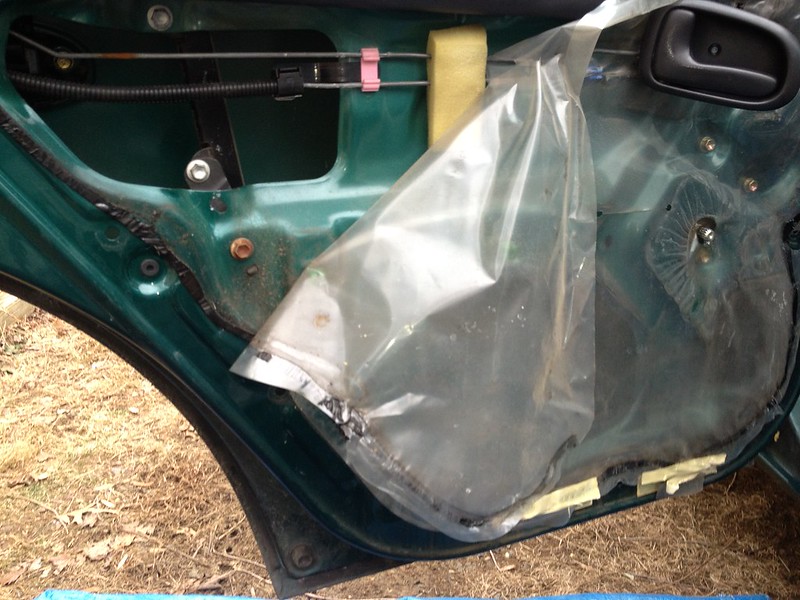
So now I had access to the inside of the door.
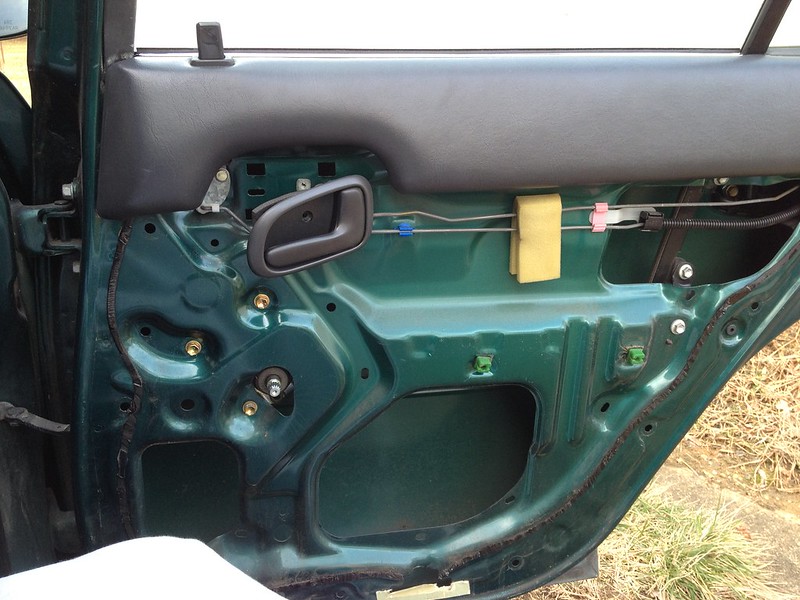
You can't even see the gears and stuff that lifts and lowers the window. But you can see part of the channel that the window slides in. I wanted to start by cleaning this channel and then lubricating it.
So I got a small brush and swept it clean and then sprayed silicone lubricant on the brush and brushed that lubricant into the channel.
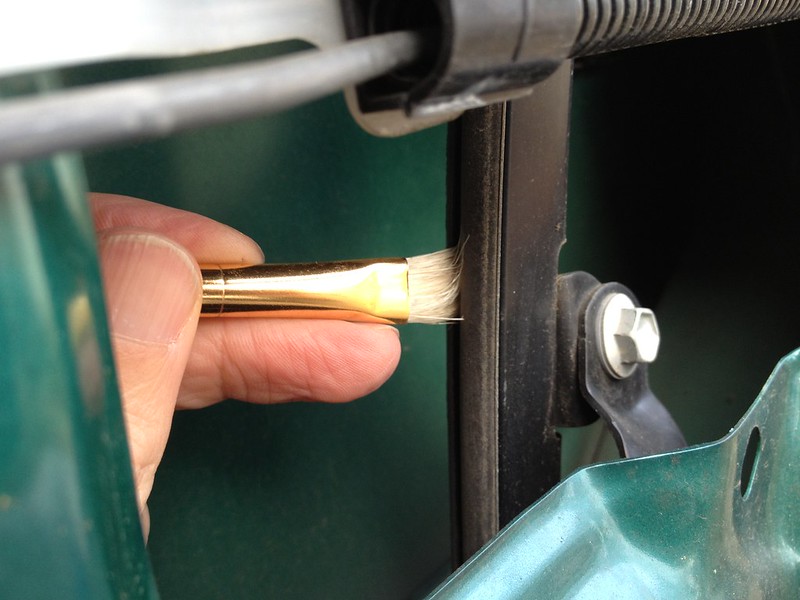
I did the same thing with the channel way inside the door by the hinges. I couldn't take picture of that, but I could feel my way in there and clean and lubricate that channel by feel.
I stuck my phone inside the door and took a picture of the regulator.
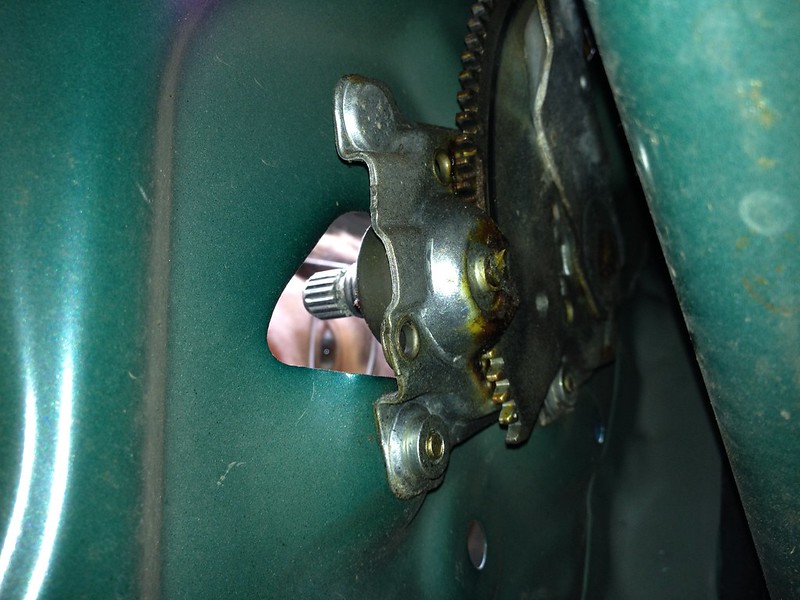
The grease on the regulator had died out after 18 years, so I put a glob of grease on my finger tip and felt around for the gear and then smeared it with the grease.
Then I rolled the window down, and it was still pretty squeaky, and now I could see why. The roller on the regulator arm was all frozen on its little rusted axle. So I sprayed it like crazy with silicone spray.
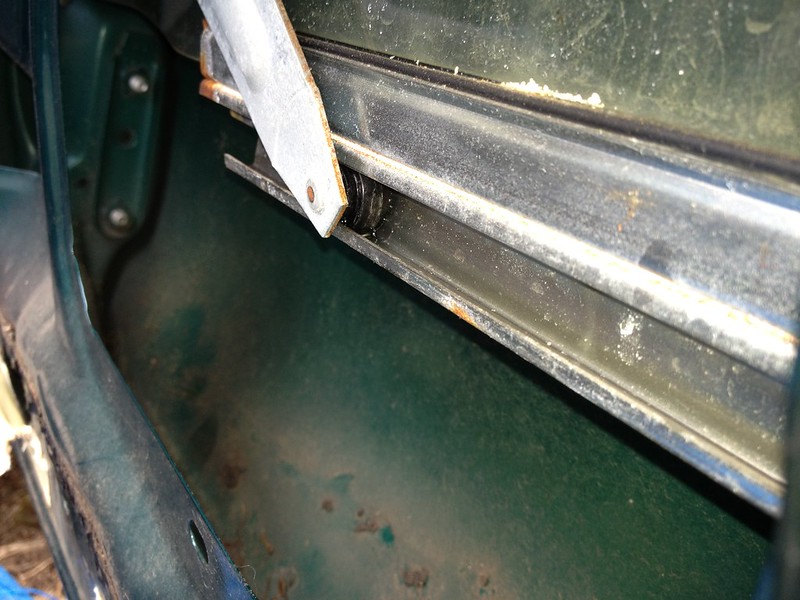
After doing this, the window rolled up and down beautifully and quietly. So it was time to put things back together. You basically just do everything in reverse, except that once you have the plastic barrier in place and are putting the interior trim panel back, there are these 4 (or actually 5) holes in the top of the trim panel.
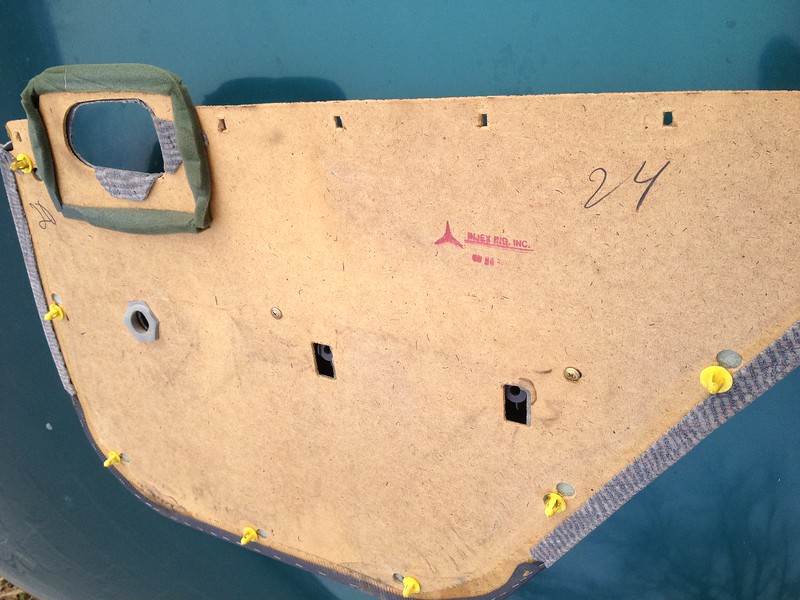
Those holes are there so that the padded trim up by the window opening can attach to this trim panel. There a thin metal tabs poking out of the bottom of that padded trim piece, and you bend those tabs straight with your fingers, poke them through these holes, and then reach behind this trim panel and bend those tabs over to hold the two trim pieces together.
I can't show you any of this, because the metal tabs are hidden from view, but you can feel them, and all this bending is done by sticking your arm back behind the panel and bending those tabs. After the tabs are attached, and you have fed the door handle back through the opening, then you can snap all those yellow snap connectors back into place.
The last thing to do, other than putting all the screws back in the armrest and interior handle, is to put this window crank handle and its finicky clip back into place. I used a putty knife again.
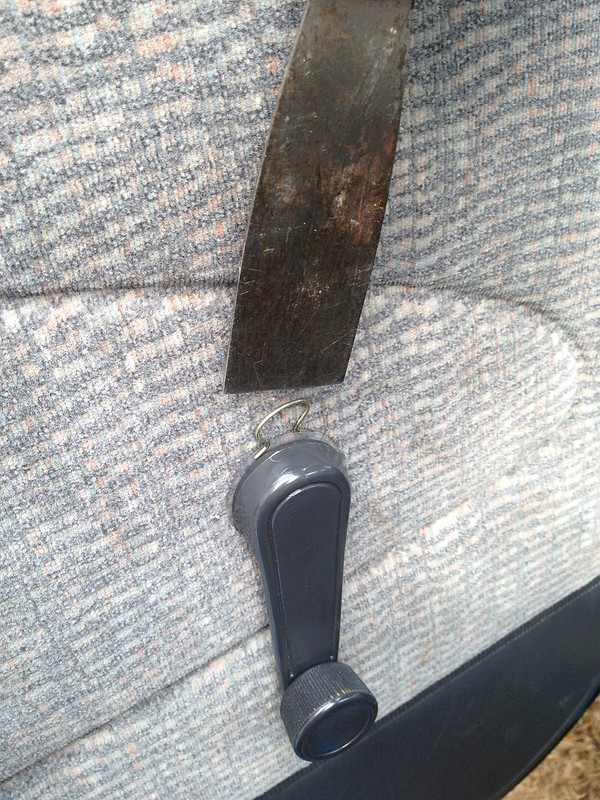
So that's pretty much it. The windows work perfectly again. I should have done this ages ago.
Vurry nize.
But, $42?? Daaaaaaaaaayum.:eek:
Yeah. Cheaper than new though.
That included shipping, and the seller swore that the switch lever worked and it was tight on the swivel, and of course once I had gotten him to answer those questions, other people got excited about the auction and started bidding against me.
I wish we had a local junkyard. I probably could have found one for $5 and an afternoon of walking around rows of old broken cars.
The DC area isn't known for its industrial sector or for its junkyards. Not many people here tinker with their own cars. Too rich here.
Wait! Hold that! I was just checking on something else I bought on Ebay and saw the mirror was $32 not $42.
Most junkyards won't even let you in the yard anymore, unless it's one of those yards where you remove the part you need from the donor car yourself, i.e. Pick-a-Part, PullAPart, You Pick...none of which has locations near you (DC).
finicky clip, retaining clip. AKA Jesus clip. As in Jesus where the F@##$ did it go?
Most junkyards won't even let you in the yard anymore, unless it's one of those yards where you remove the part you need from the donor car yourself, i.e. Pick-a-Part, PullAPart, You Pick...none of which has locations near you (DC).
That's true. Of course the biggest problem is lawyers and insurance companies dragging them to litigationville.
But even before that they got tired of people destroying good parts to get at the part they needed. Also breaking several parts leaning how to take one off intact, of course they only pay for one.
finicky clip, retaining clip. AKA Jesus clip. As in Jesus where the F@##$ did it go?
LOL!!!
Twasn't me, but the tenants of this apartment building seem to have done a little cable wiring themselves. I took the picture though. It's visible only from the bike path.
[ATTACH]46998[/ATTACH]
[ATTACH]46999[/ATTACH]
You're likely correct.
But don't discount the possibility of lazy cable installers.
Ahh No , No way , no how would any body that knew ANY thing about Installing ANY type of wire do THAT !!!
I assume they are stealing cable, but I thought signals were scrambled these days and you need a box at the set.
But if you have the wire, you can pick up a box at the cable company's office. They don't ask how you got the wire. Plus that may be an accumulation of years of DIYers.
I assume they are stealing cable...
Yeah, but,
who? Perry Mason couldn't figure that shit out.
Restored some slightly cloudy headlights today.
Before: The headlight has been cleaned and dried and masking tape to protect the surrounding area.
[ATTACH]47098[/ATTACH]
Now I'm sanding it with the coarsest of 4 sanding pads. The one marked #1 on its face. The kit provides a spray bottle of soapy water for wet sanding.
[ATTACH]47099[/ATTACH]
I dried it off and you can see how super scratched that first grit of sandpaper made it.
[ATTACH]47100[/ATTACH]
So then I sand in the other direction with number 2, and it's already looking a bit better.
[ATTACH]47101[/ATTACH]
On to number three and then four, always sanding perpendicular to the last time to get rid of the scratches left by the earlier grit.
And then after you go through all four grits, you switch to the abrasive polishing compound.
It was exactly like toothpaste, except without the mint smell.
[ATTACH]47102[/ATTACH]
After you polish for a while, you buff it out until it shines.
Then you open a sealed pad that has a damp wipe on it, and wipe the lights. Once that dries, you open a second pad that contain a kind of varnish, and spread that as evenly as you can over the lights.
[ATTACH]47103[/ATTACH]
And then you are done. The pictures don't do it justice. They look remarkable better. These 13 year old headlights.
[ATTACH]47104[/ATTACH]
Well this is from the weekend. I went to the annual Land Rover event here in Texas known as SCARR, South Central Area Rover Ralley and was one of about 200 participants with LRs of all kinds. Had a great 4 days of camping out and driving all kinds of trails. The dirt up their is really red, kind of like a Martian landscape in places with all the red dirt and rocks. My car held up really well despite smashing one of my alpine windows at the back when I got too close to a tree and the roof rack support got knocked loose and broke the glass. Had a great thunderstorm rip through camp on Friday night, it was all I could do to keep my dining fly from going airborne.
Think I will get out the pressure washer today and knock of most of the dirt and dried mud I brought back with me.
Wow. Looks like you had a blast!
thats the way a 4x4 Should look !!!!
So what do you do with a WaldoMarto frame pool that the wind killed and you had to take a box cutter to clear out all the nasty plastic ???
You make a Garden table for your wife !!!
first you scrounge up the nuts and bolts ,
then piece it to gather ( a few speed screws to hold a few pieces to gather ) ,
then you start laying out the slats ,
nope that wont work ,
nope not enough of those pieces to make it work ,
Hey what about ,,,,,, yeah that works , cool ,
then you spend the afternoon remembering Why you DON'T weld for a Living,
Its not finished yet but ill post some pics of my nasty welding so Bruce and buster can Laugh at me
Its not finished yet but ill post some pics of my nasty welding so Bruce and buster can Laugh at me
Not me, every time I have a project that requires welding, just about the time I get my chops back, it's done. :facepalm:
Sorry zippy, but I can't see anymore. That looks good to go to me.
On Saturday morning I did some car work.
The brakes would pulsate more than I liked when stopping hard. Probably warped discs. The discs were also rusty and would rub a little bit just driving around. I had replaced the pads several months ago, and they still had plenty of life left, but I had done a half-assed job of it by not resurfacing the discs.
So rather than trying to find a shop to resurface the old discs, I spent $22 each for two new ones from Amazon. Much easier to click a few times and have them delivered than drive around looking for a shop.
The old discs:
[ATTACH]48333[/ATTACH]
And the new ones:
[ATTACH]48334[/ATTACH]
A lot of rust visible still on other stuff, but everything works well and is solid. I went through almost two cans of brake cleaner, and also lubed the sliding pins and pad retaining clips. These brakes are amazing now. No pulsating and you can stop on a dime. It's fun to slam on the brakes and see how fast the car stops now.
I also worked on a broken door handle. The old plastic cracked when a passenger opened the door with a little too much gusto.
I ordered a new door handle on Amazon for only $12. Amazon has everything.
Anyway, the old one come off by removing a screw and sliding the housing forward half an inch.
[ATTACH]48335[/ATTACH]
Then you remove a thick wire from a clip.
[ATTACH]48336[/ATTACH]
[ATTACH]48337[/ATTACH]
Install in reverse.
[ATTACH]48338[/ATTACH]
A pretty easy job if you don't leave your screw driver in direct sunlight for two hours in its little greenhouse case where it will heat up like white hot steel and burn your hand when you try to put a white hot bit into it.
Glatt - You might want to check out
RockAuto, if you haven't already. They don't have the hippest website, but, they're reasonably quick, shipping-wise, and all the parts we've ever gotten from them were top quality parts. They also have a variety of brand names, and prices (some amazingly low) for most parts.
Damn, that was dangerously close to a commercial, wasn't it?
I've bought some stuff from RockAuto and they are everything you say they are. But we had a gift card for Amazon to use up.
The gas oven has been on the fritz. You could hear it the last several times we used it, cycling on and off every ten seconds or so. But there was a glow coming out from under the floor pan, so something was lit down there.
So I took the bottom floor pan of the oven off to watch the burner. It was definitely messed up. I figured it could be the igniter or the valve, or the pressure regulator. Or the control panel or the thermostat.
[YOUTUBE]n2r2Gc6iFb8[/YOUTUBE]
I did a little research and found that the igniter actually controls the valve. When the igniter heats up it starts drawing more current, and when it hits a magic number of amps, the valve opens and sends gas to the burner. So I dug out my multimeter and measured the current. I had read in one place that the magic number was 2.8 amps, an I read somewhere else that you should replace any igniter that draws fewer than 3.2 amps.
[YOUTUBE]ppwp7FVzYpI[/YOUTUBE]
This guy was drawing 2.5 amps. So I think it's the igniter. That's good, because they are only $30 online. The valves are more like $150.
So now you know what an oven burner looks like just as the igniter is starting to fail.
I ordered one from Amazon with two-day shipping. Need to get this fixed this weekend before the holiday. It should be easy. Just remove a couple screws from the old igniter. Unplug the connecter, an swap in the new one.
well done glatt. boring pics of your success would be nice, but the actual victory is what matters most. I have every confidence in you.
Fewer than twenty minutes to install it, including putting the tools back. It works perfectly now.
[youtube]eJU1z0o2U0M[/youtube]
Go, you Pro, you!
well done.
Have I mentioned lately how much I freaking love the internet? First thing I did when I noticed this problem was open up our filing cabinet to pull out the owner's manual. There was NOTHING in there. Not even a parts list or schematic. Actually, that's not true. There was a circuit diagram, but no parts list. Going to the manufacturer's web page gave me a parts list but no details about how the parts work together. It could have been half a dozen faulty components causing this problem.
But going to two different appliance web forums and a separate appliance repair page gave me a great explanation of how the oven works and what measurements I had to take to see if the part was faulty or not.
20 years ago, I would have had to replace parts randomly or hire a repairman to probably replace parts randomly. But today I could ID the problem with certainty and order the damn part with expedited shipping for a fraction of the cost of a repairman and exponentially less than a new oven.
I love you, Internet.
I concur.
This could go in the Interesting links to share thread, but it is relevant here and now. I do the same thing as you described for lots of home and car repairs, and I've found this site (there are others like it) invaluable. Sometimes it's not actually broken, I just need to look up how something is "supposed" to work. Enjoy.
http://www.manualsonline.com/Really? Good for you glatt. I jsut come here - via the internet - and ask you guys & gals. I assume you all go to other sites - via the internet - then reply with logical solutions sounding all smart & shit. :right:
This could go in the Interesting links to share thread, but it is relevant here and now.
It's so damn easy to find good info on the net I've given up saving links for that kind of stuff.
We had to put some money into our furnace last week... No fun!
We noticed we had hardly any heat, it would cut on and run and for a minute or 2 it was warm and then ran cold. Our furnace is a high end Trane model we put in about 8 years ago and winters here in Houston don't really put a big demand on it. Technician came out and tried changing out the sensor (kind of like a thermocouple) but that didn't fix it and the voltage from the circuit board was wrong which led him to suspect a bad board. He quoted $650 to replace the board. I looked on line and found some parts places would sell the board for $400 but it's a newer design so it has a new wiring harness and someone with the knowledge to transfer the 30 or so wires to the new board only made sense.
Not happy about the money spent but sometimes it's unavoidable. :thepain:
The really frustrating thing is that we were told the unit had a 10 year warranty when we got it but later found out that it is a 5 year warranty unless the consumer goes to the trouble of registering it with Trane, then it gets a 10 year warranty. We used a different company to install the system from the repair company I use now so it's not their fault. But I don't remember the original installers telling us to register it, I think they either forgot or just failed to tell us because we would have done that for sure if we had know.
That's just ridiculous. A furnace should last more than 8 years, and if they are using cheap components in their circuit board to save literally a couple bucks per unit, they deserve to have their name dragged through the mud.
Did you get to keep the old circuit board? Was there anything obvious wrong with it, like bulging capacitors?
We have a 70 year old furnace, and I keep thinking I should get a new one that's more energy efficient, but if this is the kind of crap you can get today, then forget it.
I was inspired to order some cheap LED rolls and a transformer from China through ebay. I got
these LEDs, and
this power supply.
What does it mean that this power supply is a "switching" power supply? I ordered the stuff on Jan 3, and it arrived from China on Jan 13th. Very impressive for free shipping.
At first I was confused when trying to figure out what the brown, blue, and yellow/green wires were for. But with a little Google, I found out brown is hot, blue is neutral, and yellow/green is ground. Then I dug through my junk piles and found an old iMac power cord, and cut it open to wire to the power supply. It also used brown, blue, and yellow/green, so it was easier than I expected to wire it up. I had ordered a 45 watt power supply, and wanted to see if it would drive both rolls of LEDs wired in parallel. It did!
So here are some pictures. This shows both rolls lit up:
[ATTACH]50095[/ATTACH]
And for this one, I unwound one of the rolls a little and aimed at the counter so I can get a sense of the color and brightness. I like it. Not blue at all. A little whiter than the halogen hockey pucks under the cabinets now, but not obnoxiously so. And the brightness is good. This was taken with the ceiling lights turned off.
[ATTACH]50094[/ATTACH]
I'm going to use the existing halogen hockey puck wiring. They were wired years ago by an electrician who put switched outlets under the sink, and plugged the halogen power supplies into those outlets. I can just plug my new power supply into those same outlets and use the existing wiring to the halogens.
One thing I noticed is that after a couple minutes of being plugged in, the rolls of LEDs started to get a bit warm. I guess it's the cheap quality with the black resistors after every third LED on the strip. They were only $9 after all. I unplugged the power supply when I noticed the heat. I didn't want to melt the double sticky tape on the back of the strips. I am hoping that once the LEDs are installed, the heat won't be too bad because the strips will be unrolled and the heat not so concentrated. One of the reasons I wanted the LEDs instead of the halogens is that the halogens get hot and can melt forgotten chocolate chips on the bottom shelf of the corner pantry cabinet.
So this weekend, I'll have some time to install these permanently. I'll make sure to update the thread with better pictures that show before and after shots with identical white balance and exposure settings.
...the halogens get hot and can melt forgotten chocolate chips on the bottom shelf of the corner pantry cabinet
What is this "forgotten chocolate chips" of which you speak? :speechls:
The power supply is sufficient to power both rolls(600 LEDs). Therefore you can cut them up into as many strips as you want, observing the groups of three, and power them with that one power supply, yes?
Yes. But with one caveat. The rolls say they can't be wired in series with another roll, only in parallel. So you'd have to be careful to not exceed the length of one roll with any one cut up strip. Not sure if I worded that correctly, but I bet you understand.
Clear as a bell. At 12 VDC, a whole roll (300) draws 24 watts, about 2 amps. In series it would bump the amperage up more than the designer is comfortable with.
To answer the other question asked:
A switching power supply is one in which the incoming AC voltage is first converted into DC, then fed to a series of MOSFET switching transistors translate the DC into high freq AC which is then fed into a transformer with the output being returned to DC in more useful voltages.
The advantage of a Switched Mode Power Supply is that is is much more eficient and more versatile, able to provide either AC or DC outputs depending on the circuit involved. It is necessarily more complicted but has far less hysteresis and parasitic power loss than a comparable linear power supply and generates less heat.
That's as simple as I can put it without going all TW.
Thanks Pamela. I've been working on this much of this weekend, and it's taking a lot longer than I excepted. I'm a novice at soldering, and didn't realize how much there is in this. Over a hundred solder joints, and all those tiny wire pieces to cut and strip and twist. I'm improving though.
OK, so I made this pile of LED strips, and it took exactly 100 solder joints to do it. That's the most soldering I've ever done.
[ATTACH]50145[/ATTACH]
This was the first joint I soldered. Sad. I know.
[ATTACH]50146[/ATTACH]
And this was one of the last. I feel like I got better.
[ATTACH]50147[/ATTACH]
I locked the exposure and white balance of the camera and took a before shot with halogens.
[ATTACH]50148[/ATTACH]
And and after shot with LEDs.
[ATTACH]50149[/ATTACH]
The LEDs are much brighter, use a quarter of the power, and are slightly more white. But still on the warm side of white, not cool blue at all.
Great job. I really need something like that over my sink and counters, but I'll not try.
Much better glatt! I used an led set up for the chickens this winter.
That design I'd describe as, glatten-for-punishment. :haha:
It looks like you could have used 20% to 30% less and still had plenty of light, but you really don't know what it will look like until you've done a couple.
Good job, Sir, you've earned a degree in kitchen lighting.
It doesn't have to be quite so bright, but it's not too bright. I think I can wire a special LED dimmer after the transformer if we decide it's too bright, but for now it's good.
I like it that the light is so diffuse now and even. Plus the sink has always been too dark. And now it's nicely lit.
All that rosin makes me shudder.
DOD 2000 and all. Get me some
trichlorethene, stat! Nah, really, that stuff was poison, but we practically bathed in it during my early years working for a defense contractor.
But really, glatt, you're talented and handy! :) Good work.
It's been really dry, and we just set the humidifier up in the bedroom, but really it needed to be in the living room. The problem is that ALL the outlets are behind furniture and in use, so there is no place to plug the humidifier in.
So I was pondering that, and getting more annoyed that every time we want to plug something in in the living room we run in to this problem. Dammit. We need another outlet in there.
So I looked around and decided that the best place is right under the thermostat. And the bonus is that the thermostat wires are already leading into that wall cavity.
So I dug around in my junk piles and found everything that I needed. Cut a hole in the wall that worked out perfectly. Right in the middle of the stud bay. Fished a wire up from the basement alongside the thermostat wires, and called to my son to grab it.
That's when he got interested. He had done an apprentice day with a real electrician and actually learned a lot. So I let him do all the work of wiring the outlet up. I double checked that he put the right colors on the right screws and that they were tight, but he did everything else himself.
[ATTACH]50259[/ATTACH]
Then I went down in the unfinished basement and tied it in to a very seldomly used circuit in my shop. That took about 2 hours because I needed one big wire nut that I didn't have, and had to go to the store and pay my 22 cents to get it. I had to rewire a switch, a switched outlet, and install a junction box, but it was all pretty easy since it's unfinished down there.
[ATTACH]50260[/ATTACH]
And now we have a humidifier going! It looks like that outlet just belongs and has always been there.
This could be in the proud parent thread. Or the what's making you happy thread. But it's here.
Fuckin' A. An outlet.
The next chore for Glatt is to build/re-wire a small motor and sensor
to rotate a suet bird feeder so the bird is always visible from Classic's window.
(Somehow Classic didn't seem to be taken by my last suggestion)
The next chore for Glatt is to build/re-wire a small motor and sensor
to rotate a suet bird feeder so the bird is always visible from Classic's window.
(Somehow Classic didn't seem to be taken by my last suggestion)
I must have missed it... ???
I broke an edge on a used pair of skis I picked up a while back. They look like someone left them behind a stove or over a fire place. I cut, steamed, glued, sanded, tared, flamed, and waxed. As I was corking in the new wax I found a bad crack in the unrepaired ski for next time.
That's fantastic! Well done.
Thank you, brother handyman!
Impressive. From the looks of your forecast, you'll have a chance to try them out real soon.
Got on them for almost an hour earlier. It was so nice. :)
Well done, and the gods have bless you with something for next time, too. Luck of the Irish, it is. ;)
If I can get the pics to upload, I thought I'd share my first weaving project since before my diagnosis. I used to weave a fair bit. This is a simple shawl/throw to get me back into the swing of things. It's not my usual, I typically weave either fine, complicated stuff or nice cozy wool and silk blankets. But for a restart, this looked about right. The skein on the left is slubby natural cotton, and will be used as weft. The other materials are mercerized cotton in different colors, and a variegated textured yarn called 'Tempo'.
First thing - winding the warp. The warp consists of the lengthwise threads that are put on the loom under tension. It's measured on a warping board, which has pegs set at different distances so that a warp of a predetermined length can be wound. I'm winding a 3-yard warp. At one end is the 'weaver's cross', which allows me to keep the threads in order when putting the warp on the loom. The last photo shows the warp organized on the front of the loom, ready for 'sleying'. In weaver's terms, the next step is to 'sley the reed', or feed the yarn through a series of slots that hold threads at a given distance from each other. The reed for this project is 12 'dents' per inch. I will have 12 threads per inch of width in the warp.
Oops. Here's the pic of the warp ready for sleying.
After sleying the reed, each thread has to be pulled through a heddle, a wire guide that is attached to one of the eight frames (or harnesses) on my loom. Each frame can be raised or lowered individually. Threads attached to a given frame rise or fall with the frame, and patterns in the warp are created by varying the rise and fall of each thread.
Now the warp ends are tied onto the front apron rod.
The warp has been wound on the back beam. I use heavy paper (in rolls) to separate each layer of thread as it winds, so that the layers stay even and individual threads don't sink through deeper layers. There's satisfaction (to me at least) in arriving at the point of having organized so much beautiful yarn so precisely.
Treadles are next - I have eight, and each can be tied up with any combination of the eight harnesses. For this project, having threaded 'straight draw', I am treadling plain weave but using all eight harnesses.
Spinning bobbins from a skein of cotton held on an umbrella swift. The bobbin winder is held in place with a C-clamp. None of the equipment used so far is powered. I love the elegance of simple machines that people invented thousands of years ago to do a necessary task, that haven't been improved upon in essence - only in details.
The first few throws ... at this point any errors in the warp become obvious. I check for crossed threads in front of the reed, behind the reed, and between the heddles. In this case I had two threads crossed between two of the heddles. I had to slip the threads out of the tie-ons, pull them back out of the heddles and re-thread them, pull them forward through the reed, and re-tie them in front. Then it's on to better things.
My weft in this project is a slubby natural cotton yarn ... I've never woven with such a variable width thread before. I'm interested to see how it works out.
The final setup ... heaven! I've put some placemats that I wove several years ago on the bench to soften the impact of sitting there, leaning forward to throw the shuttle. I have a nice Shetland wool color gamp blanket that was one of my first weaving projects and it's usually my bench cushion, but have still to locate it after moving.
One last pic of the pattern and photo beside the developing fabric. It's looking good. Fabrics on the loom tend to look like they have a lot of holes. Once they're taken off, they tighten up. But the real change comes with washing ... the fibers pull together, lock together really, and 'full' (if they're wool) or otherwise fluff and bind. The fabric then becomes much more solid, more what you expect to see.
This throw will end up around 33" by 75", I think. A nice lap throw for cool evenings that isn't too heavy. It could certainly be a shawl, as well. I'm mostly having fun with the different types of yarn and thinking already about other ways I could use slubby yarn in future projects. :)
I'll post a pic when it's done. Future projects include a summer-and-winter blanket and some lovely wool blankets with interesting colorways.
just. .. .. wow.
I love threads like this (I sincerely apologize for the unavoidable pun). Your WIP (work in progress) pictures help me understand what's going on in the *making* of stuff. I *love* learning stuff this way. It goes without saying that the product is lovely, I eagerly anticipate more pictures along the way as well as ones of the finished product, before and after washing.
Textiles are among the most ancient of technologies. Seeing it happen as it's happened for generations upon generations is humbling. Watching how our ancestors made things that have lasted until today. Whoa. orthodoc, well done. Please continue sharing your obvious pleasure with us.
And thanks. :notworthy
I'm really pleased to see this group of posts, and I look forward to seeing more. I've never seen such detailed descriptions of weaving.
So obviously the initial setup of the weaving is very time consuming. For a project like this throw/shawl, what percentage of the total project would you estimate the setup to be? Seems like once you get it all set up, the actual weaving would be pretty straight forward and quick. Is the setup 25% of the time for the total project? 50%?
Those place mats on the bench look fantastic, by the way!
So glad to see you happy at your crafting, Ortho!
Thank you! I wanted to share because I find it fascinating as well, and I love the elegance of the loom. The woman who taught me to weave told me about people she had visited in Thailand who wove gorgeous silk fabric on stick and string looms. When the rains flooded their village, they would dismantle the looms, take them to higher ground, and carry on. It's remarkable that we can literally lash wood together, add string, and produce beauty.
To answer your question, glatt, setting up can take 50% of the project time, if you have to completely reset your loom (as I had to for this project). If you have to add or remove heddles from some of the frames, change the reed, and start with a fresh warp, it's very time-consuming. However, I don't weave to a deadline, so I don't mind. Many people settle on a type of fabric they like to weave and keep the reed, threading, and treadle tie-up the same from project to project. Then you can simply tie your new warp on to the old one (still a bit of time, but much less overall), pull it through the reed and heddles, and beam it onto your back warp beam in a fraction of the time. I did that when I made a series of blankets in the same pattern, with different colorways. If you like to try new things, you just factor in the time to set up the loom. When you're handling beautiful yarns it's a pleasure anyway.
... mind blown.
When you talked about setting up a room earlier, I was thinking a few bundles of thread, yarn whatever and some needles ... Wow, was I wrong.
Outstanding work. I'd love to have a ... something.
Have your people get in touch with my people. ;)
Seriously, I'm glad you liked it.
I'd love to have a ... something.
I lost my ... something on 9/11, you insensitive bastard!
Aaauuugghhh ... weaving lets you know when you're too tired. Or when you've had one glass of wine too many.
I sat down tonight, and even took a photo or two to show the shuttle in the shed and how the weft, in this project, has to be laid at a steep angle to allow proper takeup in the warp. Because the weave pattern is plain weave, simple over-and-under, more weft thread is taken up per throw than if the weft were skipping some warp threads, as it does in twill, basketweave, and many other patterns. So you have to throw the weft across at a steep angle to let more length of thread be pushed down by the beater.
Anyway ... I'd been merrily throwing weft shots for a little while, when I realized my selvedges were going to hell. The selvedges are the lengthwise edges of the fabric. Suddenly I realized that not all the edge threads were being 'caught' as the shuttle turned to head back in the opposite direction. Then I looked closely at the warp and realized I had major floats ... :facepalm:
Floats are good when you want them; they are not good in plain weave.
I have spent the past 20 minutes unweaving everything I did tonight. All because I put my feet on the second and third treadles, rather than the first and second. You'd think I'd've noticed. :smack:
I'll take this as my offering to Athena, so that I don't end up with Ariadne's curse. The end product won't have any errors (thanks to my OCD) but Athena will know about tonight's error. ;)
Could be worse. Your hobby could be woodworking, and after a glass too many while being tired, you made a similar mistake with a power tool and your fingers. ;)
Anyway ... I'd been merrily throwing weft shots for a little while, when I realized my selvedges were going to hell. The selvedges are the lengthwise edges of the fabric. Suddenly I realized that not all the edge threads were being 'caught' as the shuttle turned to head back in the opposite direction. Then I looked closely at the warp and realized I had major floats
Damn. I hate when that happens.
True, glatt - it's hard to hurt yourself with yarn. :p:
Yep, when your selvedges go to hell, it's time to call it a day.
Excellent, the fact you've got all your weaving tools together and set up, the piece you're making and your set up instructions. Oh, and your head too. ;)
Without your excellent step by step, most people who hadn't witnessed it wouldn't have a clue how much work it involved. My Grandfather used to set up looms in a mill as a young man(circa 1900), and described the process to me several times. But until I witness someone actually do it, I really didn't understand what had to be done, and done right. Damn, you could have a TV show, be the Bob Ross of the loom.
I don't think I'll ever be Bob Ross, but I did finish this project, finally.
Here's a photo of the warp being cut once I'd reached the end (about 72", not quite as long as the instructions said, but still respectable).
A view of the fabric with Zoot, or Sarahna's Columbia as she's formally known, for perspective.
Here is the fabric before washing, when it's wide open, so to speak.
And here it is after washing, ready for pressing.
Final result after pressing ... I laid the fabric over a bed, but now this throw resides in our family room, draped over a chair and used for lightweight coziness on cool days. It drapes beautifully and provides a lovely lightweight cover for transitional weather - we have a woodburning insert/stove in the family room, so this throw is nice as the fire is either starting or dying. Not too heavy.
I have a gorgeous blanket planned - hope to get the loom warped this weekend, so will update soon. Shades of blue from deepest midnight to sky, with variegated blues/teals/raspberry to provide interest.
Very nice! I like it a lot.
Magnificent.

Wow.
Congratulations, that's a very fine piece of work, you have reason to be proud of it.
Dr. Made, Kitteh Approved™
:thumb::thumb:
I failed to take any pictures, but I replaced the faucets in the lav and the kitchen sinks, which burst due to unusual cold here. I found out the last time I came by and turned on the water, flooding the floors.
Now I have nice, new metal fixtures which are less likely to break than the old, cheap, Chinese ones. Next time I come by, I plan to replumb the shower, installing a nicer showerhead and faucet. And possibly the drain, which I suspect of leaking when I am not looking. That'll teach me to winterize before I leave.
You're lucky the water was turned off when it let go. Even if you'd been home asleep, you might have woken up hanging ten on your way out the door. :haha:
Pam: good excuse to update all your fixtures. :-)
Yup! More proof that I am really a girl on the inside. :D
Actually I missed several, the other side looks better. But it is full of dirty dishes.
I'm not sure I've ever seen that part of my sink.
What's it called?
Productive weekend. Among other chores, I
-Washed the old car in preparation for selling it, including removing bumper stickers.
-put new wiper blades on the new car. We learned on Saturday that the old ones sucked.
- fixed our dryer
I'm going to document the dryer fix.
The problem was that the lint gasket at the rear of the dryer drum was falling apart. A gap was opening up back there and stuff was falling down in the back of the dryer. Coins and stuff from the pockets, and also socks and underwear. I ordered the parts a month or so ago but had been too busy until now to focus on it. I got a new drum belt too because when I replaced the motor a year ago I noticed the belt was getting old and cracked.
We start by pulling the bottom panel off. A screw driver as a lever probably would have been smart, but I just pried it off with my fingers. Broke a nail. Annoying.
[ATTACH]52211[/ATTACH]
Then I know from working on this dryer in the past that the duct is going to get in the way, so I remove it now. Just wiggle it off.
[ATTACH]52212[/ATTACH]
Then I pulled out the lint trap.
[ATTACH]52213[/ATTACH]
And removed the two little screws that hold the lint trap body in place.
[ATTACH]52214[/ATTACH]
Now it's time to lift the top up, so I felt with a putty knife for the two clips that hold the top panel to the front panel. Grabbed a screwdriver and used it as a lever to pop those clips at each side of the machine.
[ATTACH]52215[/ATTACH]
Then I lift the top panel up, just like opening the hood of a car. This is where it's good that I got the ductwork out of the way. I used some twine and a clamp to hold the top up and out of the way.
[ATTACH]52216[/ATTACH]
Then I need to remove the front panel (which is the frame that holds the door.) I remove the sheet metal screws from the top.
[ATTACH]52217[/ATTACH]
And loosen the ones on the bottom. It just rests on these bottom ones, I don't have to take them all the way out.
[ATTACH]52218[/ATTACH]
There are wires connecting the front panel to the control board at the back, and I don't want to bother with those, so I just disconnect the clip holding them in place and leave them attached.
[ATTACH]52219[/ATTACH]
Then I lift the front panel off and lean it up against the side of the machine.
[ATTACH]52220[/ATTACH]
The door opening of the front panel normally supports the drum, and since I removed that front panel, I grab a nearby hiking boot to support the drum while I remove the old drive belt. I have to press against the tension pulley to get enough slack to slip the belt off the drive shaft.
[ATTACH]52221[/ATTACH]
And then I pull the drum out.
[ATTACH]52222[/ATTACH]
I cut the felt gasket and start to pull it off. Some of it comes off really easily because the glue it brittle and old and just falls off. And some of it is stuck real well and the felt tears apart with a lot of it still adhering to the drum.
[ATTACH]52223[/ATTACH]
So I scrape away at any felt that adheres to the drum. I need a pretty clean surface for the new gasket and glue.
[ATTACH]52224[/ATTACH]
And then I switch to sand paper because I think it might be easier.
[ATTACH]52225[/ATTACH]
Finally I vacuum it clean so the glue will stick.
[ATTACH]52226[/ATTACH]
Since I have the vacuum out, I clean the inside of the dryer. I find some coins as I do this, but not much because I had cleaned this not too long ago when I replaced the motor.
[ATTACH]52228[/ATTACH]
Then I open the new gasket and read the instructions.
[ATTACH]52229[/ATTACH]
The new gasket and glue.
[ATTACH]52230[/ATTACH]
It's hard getting the new gasket onto the edge of the drum until I grab some spring clamps to clamp it as I go.
[ATTACH]52227[/ATTACH]
You are supposed to apply the gasket first and them jam the tip of the glue tube underneath and start squeezing the glue in there.
[ATTACH]52231[/ATTACH]
But it makes a hell of a mess as it drips out. That indentation rides over the rollers, and the last thing I need is big glue bumps in there.
[ATTACH]52232[/ATTACH]
So I put some gloves on, and tip the drum on its side. This is much neater. Was that in teh instructions?
[ATTACH]52233[/ATTACH]
And I clean up my mess.
[ATTACH]52234[/ATTACH]
Done.
[ATTACH]52235[/ATTACH]
I put it back together in reverse, except I use the new belt. The new belt seems about a half inch shorter than the old one, and I really have to strong arm the tension pulley to get the belt on.
Very nice job!
There's something about handyman jobs like this--I look at all the steps and say, "Yes, yes, I understand that step, yes, I see how that works, all very straightforward..." but somehow the job as a whole still just makes me shut down and decide, "Nope. I can't do that, hire someone."
I hope your family makes you something extra good for dinner. :)
Right; the scary bit is always what if I get to step 4 and I fuck it up?
Good job replacing the belt while you had it apart. If you hadn't you know it would fail in a month. :haha:
I routinely fuck stuff up, but then I fix my fuck up and learn from it. All that dripping glue was a minor fuck up on this job. A professional wouldn't have done that.
Or would have done his best to talk you into a whole new drum, and failing that not cleaned up the glue, thrown it back together, taken the money and run. Whirrrrr thump Whirrrrr thump Whirrrrr thump ;)
Well done.
I agree about the perils of the unknown after step four. But I'm perpetually in some degree of unknown. And some degree of fuckup, sometimes self imposed. I most always have embarked on a journey like this because the degree of fuckup was already a problem, and my post four problem is small by comparison.
Learning from my mistakes, sometimes repeated mistakes, is part of the pleasure I derive from such work.
Good job glatt. :thumbsup:
Nothing wrong with fucking up occasionally. Most of our greatest inventions were fuck-ups.
... as was the best selling blue pill of all time.
More like the last 3 weeks. I started building my new upper kitchen cabinets out in my shop. I started with the one over the stove so it sort of has 3 sections with the area where the vent hood will go.
Next was one cabinet which will mostly hold dishes and other china. Then one that goes above the refrigerator and one near the sink. There was also a tricky one that will go over a work island and eventually have glass doors on both sides so it had no back panel. It will be for wine glasses and some crystal vases.
The wood is all birch. Birch ply is so easy to work with and fairly cheep for the boxes so I decided to just use solid birch for the face frames. The door will be of a Shaker style and will be made later as I have to retool several machines for those. Still have to stain and varnish. The cabinets shown here are upside down for storage until I start staining. So the top rail is 4 inches and the stiles and bottom rails are around 2 inches.
I would have gotten more done but my wife had to go and have that darn stroke in the middle of it!
Nice job. I hope you reprimanded her for holding you up. :haha:
Just an update. I got all the cabinets and adjustable shelves stained and have applied 2-3 coats of gel urathane finish. I like the gel as you brush it on with a foam brush and then just rub it smooth to take away the brush marks but leave a slightly wet look which dries with an increasing satin finish. The stain and finish are really bringing out the textures of the grain in the wood.
FYI, the cabinets shown here are upside down, the header at the top is 4 inches and the other parts of the face frame are around 1 1/2 inches. I'm working on them this way because the tops won't be finished but the bottoms will be.
Hope to be done this weekend and hanging them after that. Only 3 1/2 years in the planning and getting them this far along!
Nice work Chris! Some projects need fermentation time.
Yes, think of all the mistakes you've eliminated during the gestation period. Nice job. :thumb:
Some projects need fermentation time.
Some of my projects get that fermentation time whether they need it or not.
Yesterday I turned 59 and celebrated by installing the upper cabinets in my kitchen. My remodeling project has taken 2 1/2 years so far because daily life just gets in the way! After tearing out all the old site built plywood cabinets installed when the home was built in 1984 I had removed most of the drywall since changes needed to be made to the plumbing, electrical and AC duct work. Eventually all the new drywall went up, recessed LED lighting was installed and the new tile floor went in. All these parts of the project take time when you are doing most of the work on you own although my son helped when I needed a helper.
We painted the walls with a new color except where the cabinets and back splash would go, makes it easier to see where the wall studs are. The design of the cabinets took a while to complete, I do it the old fashioned way with a large sketch pad, pencil and ruler. As I mentioned earlier I had planned to make the boxes for the cabinets from birch ply as it is a good material, fairly cost effective and easy to work with. Then I just decided to do everything in birch, even the face frames and eventually the doors. That meant purchasing solid birch stock, ripping it in the shop, milling edges and a lot of sanding.
I should explain I built temporary lower cabinets from scrap lumber and some old white Formica'd counter top and put them all on wheels so I have a place to cook but can move things when necessary. Also, we have our stove on an island but it eventually be on the wall and the island will be a work/prep area. There is a cabinet above the island that will have glass doors on both sides and be a place for crystal and wine glasses, it is lit inside and underneath.
So here they are installed. First shot is just to show my idea for installation. As the boxes are large and bulky to get level and fitted I mounted small brackets I whipped up in the shop on to the wall, then just set the cabinet in place where I wanted it to go and attached it to the wall. Eventually a tile back splash will go up and hide any holes from these brackets but it made leveling and screwing them to the wall where I wanted them easy.
Looks good, I can't wait to see when you get it done.
Looks sweet Chris. Think I'll work on my perpetual barn project today.
You out Ikeaed, Ikea. Flat pack crap? Pshaw, lumber baby. Only thing after that is felling trees and making cabinets from them. Excellent design, first class construction, something to be very proud of. :notworthy
One suggestion though, instead of "my kitchen" use "our kitchen", for extra brownie points. :lol2:
It's been a bit like Christmas as I up pack the boxes of our better dishes and glassware and get them on my new shelves. These have been packed away for almost 3 years now, we got by with just some basic stuff when the kitchen was all torn up. It's been slow at times as I decided to run a lot of the glass ware through the dishwasher. The cabinet for our crystal and other nice glasses will get a glass shelf but I need to have a glass shop make it up.
I also realized I need to make 3 more shelves for the cabinet where plates and other serving dishes go.
Just got back from a few days at a Boy Scout camp. It was a fun time. Pretty location. No cell signal at all, even on the mountain hike, because we never went over the other side of the ridge. It's been a few years since I've been disconnected from the world for that long. I need to do it more often.
[ATTACH]52854[/ATTACH]
Was that for their witch burning merit badges?
Lesson in creating air pollution. :lol2:
It was pretty cool. Every boy likes building a fire but is always taught to build them small and keep them under control. To see a couple massive fires was literally awesome.
The hand crank that lifts the table on my drill press got a crack in it. I thought it was a cast iron hand crank, but on further inspection, it's cheap ass plastic. Craftsman quality.
[ATTACH]57811[/ATTACH]
It felt like it was going to break off completely any day now, so I looked for a replacement. The
replacement part was $20 or so (with shipping) from Sears. It would be the exact replacement part. In other words, another cheap plastic handle.
So I measured the shaft with my calipers, and then the bore of the existing handle to see how much slop there was in the handle. Turns out I needed a 9/16th bore.
Not a lot of those, but finally I found this, and for the same price as the new plastic one.
[ATTACH]57813[/ATTACH]
It fits perfectly.
[ATTACH]57812[/ATTACH]
But it wants a keyed shaft. My shaft has a flat spot, not a key. So I think I'll try to drill a hole in the handle and tap it to accept a set screw that can press against that flat spot.
Nice job! It amazes me the crap that they produce now and when they design a part so badly. Lifting the table puts a lot of torque on the handle, your new one should be much better.
My old Delta doesn't have a crank and gear rail like yours, you just loosen the clamp and heft the table up or down. I saw a jig I can make where I would mount a pulley up at the top rear of the column and attach a cable to the back of the table clamp and put a weight on the other end that would just hang down and act as a counterweight.
But it wants a keyed shaft. My shaft has a flat spot, not a key. So I think I'll try to drill a hole in the handle and tap it to accept a set screw that can press against that flat spot.
Can you get the proper sized key for the handle and file it down so it fits into the handle and rests on the flat? Then, when you drill and tap your hole, the set screw will press the key against the flat, like a brake, and not scar up the shaft.

Good idea, but the key is in a spot where you can't drill a hole. It's by the handle itself.
It came out well though anyway.
Actually yesterday. Did a major inspection of all hives and found one that has a mother/daughter queen situation. Not uncommon, the original queen is failing somehow and the bees raised a new queen to replace her. Sometimes, they will co-exist for a while, then the older queen gets killed or pushed out. I hope that the new queen can produce enough brood to build the hive up for the winter.
Who kills the Queen? The daughter or one of the others?
My bees are really going to town on the golden rod. The hives smell amazing.
This is sort of the defacto repair thread. Yesterday I spent about 4 hours replacing the sound deadening insulation in our dishwasher door. It's a tar like material that provides weight to the door to keep it open, and sound deadening.
Over two decades it tends to break down and fall into the wash chamber where bits of it act like a black crayon marking the white insides and dishes up.
So here are before and after pictures. 80% of my time was cleaning an incredible amount of gunk out of nooks and crannies.


And while I was in there, I replaced the door gasket.

I freaking love this dishwasher. You can't buy one this good anymore. They are all high efficiency models today that take 6 hours to clean your dishes with an ounce of water.
I'm going to keep it going for as long as I can.
Nice work... and you remembered the name of the thread. :cool:
http://cellar.org/showthread.php?p=989756#post989756holy cow, those photos are massive.
Stupid tapatalk. Sorry guys.
Heh. I was looking at them on the Nook last night. It sizes to fit the pics, and I thought that's all there was, I thought you posted pics w/no text. The text got sized so small I didn't even know it was there.
Lots of detail, though.:)
I've posted before about my displeasure with our plumbing situation. Our house seems to get supplied with gritty water by our municipality. In addition to that, our pipes are 70 years old and are galvanized pipe. The zinc galvanized coating wears off over time, and spots where the pipes have been cut and threaded have no galvanization at all. So the steel pipes underneath start to rust and small chunks of rusty iron slough off into our water supply. They flow down stream and cause blockages in fixtures.
Here's a picture of the inlet valve of our dishwasher that I replaced over a year ago. It's got mostly flakes of mineral buildup that has probably come from a combination of the county water and my hot water heater, and there are also dark specks that come from my rusting pipes. It blocked the dishwasher water supply enough that it wasn't cleaning the dishes.
[ATTACH]61345[/ATTACH]
And this is a small section of pipe that lead to our boiler. To be fair, this was a side branch that seldom called for water, so it was a location where sediment was just asking to build up. I replaced this and a clogged pressure relief valve last spring.
[ATTACH]61346[/ATTACH]
I knew eventually I would have to replumb the house. And install a whole house water filter to keep the county's sand out of my water. So last week I planned it all out and ordered the parts from a supply house online. Got a special pex tool off Ebay too for $170.
Our basement is unfinished, which will help tremendously. A decade ago, I tiled the tub surround on the first floor bath, and I ran pex tubing up inside that wall while it was open. So there is tubing in place for the 2nd floor toilet and the 2nd floor shower. There is no tubing in place for the 2nd floor sink. So on Sunday, I decided it was time to tackle this most difficult part of the replumb project.
The 2nd floor bathroom sink shares a wall with the staircase. I decided the best path was to cut a hole in the plaster wall of the stairs that lead down into the unfinished basement. It's out of public view and a good spot for a hole. I stuck a mirror up in there to see what I could see.
[ATTACH]61347[/ATTACH]
You can see the exisisting pipe that leads to the 2nd floor sink. I plan to snake some pex tubing along side of those pipes.
So then we had to go upstairs to the bathroom 1.5 floors away and cut a hole under that sink. The cabinet has drawers, so we took the drawers out and had to reach through to get to the wall. Pain in the ass, but less work than pulling the sink.
[ATTACH]61348[/ATTACH]
My son was doing most of the work at this point. I want him to do as much as he can, and I'll pay him. He needs to keep busy this summer.
So he cut a hole out under the sink inside this cabinet. Tried to keep it neat so patching it would be easier later. He found it to be tiring working with a dull drywall saw reaching through the cabinet drawer openings. He did a good job though.
[ATTACH]61349[/ATTACH]
Then I got my cordless drill out and put a new spade bit in and started drilling down into the bottom plate. I though I just needed to drill through the bottom plate. I wasn't thinking at first that there would be the thickness of the joists and then the top plate of the ceiling below. When I got through the bottom plate of the second floor, the cordless drill battery started hitting the edge of the drywall hole and I couldn't get any deeper.
So I switched to my electric corded drill. It was smaller and could drill deeper and broke through. But I wasn't through the top plate yet. I needed to run off and buy a 16" spade bit.
So I did, and a fair bit of sweating and pushing in an awkward position later on the drill, I broke through the top plate of the floor below. There was actually a third framing member in there that I also had to drill through. No idea what that was. Maybe some diagonal bracing at the stairs.
Anyway, once I was fianlly through, we fished some wire through there, hooked it unto the red hot water side pex, and pulled it through.
[ATTACH]61350[/ATTACH]
And then down at the basement stairs hole, I drilled down into the first floor bottom plate and into the joist area and snaked the red tube into the basement.
[ATTACH]61351[/ATTACH]
So that went pretty well. Now for the blue tube.
I didn't take pictures of this, but I had a hell of a time getting a hole drilled for the blue tube. The spade bit would break through the bottom plate and then get steered off in the wrong direction and kept hitting the same nail. I tried 3 different holes to avoid that nail, but the lower framing members kept steering the bit to the nail.
Finally, I drilled a fourth hole and could drill it straight and miss the nail.
So we fed the blue tube down.
[ATTACH]61352[/ATTACH]
So here is where we stopped for now up in the bathroom. I'll make the connections later. It will be a big rushed job because I have to shut the water off to the house and need to make about 100 connections before we can turn the water back on again. Basically a day without plumbing.
[ATTACH]61353[/ATTACH]
And this is what it looks like inside the upstairs bathroom wall. See all the drilling I did without ever breaking through in any of those holes? This was while all contorted inside a freaking cabinet.
[ATTACH]61354[/ATTACH]
More as this project progresses. Maybe this weekend.
Bravo!
I am taking notes on the plumbing. I will go to school on you on this one. THANK YOU! we also have low water pressure... Probably not same cause, copper pipes here.
This is down the list though. .
I should replace the hot water heater now too, but am going to hold off on it for now. It's old and full of sediment that won't drain completely out when I try to flush it. And when I inspect it from below with a flashlight and mirror, there is more rust than I would like to see. It might have another 2-3 years left in it or it might go tomorrow. But replacing it as part of this job is just too much to bite off at once. So I am going to install a filter after the hot water heater too. Keep the sediment in the tank from spreading to all the fixtures.
I'm replacing the kitchen faucet too, because it's beyond all hope of repair/cleaning. I don't want the new kitchen faucet to be clogged by the old hot water heater's sediment.
Good job documenting the work(er), better job doing the work.
I have two hot water heaters in my basement. The one I installed last year and the one I replaced is STILL down there. I should have never listened to the guy that told me to let it sit awhile and dry out so no rusty water leaks onto the carpets while removing it from the house.
I did the hot water heater last year, I'll post it and write it up here. Not too difficult. A 3 on a scale of 10.
Good on ya getting Glattboy involved. Good training.
So I replumbed the house yesterday. I had gradually installed the majority of the pex tubing adjacent to the old galvanized pipes but needed to make all the connections at the the service entrance, each fixture, the water heater, and the boiler. I thought it would take some time, but had no idea that it would take so long. I got started at 8am and finished at 9pm, turned the water back on to check for leaks and then cleaned up and was done at 10pm.
The pex connections were the easy part. It was trying to take out the old galvanized fittings to make room for the pex connections that was hard. Some of those joints hadn't been touched in 70 years and were completely fused together. I wasn't even trying to remove all the old pipes yesterday. Just enough to get them out of the way for the pex connections.
So I learned a few things.
- There are times (although not too many) where you just wish you owned a sawzall. Yesterday was one of those times.
- A good pipe wrench is indispensable and nice to have, but it would have been even nicer to have one with a really long handle. 12 or 14 inches just isn't long enough for the leverage you need.
- Propane torches, one in each hand, will loosen many stubborn fittings enough that you can get them loose with the wrench. Wear leather gloves.
-When you don't need to be saving the integrity of a pipe and its threads, a hacksaw will just barely fit in between joists in some situations, but you'll get a real workout.
-A power saber saw with a metal cutting blade can do the trick sometimes, but is mostly not worth the effort, vibrations, and noise through the entire house.
- Home Depot pretty much sucks and doesn't have the fittings you need in the size you need. You will have to cobble something together and it won't be pretty.
-Don't assume anything about the old pipes and what you will be able to save and connect to.
Oh, and the main shutoff valve isn't going to work when you want it to. We had even had it replaced about 20 years ago when the original shutoff valve wasn't working. It seeped enough water to make sweating a new copper male threaded fitting virtually impossible. I was finally able to get it done by having my son hold two propane torches on the fitting while I held a shop vac nozzle just above the fitting to suck the seeping water out of it so it would heat up, and I used my other hand to hold the solder against the joint. I had tried the bread jammed in the pipe trick, but this was about an inch from the shutoff valve, and there was no room for a bread ball to be jammed in there. The good news is that the pex has a new ball valve to act as a main shutoff just 6 more inches downstream, so this shouldn't be a problem in the future.
I didn't take any pictures yesterday. Too busy and too hard to hold camera while straining against stubborn pipes.
But, here is a series of photos getting the upstairs bathroom sink plumbed. I did this on the rainy Saturday. Because these valves are hidden inside the cabinet, I just left the old ones in place and added the new ones next to them.
I pulled the red hot water pipe out into the area where I could reach it with the expander tool. The other end of this tube two floors below wasn't connect yet, so I could move it back and forth as needed to work on it. You place a white expander ring on the end of the tube and use the tool to stretch the tubing wide open. Is slowly shrinks back to its original size, but you have a couple seconds to get it inserted on the fitting.
[ATTACH]61712[/ATTACH]
No effort needed at all to put it on the fitting. You just slide it in place. But you do need to hold it in place for maybe 30 seconds while the tubing shrinks back down onto the fitting and clamps down hard. You see that black fitting has little prong like wings sticking out on the sides. That's the depth guage. You push the tubing on until it hits those prongs and then you just hold it in place for a bit.
[ATTACH]61713[/ATTACH]
So then I drilled a hole in the drywall for the new valve to go.
[ATTACH]61714[/ATTACH]
And I pushed the tubing back down into the wall toward the basement and poked the black elbow fitting out the hole I just drilled. You can see I also did the blue cold water side as well.
[ATTACH]61715[/ATTACH]
I pre-made these valve assemblies so I could poke them through the wall hole onto those elbows. There was no way for my expander tool to get into the cabinet to build these things up from the wall, so I did them out in the open. The escutcheon plate is a deep one that fits onto the valve, and then you expand the tubing and push it on inside that plate. I cut the tubing a little long so I could cut it to fit later.
Here, I am holding the tubing up against the drywall so I can measure where to cut it.
[ATTACH]61716[/ATTACH]
These special tubing cutters work extremely well.
[ATTACH]61717[/ATTACH]
I put a white expander ring onto the tubing. These rings help apply extra force against the fittings to keep the joint water tight.
[ATTACH]61718[/ATTACH]
And then I used the expander tool to stretch that tubing so it will fit on the elbow.
[ATTACH]61719[/ATTACH]
With the tubing expanded, I have a few seconds to push it onto the elbow fitting in the wall. I couldn't see if I was hitting the prongs of the fitting to be sure I had it on all the way, but it was stopping, so I think it was good.
[ATTACH]61720[/ATTACH]
I stuck my phone in the wall and took a picture so I could hopefully see if the tubing was on the elbow fitting all the way. Looks like it was. The white ring is touching those prongs. I'm sure with more experience, I would just know by feel that it was fine.
[ATTACH]61721[/ATTACH]
So I did the same thing with the hot water side, and I'm holding the fitting in place for a moment while the pex tubing contracts and clamps down tight on the fitting.
[ATTACH]61722[/ATTACH]
And this was the upstairs sink all done. From the time stamps on the photos, this took me 25 minutes, but a lot of that was going down to the basement to get tools I had forgotten, and I wasn't rushing at all.
[ATTACH]61723[/ATTACH]
Yes, a Sawzall is most valuable and can be use to make milkshakes or martinis in the slow times. ;)
This is one of the reasons I live in an apartment. I've played This Old House before it's not that fun.
It was fun when I could do the prep work at my own pace. Yesterday wasn't so much fun.
Way to close the deal man! It was a pain but you did it without getting ripped off by a plumbing company. Somebody needs to give you a pat on the back.
"I replumbed the house"
#veryimpressed
#flairforunderstatement
Point of interest, my plumber buddy says Lowe's has the best selection of plumbing parts he's ever seen. They even have stuff in stock, the plumbing supply houses have to order.
I'm slowly removing the old pipe to get it out of the way. This is a short segment of vertical section about three feet above the shut off valve, right where the water enters the house. 3/4 inch diameter. I'm holding it over a flashlight so you can see the insides well.
Crazy huh?
[ATTACH]61811[/ATTACH]
There may be gold in those deposits. ;)
I'm slowly removing the old pipe to get it out of the way. This is a short segment of vertical section about three feet above the shut off valve, right where the water enters the house. 3/4 inch diameter. I'm holding it over a flashlight so you can see the insides well.
Crazy huh?
[ATTACH]61811[/ATTACH]
*
shudder*
My house is 19 years old - does my plumbing look like that, too? If it does, I'm going to have to start showering with bottled water. :(
These pipes are 70 years old. Your 19 year old pipes are perfectly fine.
The fatberg is disgusting.
And just for completeness's sake, this is after.
[ATTACH]61813[/ATTACH]
After? Or just the new pipe? Did you clean all that gunk out yourself?
These pipes are 70 years old. Your 19 year old pipes are perfectly fine.

Sorry. That blue pipe is a brand new pipe.
Fatberg was the result of clueless people who feel when it leaves their sight, it's not their problem anymore.
glatts pipe looks yucky, but it's just rust and dirt that blocks flow and migrates until it gets to fixture workings or strainers. But it's not germ and disease bearing like sewage, and you could swallow it without killing yourself. Usually it's the stuff you can't see that's harmful.
A little rust never hurt nobody. Ask any 70s Chevy pick-up.
[SIZE="3"]Zing![/SIZE] :D
Am I nesting? Even I question the need to do this, but I replaced the garbage disposal gasket. The old one was cracked in 4 or 5 places. My wife had mentioned that it was too bad a new garbage disposal was a little bit expensive and it wasn't worth getting a new one just because the gasket was getting nasty. So I knew you could just replace the gasket. And it was only about half the work of installing a whole new disposal because you can leave the dishwasher and electric still connected as you replace the gasket.

Am I nesting?
Heh... when's your second one going off to college?
I have a vague memory from possibly seven or eight years back that some of us thought it would be interesting if we shot stills or even video of our daily commutes. Apparently, we felt it might share a little bit of our daily realities. Why we ever thought this was a good idea escapes me, but I remember it was the case.
Well, technology has advanced and gotten cheaper since then, and so I am now able to bring you this: a 360 degree spherical 4k video of my commute home from work yesterday. You're welcome. Do not attempt to enjoy unless you have unlimited and pretty snappy bandwidth.
[YOUTUBE]mVly6BIv3UU[/YOUTUBE]
Hmm. The 360 wrapping doesn't work, at least on my iPhone.
Odd...now I have to try it on mine...it certainly is displaying as 360 when I play it via this link or directly on YouTube.
I was able to play it properly via the YouTube app on my iPhone. Pull up that app and Search "elspode". It should be available there.
Or don't waste your time. It is a novelty at best. :D
Works for me in youtube. Cool!
Must be a tapatalk thing.
Both here, and on youtube, I have to use the direction arrows in the circle at the upper left hand corner to move the direction of the camera. Sure is flat.
Do not attempt to enjoy unless you have unlimited and pretty snappy bandwidth.
I live in rural PA. We wouldn't want high speed internet, apparently.
I've been researching rural "broadband" for my son, who lives in the sprawling metropolis of Rich Hill, MO. Despite living within 100' of a major North/South Interstate highway, his options are shitty, shittier, and shittiest. At best, he can get a 25mbps satellite pipe at $80/month with a 12gb monthly data cap, which gets throttled to 1 mbps if you go over it. Cost? $85 after taxes. Sucks. Every other option is slower and more expensive and requires a phone line because it is all DSL.
Both here, and on youtube, I have to use the direction arrows in the circle at the upper left hand corner to move the direction of the camera. Sure is flat.
So you are't seeing it as a spherical video? Just as the whole thing spread out like a mercator projection?
Yes, I have to swivel the camera like Google street view on Verizon Fios 80Mb.
Yes, I have to swivel the camera like Google street view on Verizon Fios 80Mb.
Still confused. I mean, you *do* have to swivel the camera view, either using the directional "pad" in the upper left, or by clicking and holding in the field of the picture, and dragging the view around. That's the normal way it works...
Apparently, I need a video of you trying to view the video...:blush:
Works for me, too. Click, hold, 'n' drag. Really cool, 'Spode.
I like.
I wonder, if'n I save the vid, would the 360 degree part work on a PS3?
I wonder, if'n I save the vid, would the 360 degree part work on a PS3?
Vid plays, but, ya can't drag the vid around to see 360 in WinMediaPlayer. The hood is split in half, onto opposing sides of the screen, and you're watching where ya been.
Yup...gotta be a codec issue, then. I had to download Hero's GoPro 3D software (free) to be able to play the videos locally on my PC outside of the software used to create the videos in the first place. Of course, this doesn't explain why Bruce isn't seeing it when played on YouTube, cuz Youtube is supposed to handle that external to your computer.
Or...maybe not, because I played it on my TV via the built in YouTube app that is part of the Google Fiber TV box software, and it wouldn't do 360 on the TV as it was doing it on my laptop in YouTube. Bottom line: I don't know how this shit works in the first place. I suspect Black Magic, but clearly I need to learn more if am to exploit this device.
When I open it in youtube on my iPhone it's cool because it does that thing where if you move you phone around and up and down you see different parts of the video, but the really unuasal thing is that when you first start the video, you are facing backwards. To see where you are driving, you have to turn around. I wonder if your camera has a "front" and "back" you are supposed to pay attention to when you start it?
Also, you should have mounted it to the center of your hood so we can watch you drive.
Not sure why it defaults to the rear hemisphere on start up. I may have missed a setting when processing. The feature of having it move when you tilt your phone is useful if you have a VR viewer, because you can pull the field out with a reverse screen pinch so that it fills the field (becomes no longer circular), and you can stick the phone in the viewer and then turn your bod to see the immersion effect.
Also, you should have mounted it to the center of your hood so we can watch you drive.
I'm researching clampable mounts for this reason. Well, not for this exact reason, but for greater ability to mount in interesting situations. For this, I stuck it on the end of my selfie stick, extended it out of the sunroof (that much is probably obvious), and squeezed it tight in the gap by closing the glass down on it. Held it pretty stable.
Still confused. I mean, you *do* have to swivel the camera view, either using the directional "pad" in the upper left, or by clicking and holding in the field of the picture, and dragging the view around. That's the normal way it works...
Yes, exactly. I was expecting to see 360 on the screen but I have to move it.
Great porn frontiers ahead. :thumb:
Both here, and on youtube, I have to use the direction arrows in the circle at the upper left hand corner to move the direction of the camera. Sure is flat.
for me, in youtube, I can click/hold/grab the screen anywhere and drag it around in all directions, no clicking arrows required.
That's how it is supposed to work, so that's a good thing.
Yes, that works too, but I didn't discover that until after the arrows.
I didn't know I could do that in Google street view.:smack:
This is sort of a poor man's version of Street View...without the correlation to geocoordinates. Yet.

Out of the box last night:

This morning, after proofing overnight:

Out of oven:

They don't look half bad!
They were really good. As good as any from a bakery.
Seems like an opportunity to get your household hooked on Great British Bake-off. You will reap what you sow. :)
But the French do it better. :haha:
Trader Joe's stuff is pretty good, stuffed peppers are great
I like the Chicken Teriyaki stir fry served over a bed of jasmine rice, personally. Love Trader Joe's, but not very convenient to me and a tad pricey.